Installation instructions article no. 49580
Page 1 of 1
Status 05.2011
GB Installation and operating instructions
LED magnifier pocket card light
Art. No. 49580
Many thanks for deciding to buy our LED magnifier pocket card light.
The magnifier pocket card light is ideal for reading in the dark or for using in the car, because of its small bigness.
It can be used both indoors and outdoors.
Please ready through installation and operation instructions carefully and keep these in a safe place.
We do not accept liability for damage to persons or property cause by non observation of the instructions,
improper handling or for unauthorized changes made to the product.
Package contents:
1 magnifier pocket card light
Installation and operating instructions
Technical data:
Connection
1x 3V button cell CR1220
Protection class
III
Illuminant
2 LED illuminants, not exchangeable
Safety and warning notes:
Do not look directly into the LED - especially for longer periods of time - without protecting your eyes. A
LED beam should not be directed into other people's eyes.
Take the parts carefully out of the packaging. Make sure, before using the light that it is complete and
has not been damaged during transportation. Do not operate the light if there is damage. Repairs may
only be done by a specialist electrician.
Keep packaging materials well away from children and pets.
Do not leave children unattended in the area of the lights or other electrical appliances.
Operation:
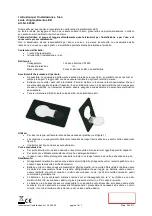
To inserting the batterie you have to take the bulb shape magnifier out of the pocket card as you can see
in picture 1.
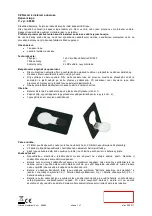
The LED light is switched on and off by putting the light bulb shape magnifier up and down. (picture 2)
The type name plate must not be removed.
Care and servicing:
Use a dry, or slightly damp cloth for cleaning. Do not use any pointed or sharp items for cleaning .
Never use chemicals or abrasives for cleaning.
Store the light in a cool and dry place if it is not going to be used and remove the batteries.
Disposal:
Old electronic equipment must be brought to public connection points and must not be disposed of as
household waste.
Batteries must not be disposed of in the household waste. You are legally obliged, as a final consumer,
to return used batteries. You can hand back batteries after use to the sales point or to its immediate
vicinity (to municipal group collection points or to the trade outlet) for example.
Batteries containing harmful materials are marked with "crossed out waste bin" and one of the chemical
symbols Cd (= battery contains cadmium), Hg (= battery contains mercury) or Pb (= battery contains
lead).
Batteries may only be handed over in an empty and drained state into the used battery collection
container at retail outlets and at disposal points organized by the public authorities. Batteries which have
not been completely drained must be protected against short circuiting. A short circuit can be prevented
by insulating the poles with adhesive tapes.
Heitronic
®
H. Vollmer GmbH
Allmendring 29
D-75203 Königsbach-Stein


