Installation instruction Art. No. 36647
Page 2 of 2
Status 08.2011
Installation:
This product may only be installed by a qualified specialist electrician.
Make sure that the connection values of your building installation for the power supply to the light comply
with the data stated on the name plate of this light.
Before the installation is done, the connection lines to the building must be switched free from voltage
and protected against being switch on again. Take the appropriate automatic circuit breakers out of the
junction box in the building.
Protection of the wall light with a default current circuit breaker is recommended when it is being used
outdoors.
Make sure that no water can collect at the place where the light is fastened.
Decide on the location where installation has to take place. The lights are suitable for surface mounting.
Mount the brackets for surface mounting. Make sure that the base and the fastening material are
suitable and the weight of the lights can be supported permanently and reliably.
Make sure that the base is suitable to support the weight of the light permanently and reliably.
Feed the supply lines for the power supply through the openings in the installation casing.
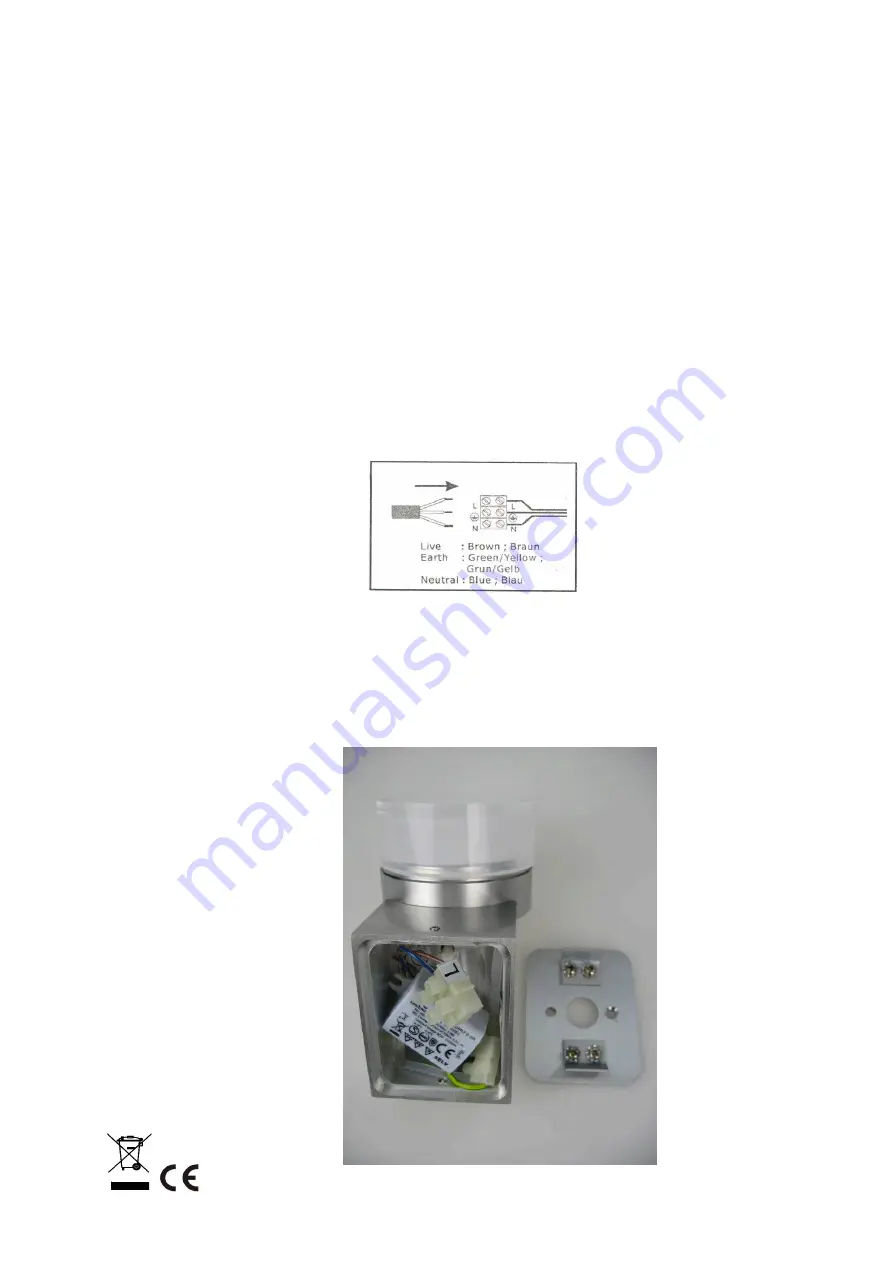
Now connect the connection lines at building installation to the screw terminals of the light. Connect up
the yellow-green ground wire first of all and then the other two lines. The brown (or black) cable is
usually the phase conductor, connect this to the terminal marked with an "L". The blue conductor must
be connected to the terminal marked with an "N".
Do not bend the cable, make sure that the cable and the plug are free from strain and rotational forces.
Protect all cables and insulations from possible damage.
Make sure you have a stable and reliable fastening.
Switch on the circuit breakers of the junction box in the building again.
The name plate must not be removed.
Heitronic
®
H. Vollmer GmbH
Allmendring 29
D-75203 Königsbach-Stein


