Binding with FrSky Taranis X9D Plus Transmitter
1.
Turn on your Taranis X9D Plus transmitter, goto "
Model Setup
" (Press
MENU
and
PAGE
button
once
). In the "
Internal RF
" section, choose
Mode = D16
,
Channel Range = CH1-16
,
Receiver No.
01
, and then click "
Bind
", the transmitter will start beeping.
2.
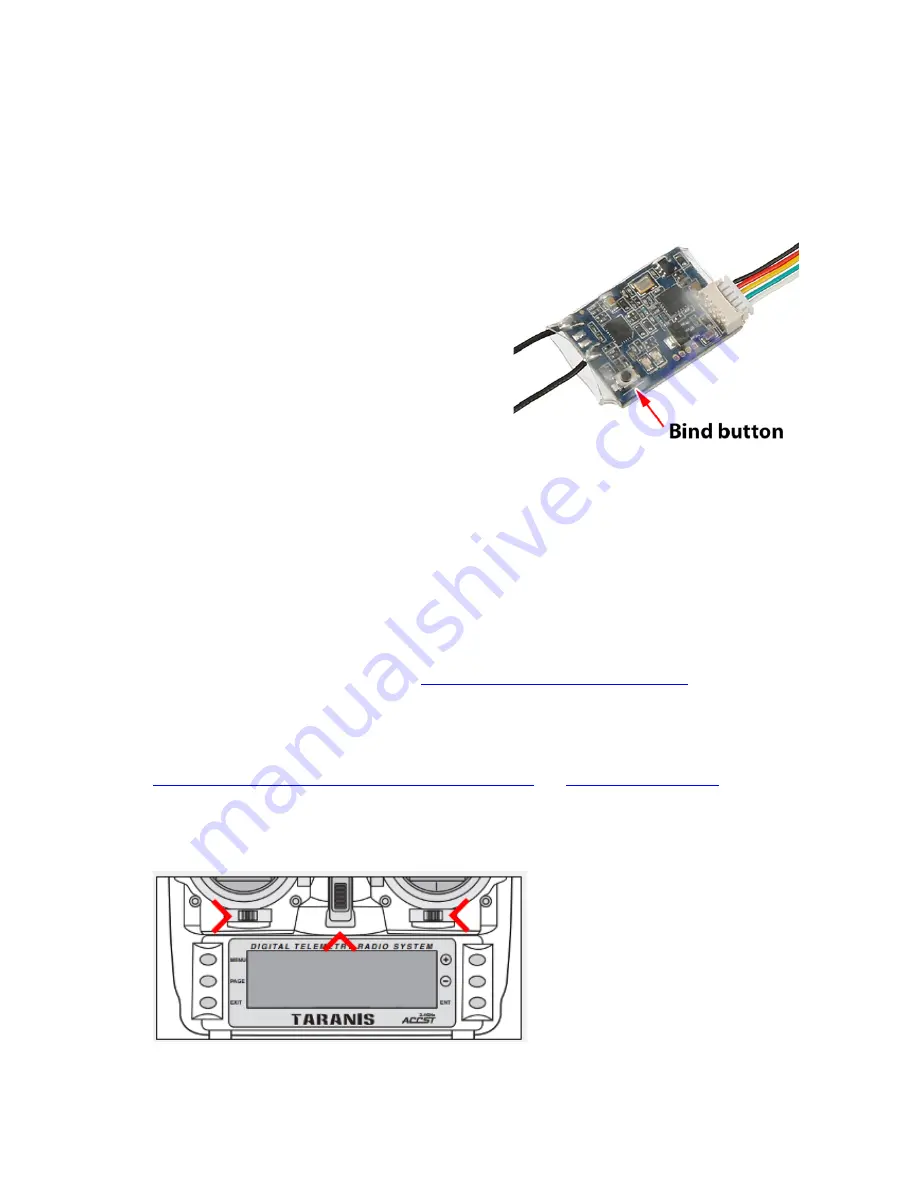
Power up the
X4R-SB
receiver
(Connect battery
to the drone) while holding the
Bind
button. The
LED on the receiver will start flashing, which
means binding has completed.
3.
Power off Transmitter and Receiver.
4.
Turn on the transmitter and power on the Receiver; you should see a Green LED on the
receiver, which means it has bound with your FrSky transmitter.
Radio Controller Parameters - FrSky Taranis X9D Plus Transmitter
For FrSky TARANIS Plus user, you can use the latest OpenTX program to backup/restore your
setting or our own profile. You can find the procedures below:
1.
Download OPENTX program by isiting
http://www.open-tx.org/downloads.html
. Always use
the latest version Use the latest
OPENTX 2.1
branch.
2.
Download the latest helipal profile for our drone here (Please
unzip
before use):
www.helipal.com/download/uav/srd-taranis-x9d-plus.zip
OR
http://goo.gl/PZQeWO
3.
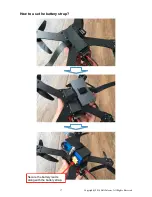
Turn on your radio by
holding both lower trims towards the center
and turn on transmitter
at the same time, you will enter BootLoader mode.
!
Copyright@2016 HeliPal.com. All Rights Reserved
14
Summary of Contents for Luminer QAV-X Storm Edition
Page 3: ...Quick Start Radiolink AT9 Radio Controller Copyright 2016 HeliPal com All Rights Reserved 3...
Page 4: ...Copyright 2016 HeliPal com All Rights Reserved 4...
Page 6: ...Copyright 2016 HeliPal com All Rights Reserved 6...
Page 7: ...How to Control Radiolink AT9 Radio Controller Copyright 2016 HeliPal com All Rights Reserved 7...
Page 9: ...Motors and propellers rotation Copyright 2016 HeliPal com All Rights Reserved 9...


