background image

25

HELIX Extension Card slot (HEC slot)

It  is  possible  to  extend  the  functionality  of  the 

 HELIX DSP.3 by inserting an optional  HELIX Exten

-

sion Card (HEC) – for example a  

Bluetooth

®

 Audio 

Streaming module, an additional optical digital in-

put, an AUX input or an USB audio input.

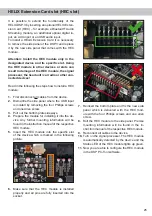
To install a HELIX Extension Card it is necessary 

to remove the side panel of the DSP.3 and replace 

it by the new side panel that comes with the HEC 

module.

Attention: Install the HEC module only in the 

designated  device  and  its  specific  slot.  Using 

the HEC module in other devices or slots can 

 result in damage of the HEC module, the signal 

processor, the head unit / car radio or other con-

nected devices!

Read in the following the steps how to install a HEC 

module:

1.

  First disconnect all

 cables from the device.

2.

  Dismantle the side panel where the USB input 

is located by removing the four Phillips screws 

and one Allen screw. 

3.

  Pull out the bottom plate sideways. 

4.

  Prepare the module for installing it into the de-

vice. Any  further  mounting  information  will  be 

found in the instruction manual of the respective 

HEC module. 

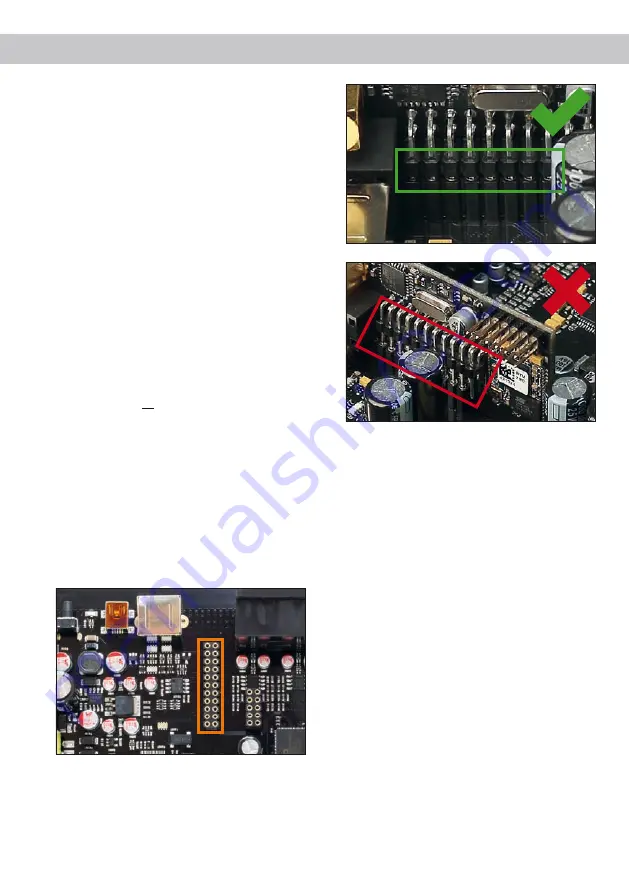
5.

  Insert  the  HEC  module  into  the  specific  slot 

of the device which is marked in the following 

 picture. 

6.

  Make sure that the HEC module is installed 

properly and all pins are fully inserted into the 

socket.

7.

  Reinsert the bottom plate and fix the new side 

panel  which  is  delivered  with  the  HEC  mod

-

ule with the four Phillips screws and one allen 

screw. 

8.

  Bolt the HEC module to the side panel. Precise 

mounting information will be found in the in-

struction manual of the respective HEC module. 

9.

  Reconnect all cables to the device.

10.

 Turn on the signal processor. The HEC module 

is automatically detected by the device and the 

Status LED of the HEC module lights up green. 

11.

  Now you are able to configure the HEC module 

in the DSP PC-Tool software.

Summary of Contents for DSP-3

Page 1: ...DSP 3 deutsch english Digitaler High Res 8 Kanal Signalprozessor mit 96 kHz 32 Bit Signalweg Digital High Res 8 channel signal processor with 96 kHz 32 Bit signal path ...

Page 2: ...ärmeabstrahlen den Teilen oder elektronischen Steuerungen des Fahrzeuges Im Sinne der Unfallsicherheit muss der Signalprozessor professionell befestigt werden Dieses geschieht über Schrauben die in eine Mon tagefläche eingeschraubt werden die wiederum genügend Halt bieten muss Bevor Sie die Schrauben im Montagefeld befesti gen vergewissern Sie sich dass keine elektrischen Kabel und Komponenten hyd...

Page 3: ...r s Zur Einschaltung eines angeschlossenen Verstärkers muss der Remote Ausgang verwendet werden 7 8 9 10 11 12 1 3 4 2 5 6 1 Line Input Cinch Eingänge zum Anschluss eines Vorverstärkersignals 2 Clipping LED Diese LED leuchtet rot wenn einer der Analogeingänge übersteuert wird 3 Input Sensitivity Regler zum Einstellen der Eingangsempfindlichkeit des Line und Highlevel Inputs 4 Highlevel Input Hochp...

Page 4: ...rwenden Sie zum Anschluss aus schließlich die mitgelieferten Stecker mit integrierten Schraubklemmen Achtung Der Highlevel und der Vorverstärker signaleingang eines einzelnen Kanals darf nicht gleichzeitig genutzt werden da dies zu Schäden an ihrem Autoradio führen kann Es ist aber zulässig an einem Kanal den Highlevel und an einem anderen Kanal den Vorverstärkersignaleingang zu verwen den 5 Optic...

Page 5: ...d Unterspannung sowie Überhitzung ausgestattet Prüfen Sie in diesem Fall alle Anschlüsse auf Fehler wie z B Kurzschlüsse oder fehlerhafte Verbindungen Ist die Sicherheits schaltung der Temperaturüberwachung aktiv wird der Remote Ausgang sowie die Signalausgabe ab geschaltet bis ein sicherer Betrieb wieder gewähr leistet werden kann Rot grün langsam blinkend Keine Betriebssoft ware auf dem DSP inst...

Page 6: ... schlüsse verpolen kann dadurch die Funktion des Signalprozessors beeinträchtigt werden Bei Verwendung dieses Eingangs muss der Remote Eingang nicht belegt werden da sich der Signalprozessor automatisch einschaltet sobald ein Lautsprechersignal anliegt 3 Anschluss einer digitalen Signalquelle Sofern Sie über eine Signalquelle mit optischem Digitalausgang verfügen kann diese an den Signalprozessor ...

Page 7: ...angeschlossen der mit dem Pluspol der Batterie verbunden ist Die Stromaufnahme des HELIX DSP 3 ist mit ca 450 mA zwar sehr gering trotzdem sollten Kabel mit mind 1 mm Querschnitt für die Spannungsversorgung ver wendet werden 6 Anschluss des Remote Eingangs Der Remote Eingang des Power Inputs muss mit dem Remote Ausgang des Steuergeräts Radio verbunden sein sofern die Vorverstär kereingänge Line In...

Page 8: ...end empfohlen vor der ersten Inbetriebnahme die grundlegenden Einstel lungen im DSP mit Hilfe der DSP PC Tool Software vorzunehmen Eine Missachtung kann zur Zerstörung der angeschlossenen Verstärker der Lautspre cher führen Informationen zum Anschluss des Signalprozessors an einen PC finden Sie auf Seite 9 9 Anschluss des Remote Ausgangs Dieser Ausgang dient dazu einen am Line Out put angeschlosse...

Page 9: ...olgenden Abschnitt lesen Sie die wichtigsten Schritte zum Anschluss und der ersten Inbetrieb nahme 1 Laden Sie die DSP PC Tool Software unter www audiotec fischer com herunter und in stallieren diese auf ihrem Computer 2 Schließen Sie danach den DSP 3 mit dem bei liegenden USB Kabel an den Computer an Wenn Sie längere Distanzen zu überbrücken haben verwenden Sie bitte eine aktive USB Verlängerung ...

Page 10: ... Aus gangskanal G als Center Full Der Kanal F bleibt unberücksichtigt 4 Nur bei aktivem Setup durchführen Aktivie ren Sie nun im Reiter Center Processing des FX Menüs die Active Setup Link Funktion durch Setzen eines Hakens 5 Wiederholen Sie die Schritte zwei und drei für alle genutzten Routing Matrizen 6 Wechseln Sie nun in das FX Menü und aktivieren im Reiter Center Processing den gewünschten So...

Page 11: ...ehn anstelle der üblichen zwei Sound Setups Mit Hilfe einer optional erhältlichen URC Fernbedie nung oder des Control Tasters lässt sich zwischen zwei der zehn Sound Setup Speicherplätze um schalten Diese zwei Speicherplätze können in der URC Setup Switch Configuration festgelegt wer den Werkseitig sind die Speicherbereiche eins und zwei ausgewählt Um zwischen allen internen Spei cherplätzen umsch...

Page 12: ...eine Inbus und vier Kreuzschlitzschrauben des Seitenblechs der Geräteseite mit dem USB Eingang und ent fernen dieses 3 Ziehen Sie nun das Bodenblech zur Seite he raus 4 Bereiten Sie das Modul für den Einbau in das Gerät vor Informationen dazu entnehmen Sie bitte der Bedienungsanleitung des jeweiligen HEC Moduls 5 Stecken Sie das HEC Modul in den im Gerät vorgesehenen Sockel siehe Markierung im nac...

Page 13: ...Generation ist mit zusätzlichen Überwachungsfunk tionen ausgestattet sodass bei Anschluss eines zu sätzlichen Signalprozessors Fehlermeldungen oder gar Fehlfunktionen auftreten können Der neue ADEP 3 Schaltkreis Advanced Diagnostics Error Protection Generation 3 verhindert diese Probleme ohne die Lautsprecherausgänge des Radios bei ho hen Pegeln unnötig zu belasten Start Stopfähigkeit Das Netzteil...

Page 14: ...nter Lizenz Andere Handelsmarken und Handelsnamen gehören den jeweiligen Inhabern Eingänge 6 x Cinch 6 x Hochpegel Lautsprechereingang 1 x Optisch SPDIF Format 12 96 kHz 1 x Remote In Eingangsempfindlichkeit Cinch 2 4 Volt Hochpegel 5 11 Volt Ausgänge 8 x Cinch 1 x Remote Out Ausgangsspannung 6 Volt Frequenzbereich 10 Hz 44 000 Hz DSP Auflösung 64 Bit DSP Rechenleistung 295 MHz 1 2 Mrd MAC Operati...

Page 15: ...al processor The HELIX DSP 3 signal processor may only be in stalled in vehicles which have a 12 Volts negative terminal connected to the chassis ground Any other system could cause damage to the signal processor and the electrical system of the vehicle The positive cable from the battery for the entire sound system should be provided with a main fuse at a distance of max 30 cm from the battery Th...

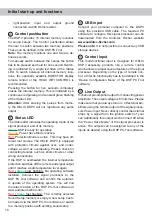
Page 16: ...ne outputs for connecting amplifiers Make sure that the remote output is used to turn on these devices 1 Line Input RCA inputs for connecting pre amplifier signals 2 Clipping LED This LED lights up red if one of the analog inputs is overdriven 3 Input Sensitivity Control for adjusting the input sensitivity of the lowlevel Line and Highlevel Inputs 4 Highlevel Input Highlevel speaker inputs for con...

Page 17: ...io Nevertheless it is possible to use the Highlevel In put of one channel and the lowlevel Line Input of another channel simultaneously 5 Optical Input Optical input in SPDIF format for connecting signal sources with a digital audio output The sampling rate of this input must be between 12 and 96 kHz The input signal is automatically adapted to the in ternal sample rate In order to control the vol...

Page 18: ...d signal output until it reaches a safe temperature level again Red green slow flashing No operating software installed Connect the signal processor to the DSP PC Tool software and confirm the automat ic update of the operating system You will find the latest version of the DSP PC Tool software at www audiotec fischer com Red green fast flashing The currently selected Sound Setup memory is empty A...

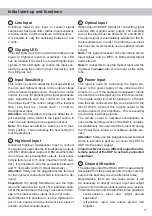
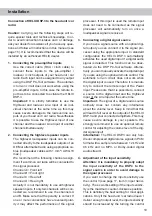
Page 19: ...nal processor If this input is used the remote input does not need to be connected as the signal processor will automatically turn on once a loudspeaker signal is received 3 Connecting a digital signal source If you have a signal source with an optical digi tal output you can connect it to the signal pro cessor using the appropriate input In standard configuration the HELIX DSP 3 automatically act...

Page 20: ...nnecting the remote input The remote input of the Power Input has to be connected to the radio remote output if the signal processors lowlevel Line Inputs or the Optical Input is are used as signal input s We do not recommend controlling the remote input via the ignition switch to avoid pop noise during turn on off If the Highlevel Input is used this input does not need to be connected as long as ...

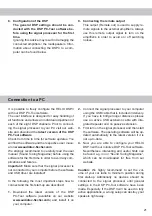
Page 21: ...tions and failures Important Make sure that the signal processor is not connected to your computer before the software and USB driver are installed In the following the most important steps how to connect and the first start up are described 1 Download the latest version of the DSP PC Tool software available on our website www audiotec fischer com and install it on your computer 2 Connect the sign...

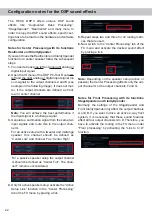
Page 22: ... to the output chan nel G For an active setup with a tweeter and midrange speaker this channel should be defined as Center Low and channel F as Center High For a passive speaker setup the output channel G should be defined as Center Full The chan nel F remains unconsidered 4 Only for active speaker setup activate the Active Setup Link function in the Center Processing tab of the FX menu by placing...

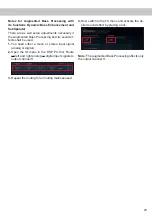
Page 23: ... shall be used 1 You need either a mono or stereo input signal analog or digital 2 Open the IO menu in the DSP PC Tool Route all left and right analog or digital input signals to output channel H 3 Repeat the routing for all routing matrices used 4 Now switch to the FX menu and activate the de sired sound effect by placing a tick Note The Augmented Bass Processing affects only the output channel H...

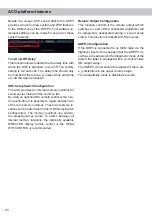
Page 24: ...e ten memory locations These two memory lo cations can be determined in the URC Setup Switch Configuration The memory locations one and two are preassigned ex works To switch between all internal memory locations the optionally available DIRECTOR display remote control or the HELIX WIFI CONTROL is recommended Remote Output Configuration This function controls if the remote output which switches on...

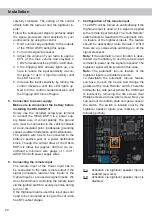
Page 25: ... USB input is located by removing the four Phillips screws and one Allen screw 3 Pull out the bottom plate sideways 4 Prepare the module for installing it into the de vice Any further mounting information will be found in the instruction manual of the respective HEC module 5 Insert the HEC module into the specific slot of the device which is marked in the following picture 6 Make sure that the HEC...

Page 26: ...peakers In particular the latest generation of car radios are equipped with additional monitoring functions so that failure messages and loss of spe cific features e g fader function quite often appear if a signal processor will be hooked up but not with the DSP 3 The new ADEP 3 circuit Advanced Diagnostics Error Protection 3rd Generation avoids all these problems without loading the speaker outpu...

Page 27: ...0 mA Max remote output current 500 mA Additional features HEC slot Ground lift switch Control Input 32 Bit CoProcessor ADEP 3 circuit Auto Remote switch Dimensions H x W x D 40 x 177 x 120 mm 1 58 x 6 97 x 4 72 The limited warranty comply with legal regulations Failures or damages caused by overload or im proper use are not covered by the warranty Please return the defective product only with a va...

Page 28: ...Audiotec Fischer GmbH Hünegräben 26 57392 Schmallenberg Germany Tel 49 2972 9788 0 Fax 49 2972 9788 88 E mail helix audiotec fischer com Internet www audiotec fischer com ...

Reviews: