21
If the potentiometer is already set to full CW
position it will be necessary to change the
sensitivity range by repositioning the jumper
(see figure 2 on page 19). Note that this will
only have an effect on the highlevel inputs!
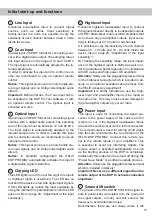
6. Increase the input sensitivity by turning the
respective potentiometer counterclockwise
until the LED lights up. Now turn the poten-
tiometer clockwise until the
Clipping LED
turns off again.
7. Repeat this process for each channel you
are using.
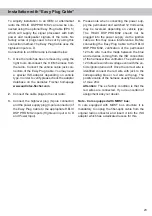
4. Connecting a digital signal source
If you have a signal source with optical or coax-
ial digital output you can connect it to the signal
processor using the appropriate input. In stan-
dard configuration The HELIX DSP PRO MK2
is configured to automatically activate the digital
input which is activated in the software as soon
as a digital audio signal is detected. The
Optical
Input
is activated ex works. This function can be
deactivated via the DSP PC-Tool software. Al-
ternatively you can manually activate the digital
input if you are using an optional remote con-
trol.
The automatic turn-on circuit does not work
when a digital input is used. Therefore it is
mandatory to connect the remote input of the
Power Input
. Please note that it is possible to
connect a source to one of the digital inputs and
the
Highlevel Input
or the
Line Input
at the same
time.
Important:
The signal of a digital audio source
normally does not contain any information
about the volume level. Keep in mind that
this will lead to full level on the outputs of the
HELIX DSP PRO MK2 and your connected
amplifiers. This may cause severe damage to
your speakers. We strongly recommend to use
an optional remote control for adjusting the vol-
ume level of the digital signal input!
Information:
The HELIX DSP PRO MK2
can only handle uncompressed digital ste-
reo signals in PCM format with a sample rate
between 12 kHz and 96 kHz / 192 kHz and no
Dolby-coded signals.
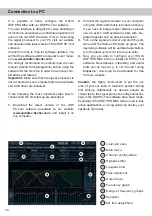
5. Connection to power supply
Make sure to disconnect the battery before
installing the HELIX DSP PRO MK2!
Solely use the included screw-type terminal to
connect the HELIX DSP PRO MK2 to a pow-
er supply. Make sure of correct polarity. The
ground wire must be connected to the vehicle
chassis at a non-insulated point. Inadequate
grounding causes audible interference and
malfunctions.
The positive wire has to be connected to the
battery’s positive post or a power distribution
block. Though the current draw of the HELIX
DSP PRO MK2 is rather low (approx. 510 mA)
we recommend a minimum wire gauge of
1 mm² / AWG18 for both power supply wires.
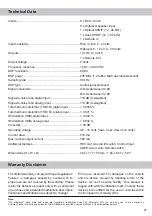
6. Connecting the remote input
The remote input of the
Power Input
has to
be connected to the radio remote output if the
signal processors pre-amplifier inputs or the
digital inputs are solely used as signal inputs.
We do not recommend controlling the remote
input via the ignition switch to avoid pop noise
during turn on/off. If the
Highlevel Input
is used
this input does not need to be connected as
long as the car radio has BTL output stages.
7. Configuration of the remote input
The DSP PRO MK2 will be turned on automati-
cally if the
Highlevel Input
is used or if a signal is
applied to the remote input terminal. The “Auto
Remote” switch allows to deactivate the auto-
matic turn-on feature. The feature should be de-
activated if there are e.g. noises while switching
on/off the signal processor.
Note:
If the automatic turn-on function is deac-
tivated it is mandatory to use the remote input
terminal to power up the signal processor! The
highlevel signal will be ignored in this case.
Note:
The activation of the signal processor via
speaker input is activated ex works.
To deactivate the automatic turn-on feature
you have to open the device and change the
position of the “Auto Remote” switch. Therefore
dismantle the side panel (where the USB input
is located) by removing the five Phillips screws.
Now you can pull out the bottom plate and get
access to the switch. The switch is located near


