background image

P2

10)

11)
12)

13)

14)

15)

16)

17)
18)
19)

Protect the power cord from being walked on or pinched particularly at plugs, 
convenience receptacles, and the point where they exit from the apparatus.
Only use attachments/accessories specified by the manufacturer.
Use only with a cart, stand, tripod, bracket, or table specified by the manufacturer, or 
sold with the apparatus. When a cart is used, use caution when moving the cart/
apparatus combination to avoid injury from tip-over.
Unplug this apparatus during lightning storms or when unused for
long periods of time.
Refer all servicing to qualified service personnel. Servicing is
required when the apparatus has been damaged in any way, such
as power-supply cord or plug is damaged, liquid has been spilled
or objects have fallen into the apparatus, the apparatus has been
exposed to rain or moisture, does not operate normally, or has
been dropped.
The apparatus shall not be exposed to dripping or splashing and that no objects 
filled with liquids, such as vases, shall be placed on apparatus. 
Main plug is used as disconnect device and it should remain readily operable during 
intended use. In order to disconnect the apparatus from the mains completely, the 
mains plug should be disconnected form the mains socket outlet completely. 
Battery shall not be exposed to excessive heat such as sunshine, fire or the like. 
Caution marking is located at the bottom of apparatus. 
The marking information is located at the bottom of apparatus. 

810-00000S-190

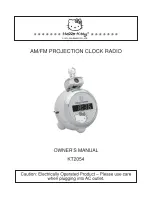
Summary of Contents for Hello Kitty KT2054

Page 1: ......

Page 2: ...or replacement of the obsolete outlet IMPORTANT SAFETY INSTRUCTIONS WARNING To reduce the risk of fire or electric shock do not expose this appliance to rain or moisture CAUTION Use of controls or adj...

Page 3: ...tus has been damaged in any way such as power supply cord or plug is damaged liquid has been spilled or objects have fallen into the apparatus the apparatus has been exposed to rain or moisture does n...

Page 4: ...rence to radio or television reception which can be determined by turning the equipment off and on the user is encouraged to try to correct the interference by one or more of the following measures Re...

Page 5: ...ON AUTO OFF switch 7 LED Display 8 Rotary Set Dial 9 Sleep Button 10 Tuning Control Knob 11 AM FM Band Selection Switch 12 Volume Buzz Knob 13 Projection 14 Projection ON OFF 15 Minute Button for Proj...

Page 6: ...h Tuning Control 10 4 Adjust the volume level with Volume Control 12 5 For best FM reception fully extend the FM Antenna Wire For best AM reception try turning the unit slowly until the best station r...

Page 7: ...ched Set the Volume Buzz Knob 12 to a desired volume level The radio will now turn on at the selected alarm time WAKE TO BUZZER Slide the Volume Buzz Knob 12 to the BUZZ position The buzzer will now t...

Page 8: ...ore the sleep time expires press the Snooze Button 3 SLEEP AND WAKE TO RADIO 1 Set the desired alarm time as described in the section SETTING THE ALARM TIME 2 Tune the radio to your desired channel 3...

Page 9: ...or from possible battery leakage We are not responsible for batteries returned with the product or for the cost of replacement Distributed by Spectra Merchandising International Inc Chicago Industry T...

Page 10: ...de within the warranty period 2 This warranty does not cover damage or equipment failure caused by electrical wiring not in compliance with electrical codes or SPECTRA owner s manual specifications or...

Page 11: ...ome cases the model you have may be discontinued and SPECTRA reserves the right to offer alternative options for repair or replacement SPECTRA MERCHANDISING INTERNATIONAL INC 4230 North Normandy Avenu...

Reviews: