Helmer Scientific i.Series
®
and Horizon Series
™
Freezer - Undercounter
Service and Maintenance Manual
360417/A
51
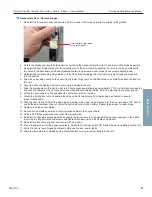
Reassemble Door / Reverse Hinges
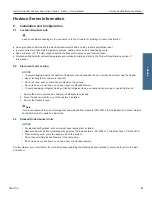
1.
Reinstall the inner door panel and secure with the screws in the holes opposite the original configuration.
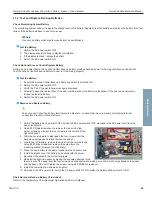
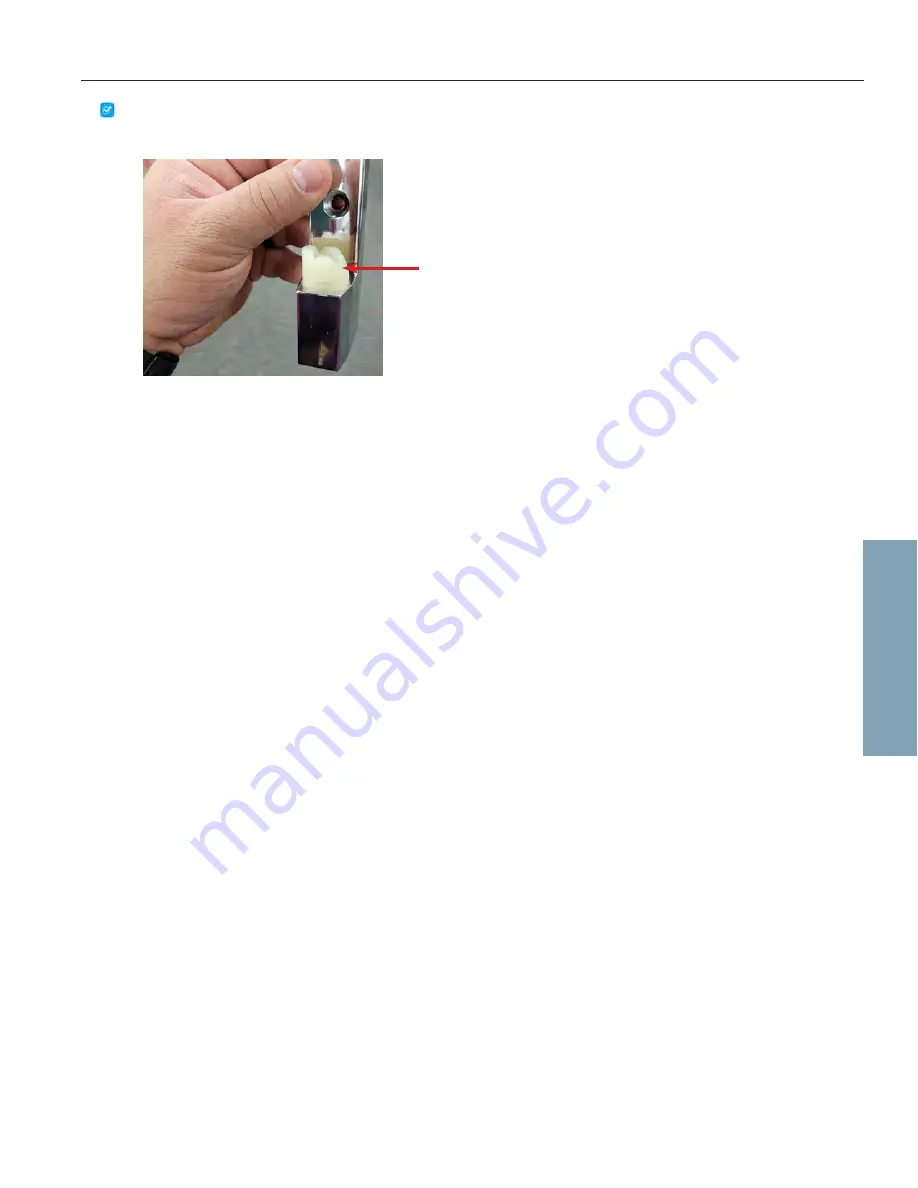
2. Rotate the plastic cam insert so the dwell is now facing the opposite direction (right), and insert in the hinge assembly.
3. Reinstall the door hinge plates onto the opposite side of the door frame by aligning the holes in the hinge plates with
the holes in the door frame and hand-threading the two long screws in each hinge (leave screws slightly loose).
4. Reinstall the corresponding hinge plates to the unit by hand-threading the three short screws through the hinge and
into the cabinet.
5. Align the upper hinge cams on the door with the lower hinge cams on the freezer as you carefully reattach the door to
the unit.
6. Level the door and tighten all screws securing the hinges to the unit.
7. Slide the braided sleeve through the slot in the front access panel allowing approximately 3” (76 mm) of slack between the
door and the cabinet so the door can open and close without straining cables. Install the grommet in the access panel.
8. Attach the door handle on the opposite side of the door with four screws.
9. Attach the strike plate to the opposite side of the unit with two screws. Test the locking mechanism to ensure
proper functionality.
10. With the door closed, reinstall the hinge pin and spring in the upper hinge. Secure with the hex nut using a 3/8" wrench
and flathead screwdriver
(hex nut should be tightened until it stops turning)
. Repeat the process for lower hinge.
11. Replace the hinge cover plates.
12. Reconnect the display power and communication cables to the control board.
13. Using a #2 Phillips screwdriver, reconnect the ground wire.
14. Reinstall the right-side access panel by engaging the four screws in unit base with the keyhole openings in the panel.
Insert the top and bottom center screws and tighten all screws using a #2 Phillips screwdriver.
15. Reinstall the front access panel and secure with six screws.
16. Plug the power cord into the power receptacle. Switch the AC power switch ON. Switch the back-up battery switch ON.
17. Verify the door is level, hinges operate smoothly and the door seals tightly.
18. Allow the temperature to stabilize at the setpoint before moving inventory back into the unit.
2
Dwell will face right when
unit is left-hinged.
Horizon Series

