Helmer Scientific i.Series
®
and Horizon Series
™
Refrigerator - Pass-Thru
Service and Maintenance Manual
360429/A
26
4.2
Test and Replace Backup Batteries
i.C
3
Monitoring System Backup Battery
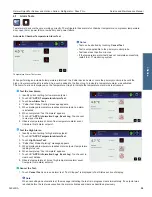
On all i.C³ screens, the Battery icon will appear in the header bar when the system is running on battery power and the screen
brightness will automatically be reduced. The monitoring system will automatically disable some features to extend battery life.
Check the i.C
3
Monitoring System Backup Battery.
1. Ensure backup battery switch is switched ON.
2. Switch AC power switch OFF.
3. Screen should continue to display information with reduced brightness and battery icon will appear on screen. If display is
blank, replace battery.
4. When completed, switch AC power switch ON.
Notes
• The i.C
3
Monitoring System and the optional i.Lock interlock use the same backup battery.
•
Use only a battery which meets manufacturer’s specifications.
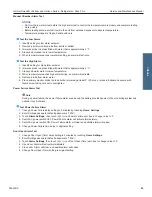
Replace Monitoring System Backup Battery
1. Switch battery backup switch OFF; switch AC power switch OFF; disconnect
AC power cord from power receptacle.
2. Using a #2 Phillips screwdriver, remove screws securing ventilated cover over ante-room
(control) side, and remove cover.
3. Locate 12V battery and disconnect power wires from battery terminals.
4. Using a #2 Phillips screwdriver, remove two (2) screws securing battery strap to top
of cabinet.
5. Remove battery strap and set it aside.
6. Remove battery from the refrigerator.
7. Place new battery on top of cabinet, in same orientation as original battery.
8. Place battery strap over battery.
9. Using a #2 Phillips screwdriver, install two screws to attach the battery strap to top
of cabinet.
10. Connect power wires to battery terminals, ensuring wires are connected to correct terminals.
11. Reinstall ventilated cover and secure with screws using a #2 Phillips screwdriver.
12. Reconnect AC power cord; switch AC power switch ON; switch battery backup switch ON.
Chart Recorder Backup Battery (if included)
Refer to Temperature Chart Recorder Operation and Service Manual.
4.3
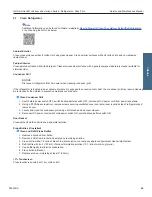
Check Probe Bottle (if installed)
Remove the probe bottle from the bracket and inspect for cracks. Replace the bottle if necessary.
Ensure the probe bottle has approximately 4 oz. (120 mL) of product simulation solution (10:1 ratio of water to glycerin). The
glycerin is used to create a solution which simulates the product stored in the refrigerator. The product simulation solution
temperature reflects the product’s temperature during normal operation. Failure to fill the bottle may prevent the chamber
temperature from stabilizing at the temperature setpoint. The probe should be immersed at least 2” (50 mm).
i.Series


