Helmer Scientific i.Series
®
and Horizon Series
™
Refrigerator - Pass-Thru
Service and Maintenance Manual
360429/A
49
Primary Monitor Probe
Verify the primary monitor probe is reading chamber temperature correctly by comparing primary monitor probe readings to the
temperature measured by a calibrated reference thermometer. If the primary monitor probe is not reading correctly, change the
monitor offset value displayed.
Notes
• Ensure product simulation bottle (if installed) is full of solution.
• The probe in the bottle or ballast is connected to the monitoring system and represents product storage temperature.
This probe does not affect the temperature control.
• For units with a solid ballast, Helmer recommends using putty to seal the probe hole when using a thermocouple wire
to calibrate.
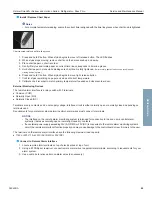
Calibrate Primary Monitor Probe
(probe bottle installed)
Calibrate Primary Monitor Probe
(solid ballast installed)
1
Remove primary monitor probe from probe bottle.
1
Ensure Primary Monitor Probe is securely installed in ballast.
2
Unscrew cap from bottle.
2
Place calibrated independent reference thermometer in one
remaining probe hole in ballast and tighten thumb screw to
secure. This may involve temporarily removing an additional
probe to provide an opening for independent reference
thermometer. (Take care not to over-tighten thumb screw,)
3
Attach calibrated independent reference thermometer traceable
per national standards to primary monitor probe, and place
them in bottle. The probe and thermometer should be immersed
at least 2” (50 mm).
4
Close door and allow chamber temperature to stabilize.
3
Close door and allow chamber temperature to stabilize.
5
Observe and note thermometer temperature. Compare to
chamber temperature displayed on monitor. If independent
thermometer corresponds to displayed temperature, proceed to
Step 7
.
4
Observe and note thermometer temperature. Compare to
chamber temperature displayed on monitor. If independent
thermometer corresponds to displayed temperature, proceed to
Step 6
.
6
Adjust monitor offset value higher or lower to reflect difference
between chamber temperature displayed on monitor and
temperature reading from calibrated reference thermometer.
5
Adjust monitor offset value higher or lower to reflect difference
between chamber temperature displayed on monitor and
temperature reading from calibrated reference thermometer.
7
Remove reference thermometer from probe.
6
Loosen thumb screw and remove calibrated independent
reference thermometer from ballast.
8
Replace bottle cap, ensuring tight fit.
7
Replace any additional probe removed previously, and tighten
thumb screw ensuring snug fit.
9
Place probe in bottle, immersing at least 2” (50 mm).
8
Replace any removed putty.
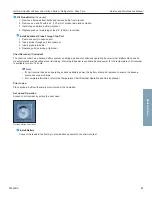
Enter the new offset value:
1. Press and hold
Up
and
Down Arrows
simultaneously for 3 seconds to enter program mode.
2. The display will show .C or .F to indicate Celsius or Fahrenheit.
3. Press
MODE
until only the MONITOR lamp flashes.
4. Hold
SET
, then press
Up
or
Down Arrow
to change monitor offset.
5. Release
SET
button. New setting is saved.
6. Press and hold
Up
and
Down Arrows
simultaneously for 3 seconds to exit program mode.
Horizon Series

