Helmer Scientific i.Series
®
and Horizon Series
™
Refrigerator - Pass-Thru
Service and Maintenance Manual
360429/A
56
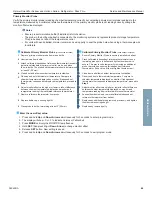
12.3 Remove / Replace Unit Cooler Cover
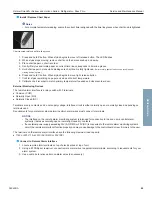
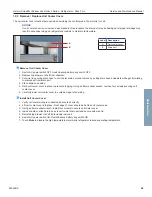
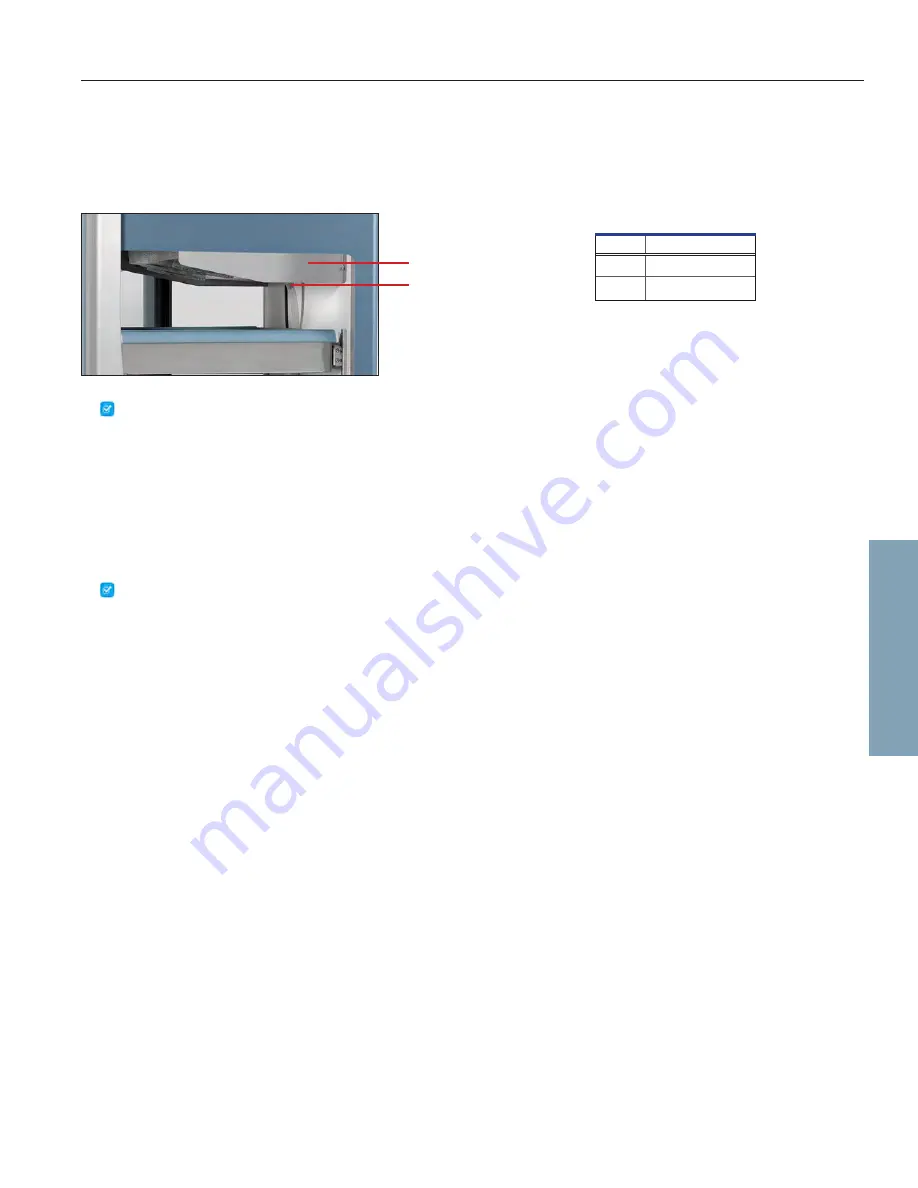
The unit cooler cover must be removed when servicing the control probe, fan motor(s) or coil.
NOTICE
If unit cooler cover is not removed as detailed in this procedure the drain port may be damaged. Improper drainage may
result in excessive icing and refrigerator’s inability to maintain temperature.
Remove Unit Cooler Cover
1. Switch AC power switch OFF. Switch backup battery key switch OFF.
2. Remove top drawer or shelf from chamber.
3. Cut wire tie securing drain hose to unit cooler drain port and remove by pulling drain hose downward while gently twisting
to disconnect from drain port.
4. Place drain hose aside.
5. Hold unit cooler cover in place to prevent dropping. Using an 8mm socket wrench, remove four screws securing unit
cooler cover.
6. Carefully lower unit cooler cover to avoid damage to fan wiring.
Install Unit Cooler Cover
1. Verify unit cooler wiring is connected and routed correctly.
2. Lift unit cooler cover into place. Front edge of cover should be behind unit cooler case.
3. Using an 8mm socket wrench, install four screws to secure unit cooler cover.
4. Inside chamber, attach drain hose to unit cooler drain port and secure with wire tie.
5. Reinstall top drawer or shelf if previously removed.
6. Switch AC power switch ON. Switch backup battery key switch ON.
7. Touch
Mute
to disable the high temperature alarm while refrigerator reaches operating temperature.
Label
Description
A
Unit cooler cover
B
Drain port
A
B
Horizon Series

