360142-D/D
78
Horizon Series™ Models
14.5
Unit Cooler Cover Removal and Installation
If unit cooler cover is not removed as detailed in this procedure the drain port may be damaged. Improper
drainage may result in excessive icing and freezer’s inability to maintain temperature.
Required tools:
►
5/16” socket wrench
►
Tool to push putty away from the drain tube
A
B
C
D
E
F
G
H
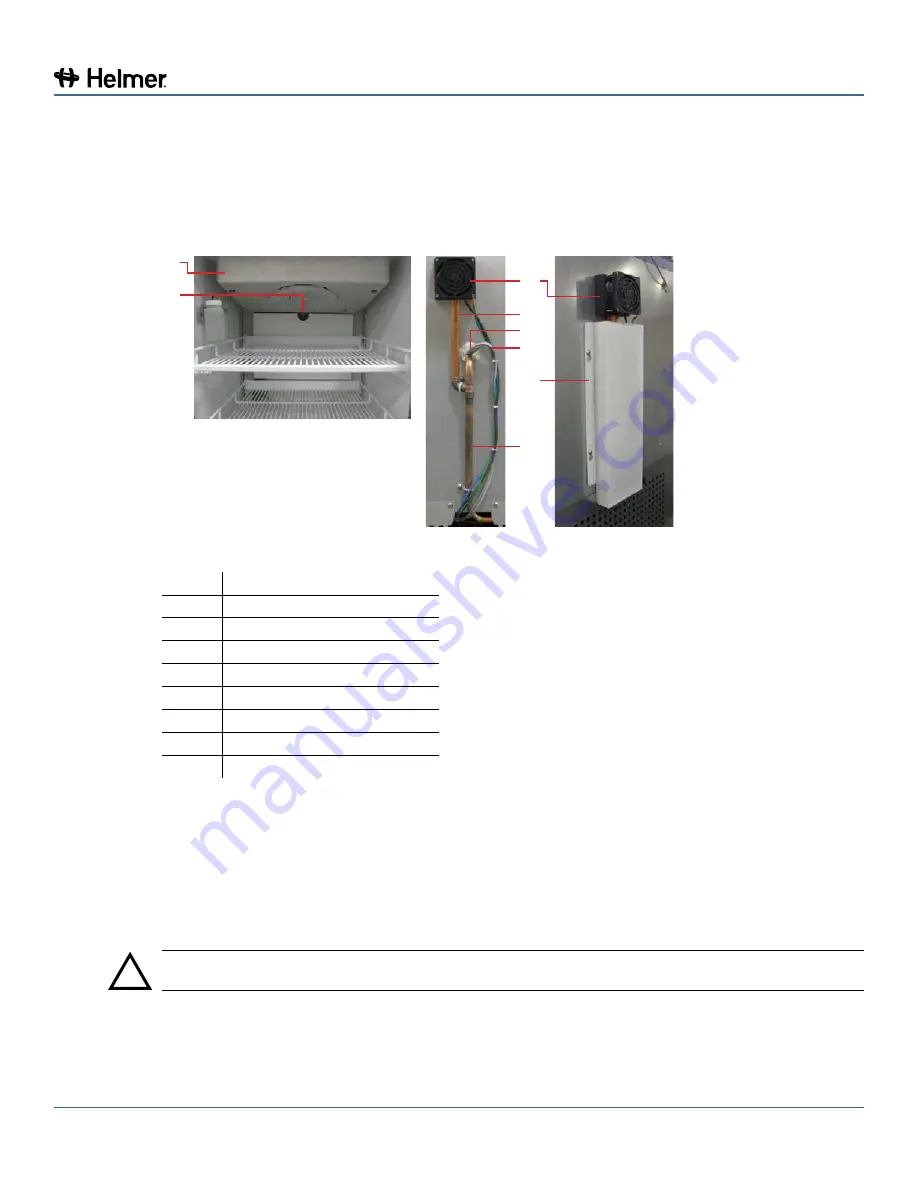
Drain line, fan, and heater components.
Label Description
A
Unit cooler cover
B
Drain port
C
Drain fan
D
Fan tube
E
Heating element
F
Heater wires
G
Protective cover
H
Drain tube
14.5.1
Remove the Unit Cooler Cover
1
Switch AC ON/OFF switch OFF. Disconnect the battery.
2
Remove the rear protective cover (G) on the rear of the cabinet.
a
Loosen four screws
b
Slide the cover up and remove
c
Cut the wire ties securing the drain line to the cabinet
3
On the back of the cabinet, peel the putty back to expose the drain tube (H) and drain heater (E).
!
CAUTION
The condensate evaporator and water evaporation tray are hot.
4
Inside the cabinet, remove the putty around the drain tube.
5
Remove the wire ties securing the heater wires (F) to the cabinet. Verify the heating element is cool.
6
Remove the drain heater from the drain tube.


