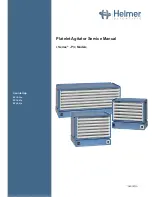
Helmer Scientific Platelet Agitator
Service Manual
360391/A
11
3 Maintenance
Maintenance tasks should be completed according to the schedule below.
Notes
• These are recommended minimum requirements. Regulations for your organization or physical conditions at your
organization may require maintenance items to be performed more frequently, or only by designated service personnel.
• The Preventive Maintenance schedule provided below supersedes the schedule provided in the Platelet Agitator Pro
Operation Manual.
Table 4. Preventive Maintenance Schedule
Task
Frequency
Annually
As Needed
Test the motion alarm.
ü
Check the 9V NiMH back-up battery for the motion alarm system after an
extended power failure and change it if necessary, or change the battery if it has
been in service for one year.
ü
Check moving parts for wear. Clean moving parts.
ü
Replace moving parts if worn.
ü
Clean the exterior of the platelet agitator.
ü
Notes
•
During a power failure (when the motion alarm is enabled), the back-up battery provides power to the motion alarm.
If the back-up battery is not functioning, the motion alarm will not be activated.
• If the back-up battery does not provide power to the alarm system during the motion alarm test, replace the battery.
• If battery has been in service for one year, replace battery.
•
Use only manufacturer specified rechargeable battery for replacement (9V NiMH battery with a capacity of ≥175 mAh)
.
3.1
Remove / Replace Trolley
The storage trolley must be removed when performing certain maintenance tasks.
Remove Trolley
1.
Switch the Motion Alarm ON/OFF switch
OFF
.
2.
Switch the Power ON/OFF switch
OFF
, and disconnect the power cable from the power receptacle.
3.
Remove the thumb screws securing the drawer stop panels to the left and right sides of the agitator trolley. (Note the
orientation of each panel)
4. Carefully pull each panel from the agitator and set panels and thumb screws aside.
5.
Slide the drawer(s) out and remove.
6.
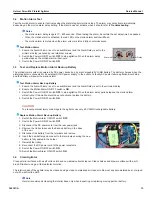
Use a #2 Phillips screwdriver to loosen the four (4) center screws on the floor of the trolley.
7. Slide the screw heads to the opposite end of the slots.
8. Lift the trolley straight up and set aside.
Install Trolley
1. Carefully place the trolley on the base aligning the back and sides of the trolley with the back and sides of the base.
Ensure the motor arm roller is placed within the trolley plastic guide block.
2.
Slide the four (4) center screw heads in the floor of the trolley to the opposite ends of the slots, and secure using a
#2 Phillips screwdriver.
3. Reinstall drawers in desired location by aligning the outer edges of the drawer with the slots in the drawer guides and
push inward.
4.
Reinstall the drawer(s) stop panels in the same orientation as removed, and secure with thumb screws ensuring they are
finger tight.
5.
Reconnect power cable to power receptacle and, switch the Power ON/OFF switch
ON
.
6.
Switch the Motion Alarm ON/OFF switch
ON
.

