background image

360094-1/M

6

General Information

6 Installation

6 .1 

Location Requirements

► 

Has a sturdy, level surface

► 

Has a grounded outlet meeting national electric code (NEC) and local electrical requirements

► 

Is clear of direct sunlight, high temperature sources, and heating and air conditioning vents

► 

Minimum 8” (203 mm) above

► 

Access to a water supply

► 

Adjacent to a sanitary drain or waste water container

► 

Meets limits specified for ambient temperature and relative humidity

NOTE 

If possible, drain or waste container should be located on same side as drain 
port.

6 .1 .1 Placement

CAUTION

► 

Ensure chamber has been drained before moving.

► 

Unplug unit from AC power before moving.

6 .2 

Install External Thermometer (Optional)

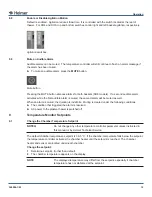
Install the external thermometer according to the manufacturer’s documentation.  If using a Helmer DT1 
digital thermometer, refer to the instructions on the CD shipped with the plasma thawer.

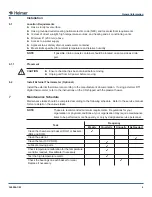
Maintenance Schedule

Maintenance tasks should be completed according to the following schedule.  Refer to the service manual 
for more detail on the various tasks.

NOTE 

These are recommended minimum requirements.  Regulations for your 
organization or physical conditions at your organization may require maintenance 
items to be performed more frequently, or only by designated service personnel.

Task

Frequency

Weekly

Quarterly

Annually As Needed

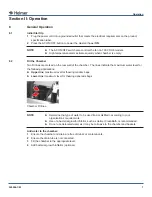
Clean the chamber and basket (DH2) or baskets 

(DH4 and DH8).

Clean the exterior.

Clean the fan (100 V DH8).

Lubricate moving parts.

Check temperature calibration for the temperature 

controller readout.  Recalibrate if necessary.

Test the high temperature alarm.

Check the bearings on each basket for wear.  

Replace if necessary.

Summary of Contents for OuickThaw DH2

Page 1: ...ergen Boulevard Noblesville IN 46060 USA PH 1 317 773 9073 FAX 1 317 773 9082 USA and Canada 800 743 5637 ISO 13485 2003 CERTIFIED Plasma Thawing System Operation Manual OuickThawTM Model Version DH2...

Page 2: ...sion Description L 08 MAY 2013 8409 Supersedes A B C D E F G H I J K Revised layout for ease of navigation and locating information M 16 MAY 2014 9492 M supersedes L Removed 0086 mark from manual Date...

Page 3: ...ternal Thermometer Optional 6 7 Maintenance Schedule 6 Section II Operation 7 8 General Operation 7 8 1 Initial Start Up 7 8 2 Fill the Chamber 7 8 3 Drain the Chamber 8 8 4 Determine the Correct Thaw...

Page 4: ...marks and registered trademarks are the property of their respective owners Helmer Inc doing business as DBA Helmer Scientific and Helmer 2 Safety Includes general safety information for plasma thawin...

Page 5: ...32 L Basket Capacity 2 units 4 units 8 units External Port Standard for external thermometer Electrical Input Voltage and Frequency 100 V 50 Hz 115 V 50 60 Hz 230 V 50 60 Hz Voltage Tolerance 10 Circ...

Page 6: ...roduct is certified to applicable UL and CSA standards by a NRTL This device complies with the requirements of directive 93 42 EEC concerning Medical Devices as amended by 2007 47 EC Sound level is le...

Page 7: ...ermometer according to the manufacturer s documentation If using a Helmer DT1 digital thermometer refer to the instructions on the CD shipped with the plasma thawer 7 Maintenance Schedule Maintenance...

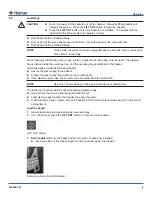
Page 8: ...The lines indicate the maximum water level for the following applications Upper line maximum level for thawing random bags Lower line maximum level for thawing apheresis bags Chamber fill lines NOTE...

Page 9: ...coupling valve installed Right 90 elbow fitting Drain water from the chamber 1 Press the AC ON OFF button to power the plasma thawer OFF 2 Disconnect the power cord from AC power 3 Place the open end...

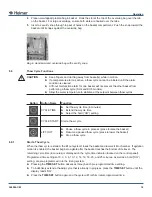
Page 10: ...ap bag is attached to the basket Overwrap bags provide the following benefits Secure the plasma bag to the basket Protect the plasma bag from water borne contaminants If the plasma bag breaks the cont...

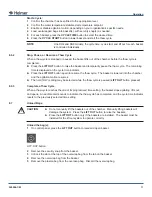
Page 11: ...ion CYCLE TIME Set thaw cycle time in minutes Extend thaw cycle time Select the hold HO setting CYCLE START Start a thaw cycle LIFT OUT Pause a thaw cycle in process press to raise the basket Resume a...

Page 12: ...resume the thaw cycle The basket is lowered into the chamber and the agitation motion resumes The hold HO setting may be selected while the thaw cycle is paused LIFT OUT button pressed 8 6 3 Complete...

Page 13: ...an alarm is muted the duration is indefinite Muting is cleared under the following conditions The condition that triggered the alarm is resolved AC power to the plasma thawer is switched off 9 Temper...

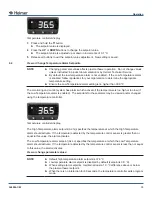
Page 14: ...the temperature is too high or too low if the Low Temperature alarm is enabled The setpoints for these alarms may be viewed and or changed using the temperature controller Temperature controller displ...

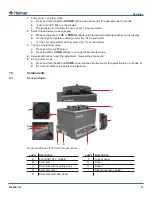
Page 15: ...e AL Lo parameter 3 Change a parameter value a Press and hold the button b Press the UP or DOWN buttons to change the parameter value 4 Release all buttons to exit the parameter New settings are saved...

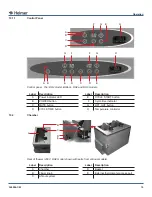
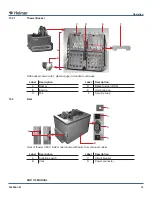
Page 16: ...n A Power indicator LED E CYCLE START button B POWER button F Cycle time indicator C MUTE button G LIFT OUT button D CYCLE TIME button H Temperature controller 10 2 Chamber A B C D E Rear of thawer 23...

Page 17: ...Label Description Label Description A Basket D Basket divider DH8 B Bearing E Overwrap bag C Tab F Security snap 10 3 Rear A C C D C B Rear of thawer 230 V DH4 model shown with parts from various mode...

Page 18: ...HELMER SCIENTIFIC 14400 Bergen Boulevard Noblesville IN 46060 USA PH 1 317 773 9073 FAX 1 317 773 9082 www helmerinc com...

Reviews: