background image

2

Dimensiones Recomendadas /

Recommended Dimensions

*A

tubería de alimentación


Ø 32 mm (1¼”)

 (no incluida)

feed pipe

Ø 32 mm (1 ¼ ")(not included)

60 cm

(23,6”) 

Reducción campana de 

Ø 32 a 25,4 mm 

(1¼” a 1”)

(no incluida)

Bell reduction

Ø 32-25,4 mm (1 ¼ "to 1")

(not included)

cámara de aire

air chamber

tubo Ø 32 mm 

(1¼”)

(no incluido)

tube Ø 32 mm (1 ¼ ")

(not included)

tubo Ø 25,4 mm 

(1”) 

(no incluido)

tube Ø 25,4 mm (1 ") (not included)

adaptador (incluido)

adapter (included)

Nota:

 La tubería debe ser 

Ø 1¼”  

desde la alimentación

Note:

 The pipe should be Ø 1 ¼ "from food. 


Verificar que la dimensión 

*A 

sea


la necesaria para enroscar la llave

 de retención con su chapetón,

hasta el paño de la pared. 

Check that the dimension A is the 

necessary to screw key retention with

escutcheon cloth to the wall.

3

Componentes del Producto

 / Product Components

No. DESCRIPCIÓN

DESCRIPTION

1 Cúpula Ciega Fluxómetro

Flushometer Blind Dome

2 Émbolo 

Piston

3 Rondana Vulcanizada

Vulcanized Washer 

4 Tapón Fluxómetro Doble Botón

Cap for Button Holder

5 O´ring 2-118

O´ring 2-118

6 Tapón para Carcasa

Cap Housing

7 O´ring 2-011

O´ring 2-011

8 Dispositivo Electrónico Flux Baterías

Electronic Device 

9 Tubo Camisa

Cover Tube

10 Anillo de Presión

Locking Ring

11 O'ring  2-123

O'ring  2-123

12 Llave de Retención Armada

Stop Valve

13 Adaptador

Adapter

14 Tubo Camisa

Cover Tube

15 Chapetón Llave de Retención

Stop Valve Escutcheon

Para spud de Ø 19 mm / 

For Ø ¾” spud

2

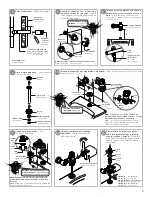
Instalación General

/ General Installation

adaptador

adapter

tuerca

nut

dispositivo electrónico

electronic device

A

adaptador

adapter

chapetón

escutcheon

cortador de tubo 

(no incluido)

pipe cutter       

(not included)

4

5

Para spud de Ø 19 mm

For Ø ¾” spud

1

16

2

3

8

4

5

6

7

9

10

11

12

13

14

15

16

Rondana tuerca, tuerca de 32 mm, 
niple recto reducción 32 - 19 mm, 
kit tuerca 19 mm c/rondanas y 
chapetón mingitorio 19 mm

Washer nut, 1 ¼" nut, 1 ¼" - 
¾" straight nipple reduction, 
¾" setting kit nut with washers 
and ¾" urinal escutcheon

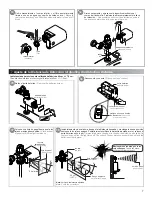
Desarme el fluxómetro. 

/ Disassemble the flushometer.

camisa

cover 

tube

llave de 

retención

stop valve

llave de

retención

stop valve

camisa

cover tube

llave de

retención

stop valve

cuerpo armado

body assembly

Nota: 

Recorte la camisa si es necesario.

Note: 

Trim cover tube if necessary.

Presente  la  llave  de  retención  y  el  adaptador  (incluido)  con  respecto  a  la 
ubicación del mueble. /

 Present the stop valve and adapter (included) according 

to the location of the toilet.

FB-185-19  

      Émbolo (rojo) 3 lpf

FB-185-19-0,5  

Émbolo (verde claro) 0,5 lpf

FB-185-19-1  

   Émbolo (gris) 1 lpf

FB-185-19  

        Piston (red) 3 lpf 

FB-185-19-0,5  

 Piston (ligth green) 0,5 lpf  

FB-185-19-1  

    Piston (gray) 1 lpf 

6

Summary of Contents for FB-185-19

Page 1: ...yendo niños con capacidades físicas sensoriales o mentales reducidas o carezcan de experiencia o conocimiento a menos que reciban supervisión o capacitación Los niños deben supervisarse para que no jueguen con el aparato The device should not be used by persons including children with reduced physical sensory or mental capabilities or lack of experience and knowledge unless they receive supervisio...

Page 2: ...king Ring 11 O ring 2 123 O ring 2 123 12 Llave de Retención Armada Stop Valve 13 Adaptador Adapter 14 Tubo Camisa Cover Tube 15 Chapetón Llave de Retención Stop Valve Escutcheon Para spud de Ø 19 mm For Ø spud 2 Instalación General General Installation adaptador adapter tuerca nut dispositivo electrónico electronic device A adaptador adapter chapetón escutcheon cortador de tubo no incluido pipe c...

Page 3: ...hen firmly tighten the body assembly to stop valve Verifique que las rondanas estén bien colocadas Check that the washers are properly installed rondana tuerca washer nut tuerca nut niple nipple niple armado nipple assembly Coloque y enrosque el dispositivo electrónico Place and screw the electronic device dispositivo electrónico electronic device Cierre la llave de retención y abra el suministro ...

Page 4: ...ctronic device and open the stop valve completely dispositivo electrónico electronic device 4 cúpula dome rondana whaser émbolo piston 18 Retire el porta baterías incluidas Remove the batteries holder batteries included 19 Conecte el conector del sensor en el porta baterías Connect the sensor in the batteries holder basura garbage luz roja parpadeando red light blinking 20 Espere hasta que la luz ...

Page 5: ... blinking 25 Retire el porta baterías Remove the batteries holder porta baterías batteries holder 26 Cambie las baterías por unas nuevas Change the batteries with a new Al cambiar las pilas no es necesario hacer el ajuste de la distancia de detección When changing batteries is not necessary to adjust the detection distance 27 Arme nuevamente Reassemble tapón cap Accione tres veces permitiendo el c...

Page 6: ...e Electrinic Device 31 32 Cierre la llave de retención Close the stop valve Retire el dispositivo electrónico Remove the electronic device dispositivo electrónico electronic device cúpula dome cúpula dome rondana whaser émbolo piston tornillo screw rondana washer resorte émbolo spring piston asiento con perno bolt seat llantita vulcanizada verificar desgaste piston vulcanized tire check for wear r...

Page 7: ...uz roja se mantenga encendida Place a sheet of paper until the red light remains on 37 5 cm max hoja de papel paper sheet 8º luz roja parpadeando red light blinking 38 Inmediatamente mueva la hoja de papel a la distancia deseada y mantengala en esa posición hasta que la luz roja se apague Posteriormente verifique la distancia ajustada arme y coloque el porta baterías en su lugar Immediately move t...

Page 8: ...ión mínima de operación sea de 1 kg cm Verify that the minimum operating pressure is 1 kg cm La llave de retención está cerrada The stop valve is closed Abra la llave de retención pag 4 paso 17 Open the stop valve page 4 step 17 La línea está obstruída The supply line is obstructed Verifique que haya un buen flujo del agua retirando el émbolo y purgando Pag 3 y 4 pasos 13 al 17 Check for good wate...

Reviews: