8
EN
To light the patio heater
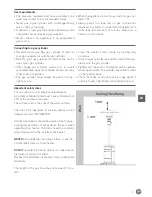
• The pilot should be lit and the knob set to
PILOT
.
• Press the knob 3mm and turn anti-clockwise to
HIGH
.
• When mesh glows lit, turn knob clockwise from
HIGH
to
LOW
as needed.
Note: The burner may be noisy when initially
turned on. To eliminate excessive noise from the
burner, turn the control knob to the pilot position.
Then, turn the knob to the level of heat desired.
Re-lighting
Note: For your safety, Control Knob cannot be turned OFF without first depressing Control Knob in PILOT
position and then rotating it to OFF.
• Turn Control Knob to OFF.
• Wait at least 5 minutes, to let gas dissipate, before
attempting to re-light pilot.
• Repeat the “Lighting” steps
To extinguish
• Hold knob depressed & turn the knob clockwise
to ‘OFF’
• Close the valve of the gas cylinder or the regulator
after use.
• Allow this appliance to cool before moving.
Note: After use, some discoloration of the emitter
screen is normal.
Leak testing
NEVER USE A NAKED FLAME TO CHECK FOR LEAKS.
NEVER LEAK TEST WHILE SMOKING
The gas connections on this appliance are leak test-
ed at the factory prior to shipment.
This appliance needs to be periodically checked
for leaks and an immediate check is required if the
smell of gas is detected.
•
Make a soap solution using 1 part of liquid
dish-washing soap to 3 parts water. The soap
solution can be applied with a soap bottle, brush,
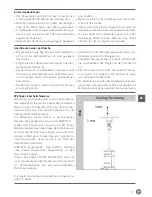
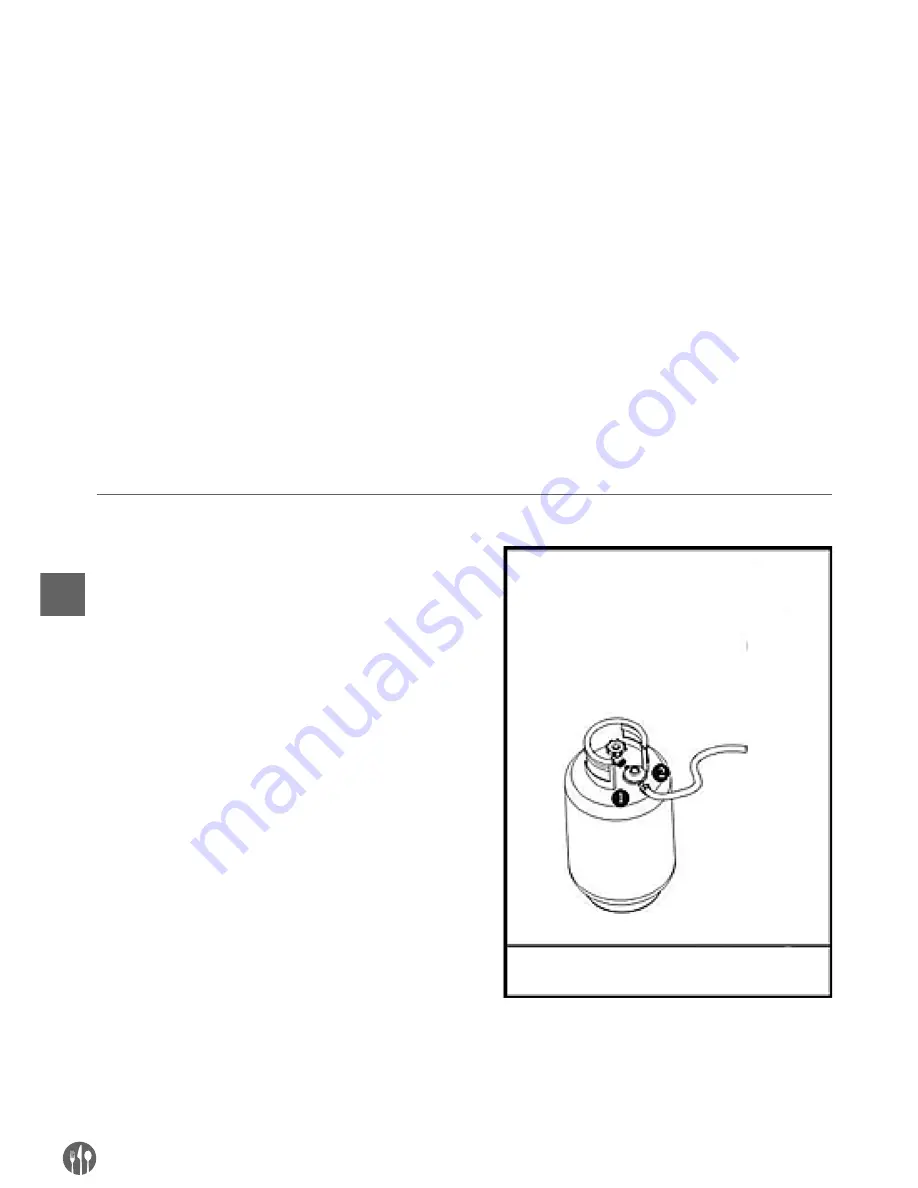
or rag to the leak tested points shown in the figure
above.
• The valve of the gas cylinder should be in the OFF
position at this point of the leak test. Once the
soapy solution is applied to the gas connections,
the valve of the gas cylinder needs to be turned to
the ON position.
• Soap bubbles will begin to form in the soapy solu-
tion if a leak is present.
• In case of a leak, turn off the gas supply. Tighten
any leaking fittings, then turn the gas supply on
and recheck.
Leak Test Point


