11
EN
Inserting Batteries (not included)
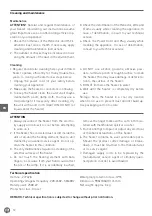
• Insert 2 AAA/ Alkaline type batteries into your re-
mote control.
1. Flip the backside of your remote control and pull
out battery cover. Insert the batteries in accord-
ance with the instructions and polarity the bat-
teries.
2. Change the batteries in the same way depicted
above.
NOTICE:
1. Replace the old batteries with the same type
batteries. Otherwise, your heater may not func-
tion well.
2. Pull out the batteries in case of long terms of
disuse to prevent leakage which may impair your
remote control.
3. Do not allow water or liquid to get into the re-
mote control.
CAUTION
When the appliance is not operated for a long pe-
riod of time, cleaning or maintenance is conduct-
ed or when the location of the heater is changed,
the heater should be turned to OFF and unplugged
from the electrical connection.
Periodic inspection and removal of dirt and con-
taminants will ensure that equipment can be op-
erated safely.
Troubleshooting
If the appliance does not function properly, please check the below table for the solution. If you are still unable
to solve the problem, please contact the supplier/service provider.
1. Check if the power cord is plugged into an elec-
trical outlet, if not, plug in.
2. Check if electricity to the main fuse is working
3. Error code shows on display
Problem
Possible cause
Solution
E1 Error on display
Control unit overheat.
Cooling down the heater after 1
hours and restart heater.
L1,2,3,4 shows in display, but no heat
Bulb is damaged.
Arrange for replacement bulb with
local Dealer.
In case of any doubt, always contact your supplier!
Summary of Contents for BOLA 272428
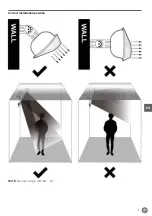
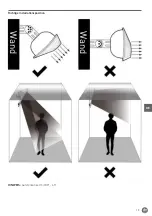
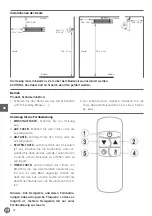
Page 7: ...7 EN Correct installation position NOTE Mounted angle with 30 45...
Page 19: ...19 DE Richtige Installationsposition Wand Wand HINWEIS Aufstellwinkel mit 30 45...
Page 30: ...30 NL Correcte installatiepositie Muur Muur OPMERKING Gemonteerde hoek met 30 45...
Page 52: ...52 FR Position d installation correcte Mur Mur NOTE Angle de montage avec 30 45...
Page 63: ...63 IT Posizione di installazione corretta Parete Parete NOTA Angolo di montaggio 30 45...
Page 74: ...74 RO Pozi ia corect de instalare Perete Perete NOT Instalare n unghi de 30 45...
Page 81: ...81 RU Hendi...
Page 82: ...82 RU 3 0 9...
Page 83: ...83 RU 200 C 10...
Page 84: ...84 RU I HENDI BOLA...
Page 85: ...85 RU 19 7 2 4 1 2 3 2 4 4 2 4 5 0 5 6 1 7 1 8 90 45 9 10 11 12 13 0 5 14 15 16 17 18 19...
Page 86: ...86 RU 30 45...
Page 87: ...87 RU 3 0 9...
Page 88: ...88 RU 1 2 3 4 1 4 2 M6 60 4 3 6 2 4 6 1 2 5 M6 12 2...
Page 90: ...90 RU 2 1 2 1 2 3 1 2 3 1 1 L1 2 3 4...
Page 91: ...91 RU 1 1 2 3 4 1 2 3 4 5 6 1 2 3 4 5 6 7...
Page 92: ...92 RU 272428 220 240 50 60 2500 I IP55 900x100x 174 3...
Page 93: ...93 GR Hendi...
Page 94: ...94 GR 3 0 9 m...
Page 95: ...95 GR 200 C 10...
Page 97: ...97 GR 30 45...
Page 98: ...98 GR 3 0 9...
Page 99: ...99 GR 1 2 3 4 1 L 4 2 M 6 mm 60 mm 4 3 M 6 mm 2 4 6mm 1 mm 2 5 M 6 mm 12 mm 2...
Page 100: ...100 GR 0 5 0 5 0 5 0 5 2 4 2 4 90 45 2 4 m 1 2 L1 L2 L3 L4 1 2 3 4 L1 L4 2 3 5 0 24 0H 2 3...
Page 101: ...101 GR 2 AAA 1 2 1 2 3 1 2 3 E1 1 L1 2 3 4...


