5
• When the automatic “Vacuum&seal” function is in operation, this button stops the motor
pump and immediately starts to seal the bag so that less vacuum pressure inside the bag can
be controlled by the operator to avoid crushing for delicate items.
• Please let the machine cool down with 15 seconds after finished one sealing cycle.
7.
Pulse vacuum:
Press this button, and the device starts vacuuming; release this button will stop
operation. This process can be repeated. Then press “manual seal” when meet desired pres-
sure, turn to seal. Different pressure according to different type of foods can be chosen.
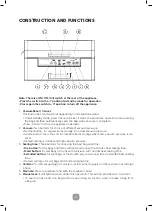
8.
Progress LED indicators:
Indicators progress of all working process.
There are 6 grid of indicators.
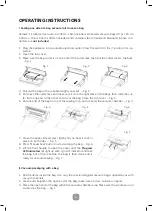
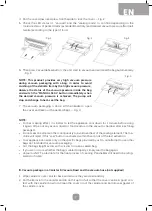
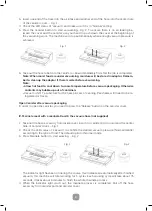
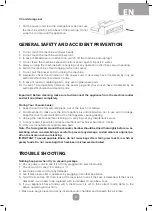
•
Operation under progress:
light up gradually & repeatedly.
•
Operation finished:
1 grid of indicator light up.
9.
Sealing mode indicators:
indicate the sealing mode that chosen & the process of the sealing
process.
10.
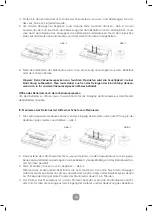
Hose port:
To insert the hose for canister and wine stopper before “marinates” or “canister”
operations.
11.
Front handle:
Press down to lock the cover. And lift to open the cover.
12.
Air intake:
Air intake connects with vacuum chamber and pump. Do not cover this air intake
when placing bag for Vacuum&Seal operations.
13.
Vacuum chamber:
Position the open end of the bag inside the chamber, draws air out of bag
and catches any liquid overflow from the bag.
14.
Sealing strip:
Place the bag to be sealed over this strip, clean and dry or replace it when dis-
torted or broken.
15.
Lower gasket:
Keep air away by forming vacuum chamber with upper gasket in the vacuum
chamber. Clean and dry or replace it when it is distorted or broken.
16.
Sealing element:
Teflon-coated heating element which is hot and seals the bag.
Never
touch
this part as it is very hot even after use.
17.
Upper gasket:
Keep air away by forming vacuum chamber with lower gasket. Clean and dry or
replace it when distorted or broken.
18.
Bag Cutter:
Press and slide in one direction or another to cut bags to a desired size.
19.
Cutter rack:
Support the cutter to slide along.
EN


