Component Replacement
50
17730-241
AR2
™
40K • 46K
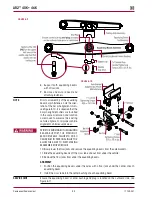
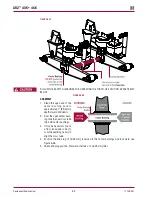
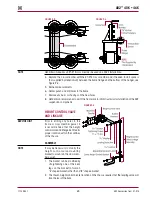
FIguRE 8‑18
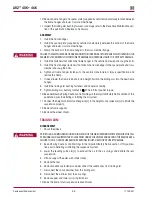
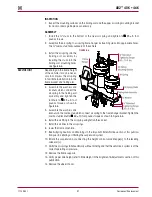
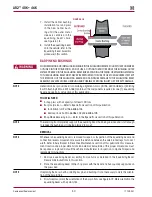
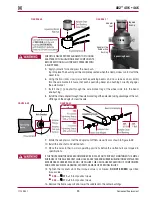
7 . Install the center bushing
installation tool and press
in the new center bush-
ing until the outer metal
sleeve is centered in the
equalizing beam’s bore,
see Figure 8-18 .
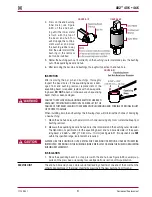
8 . Install the equalizing beam
onto the vehicle, refer to the
Equalizing Beam Assembly
procedure in this section .
BAR pIN ENd BuSHINgS
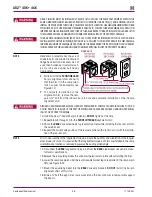
WHEN REMOVING AND INSTALLING BUSHINGS IN THE EQUALIZING BEAMS, FOLLOW THE PROCEDURES
OUTLINED IN THIS PUBLICATION . DO NOT USE A CUTTING TORCH TO REMOVE THE BUSHING OUTER
METALS PRESSED IN THE EQUALIZING BEAM BORES . WELDING, TORCHING OR ATTACHING MATERIAL
TO THE EQUALIZING BEAM MUST NEVER BE PERFORMED . THE USE OF HEAT CAN ADVERSELY AFFECT
THE STRENGTH OF THE EQUALIZING BEAMS AND CAN CAUSE DAMAGE TO THE EQUALIZING BEAM
ASSEMBLY, ADVERSE VEHICLE HANDLING AND POSSIBLE PERSONAL INjURY OR PROPERTY DAMAGE .
NOTE
Hendrickson bar pin service kits containing alignment shims, (Kit No . 34013-088L) or (Rotating
Bar Pin Bushing Kit No . 34013-188) contain all the components required for one (1) equalizing
beam end, see Parts List section of this publication .
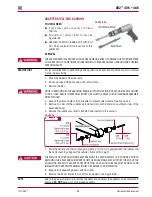
YOu wILL NEEd
■
A shop press with a capacity of at least 100 tons
■
Bar pin style tool — Refer to Special Tools section of this publication
■
Installation tool Part No . 66086-103
■
Removal tools Part No . 66086-104 and 66086-105
■
Shop Made Receiving tool — Refer to the Special Tools section of this publication
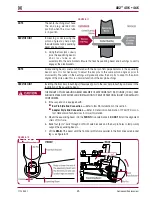
NOTE
The receiving tool completely supports the equalizing beam hub being serviced and is tall enough
to receive the bushing as it is being pressed in or out .
REMOVAL
NOTE
Whenever an equalizing beam is removed for repair, or inspection of the equalizing beam end
connection reveals movement, measure the distance between the axle bracket legs for correct
width . Refer to Axle Bracket in Preventive Maintenance section of this publication for measure-
ment location and proper dimensions . An axle bracket outside of the proper dimensions must
be repaired or replaced . Consult the vehicle manufacturer for inspection, component repair and
replacement instructions .
1 . Remove equalizing beam assembly from vehicle as detailed in the Equalizing Beam
Disassembly instructions in this section .
2 . Place the equalizing beam in the shop press with the beam end hub squarely supported on
the press bed .
NOTE
If replacing the bar pin with a rotating bar pin end bushing, it is not necessary to mark the orienta-
tion of the bar pin flats .
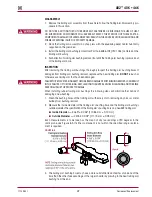
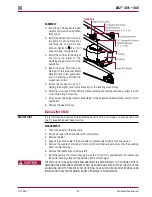
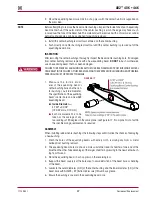
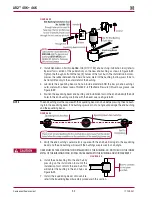
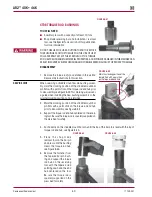
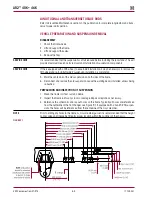
3 . Prior to removal, mark the orientation of the bar pin flats, see Figure 8-19 . Mark orientation the
equalizing beam with a paint stick .

