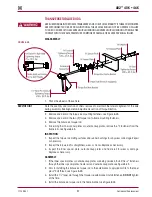
AR2 Conversion from RT•RTE
68
17730-241
AR2
™
40K • 46K
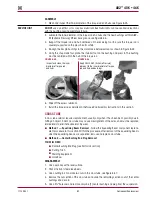
8 . Lower the frame to the correct ride height .
9 . Tighten the 1" fasteners to
470 ± 25 foot pounds torque .
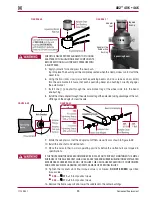
AIR SpRINg INSTALLATION
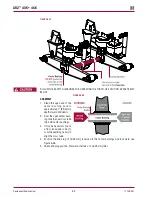
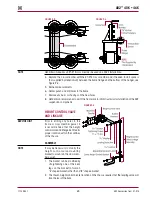
FIguRE 9‑7
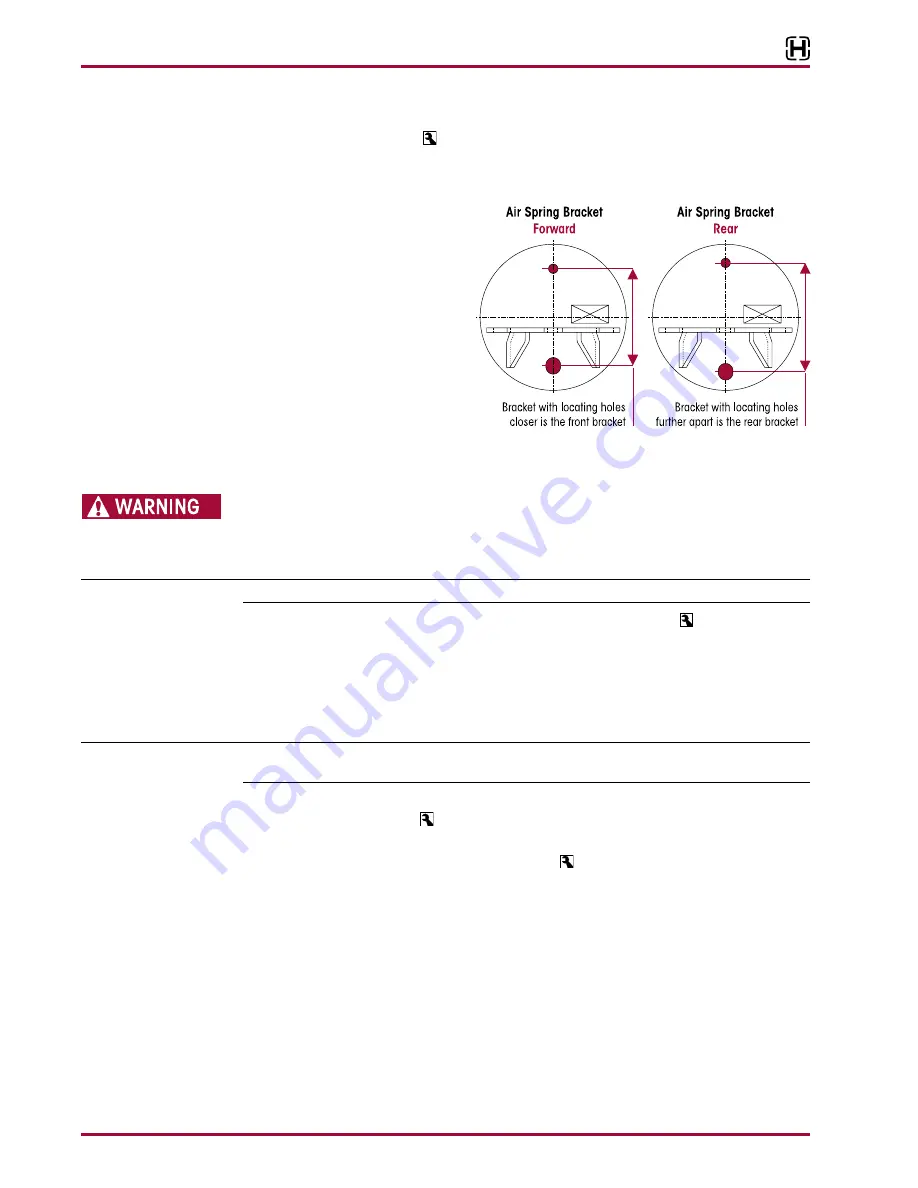
1 . The upper air spring brackets are
NOT
identical . The bracket with the
air spring locating holes closer
together is the front bracket and
should be mounted closest to
the front hanger . The bracket with
the locating holes further apart
is the rear bracket and should be
mounted furthest away from the
front hanger, see Figure 9-7 .
2 . Install the upper air spring brack-
ets against the frame .
3 . Install the mounting fasteners .
4 . Clamp the upper air spring bracket against the frame flange .
FAILURE TO CLAMP THE AIR SPRING BRACKET AGAINST THE UNDERSIDE OF THE FRAME WHILE
TIGHTENING THE AIR SPRING BRACKET CAN RESULT IN COMPONENT DAMAGE AND PERSONAL INjURY
OR PROPERTY DAMAGE .
5 . Tighten all air spring bracket mounting fasteners to the vehicle manufacturer’s specified torque .
NOTE
The air spring combination stud is on the outboard side of the frame rail .
6 . Install the ½" studs in the bottom of the new air springs and tighten to
25 ± 5 foot pounds
torque .
7 . Assemble the air springs to air spring frame hangers by inserting studs into appropriate holes .
The ¾" combo stud faces outboard of the vehicle .
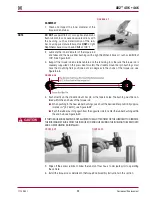
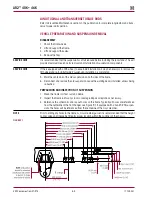
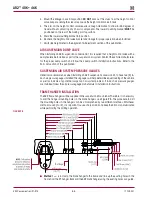
8 . Install the air springs into the trailing arm assembly by inserting the studs into the trailing arm
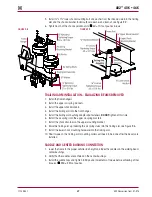
mounting holes, see Figure 9-8 .
SERVICE HINT
Depending on the frame height of the vehicle, it may be necessary to compress the air spring to
facilitate installation into the frame bracket and trailing arm .
9 . Assemble the washers and locknuts which connect the air springs to the trailing arm assembly
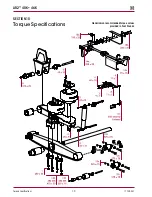
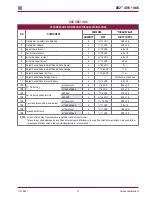
and tighten the locknuts to 25 ± 5 foot pounds torque as shown in Figure 9-8 .
10 . Assemble the washers and locknuts on the combo studs which connect air spring to the air
spring bracket . Tighten the combo stud locknuts to
60 ± 10 foot pounds torque as shown in
Figure 9-8 .
11 . Install the air fittings to the air springs using Teflon thread seal .
12 . Install the air lines to the air springs . Lower the frame, if necessary, to connect the air springs
and the shock absorbers .
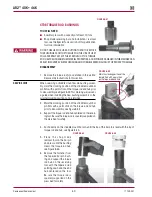
SHOCK ABSORBER INSTALLATION
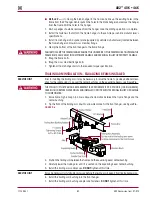
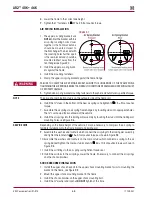
1 . Install the upper shock hex bolt in the upper shock mounting bracket prior to mounting the
bracket to the frame, see Figure 9-9 .
2 . Mount the upper shock mounting bracket to the frame .
3 . Install the shock absorber on the upper shock mounting bolt .
4 . Install the ¾" washer and locknut,
dO NOT
tighten at this time .


