17730-241
35
Component Replacement
AR2
™
40K • 46K
SECTION 8
Component Replacement
FASTENERS
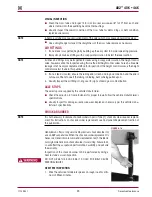
Hendrickson recommends when servicing the vehicle, replace all removed fasteners with new
equivalent fasteners . Maintain correct torque values at all times . Check torque values as specified .
See Hendrickson’s Torque Specifications section of this publication . If non-Hendrickson fasteners
are used, follow torque specifications listed in the vehicle manufacturer’s service manual .
NOTE
Hendrickson recommends the use of Grade 8 bolts and Grade C locknuts . If flange head bolts
and locknuts are not used then hardened structural washers must be used under bolt heads
and locknuts .
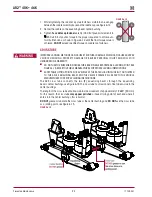
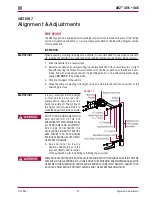
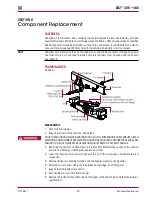
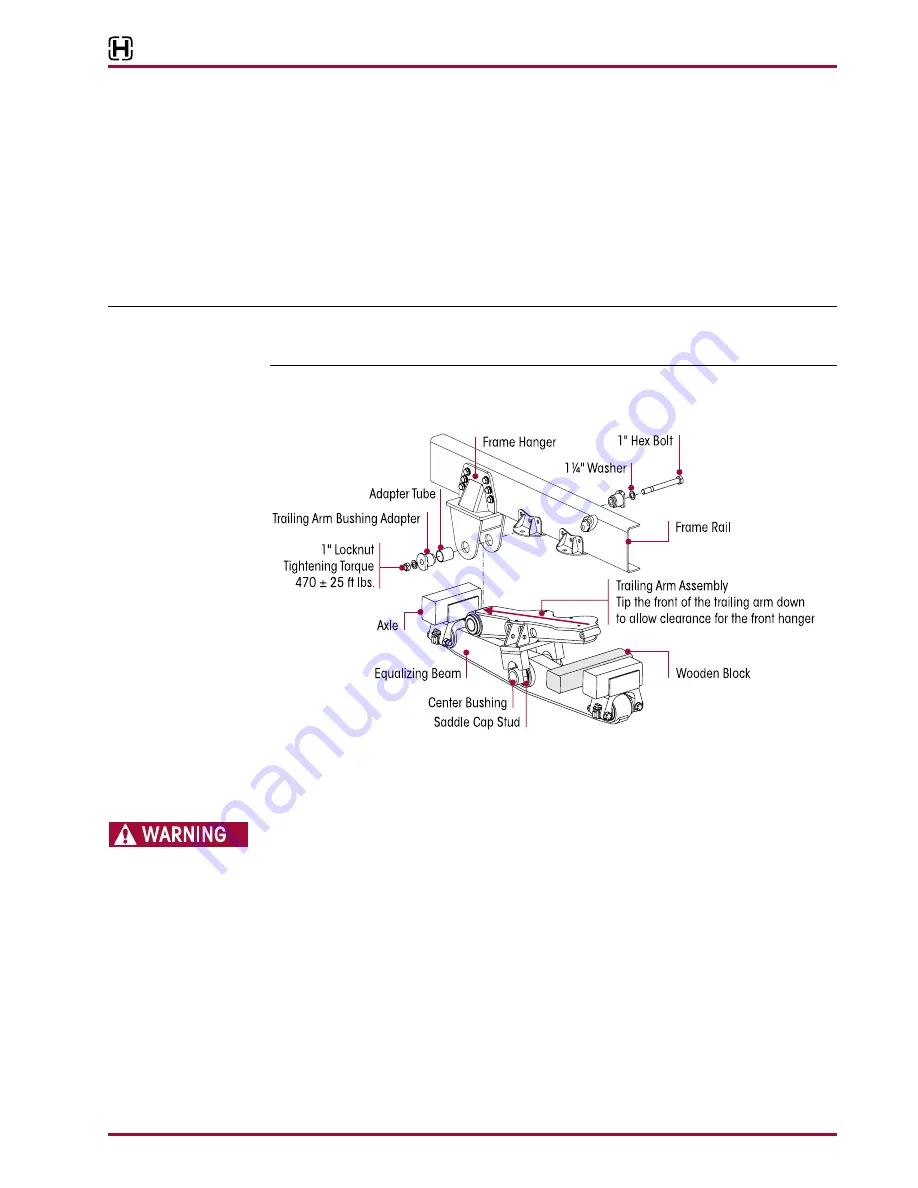
FRAME HANgER
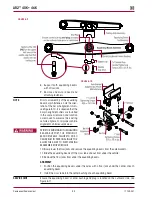
FIguRE 8‑1
dISASSEMBLY
1 . Chock the front wheels .
2 . Support the frame of the vehicle at ride height .
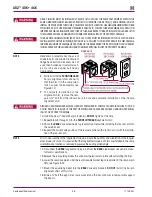
PRIOR TO AND DURING DEFLATION AND INFLATION OF THE AIR SUSPENSION SYSTEM, ENSURE THAT ALL
PERSONNEL AND EQUIPMENT ARE CLEAR FROM UNDER THE VEHICLE AND AROUND THE SERVICE AREA,
FAILURE TO DO SO CAN CAUSE SERIOUS PERSONAL INjURY, DEATH, OR PROPERTY DAMAGE .
3 . See Air Spring Cautions and Warnings in the Important Safety Notice section of this publica-
tion prior to deflating or inflating the suspension system .
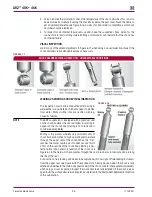
4 . Lower the leveling valve arm(s) to exhaust the air in the air springs and deflate the rear
suspension .
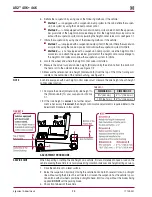
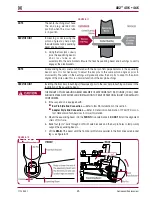
5 . Remove trailing arm bushing fasteners and the adapter assembly, see Figure 8-1 .
6 . Raise the frame to allow clearance in between frame hanger and trailing arm .
7 . Support the frame with frame stands .
8 . Push trailing arm out of the frame hanger .
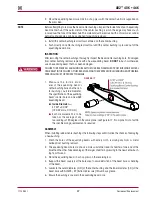
9 . Remove the fasteners that attach the frame hanger to the vehicle per vehicle manufacturer’s
specifications .

