Preventive Maintenance
14
17730-299
ULTIMAAX
®
for Fire and Rescue Vehicles
■
Equalizing beam assembly
— Check the overall condition of the equalizing beam for dents,
dings, or other damage . Check the beam end connections for tearing or extreme bulging .
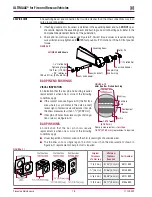
Check for any metal-to-metal contact in the bushed joints . Refer to Equalizing Beam End
Connection Inspection in this section .
■
Fasteners
— Look for any loose, missing or damaged fasteners on the entire suspension .
Ensure all fasteners are tightened to a torque value within the specified torque range . See rec-
ommended torque specifications for Hendrickson supplied fasteners in Torque Specification
Section of this publication . For fasteners not supplied by Hendrickson, see vehicle manufac-
turer . Use a calibrated torque wrench to check torque in the tightening direction . As soon as
the fastener starts to move, record the torque . Correct the torque as necessary .
NOTE
Hendrickson recommends the use of Grade 8 bolts, hardened washers, and Grade C locknuts .
Hardened washers are not necessary when flange head fasteners are used .
NOTE
Torque values shown in this publication apply only if Hendrickson supplied fasteners are used . If
non-Hendrickson fasteners are used, follow the torque specification listed in the vehicle manufac-
turer’s service manual .
■
Saddle cap fasteners —
Inspect the locknuts for proper torque to prevent wear of the beam
center bushing into the saddle . See Torque Specification Section of this publication for recom-
mended torque requirements .
■
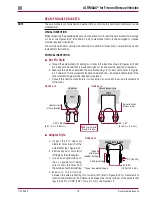
Shock absorbers —
Look for any signs of dents or leakage . Misting is not considered a leak .
See Shock Absorber Inspection in this section .
■
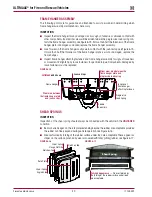
Transverse torque rods / Longitudinal torque rods
— The torque rods must be connected
and in good working condition when operating the vehicle .
■
Wear and damage
— Inspect all parts of the suspension for wear and damage . Look for bent
or cracked parts .
See vehicle manufacturer’s applicable publications for other preventive maintenance
requirements .
CENTER BUSHINGS
VISUAL INSPECTION
An inspection of the center bushing is necessary
when a vehicle is in the shop for major repair
work
and at regular preventive maintenance intervals .
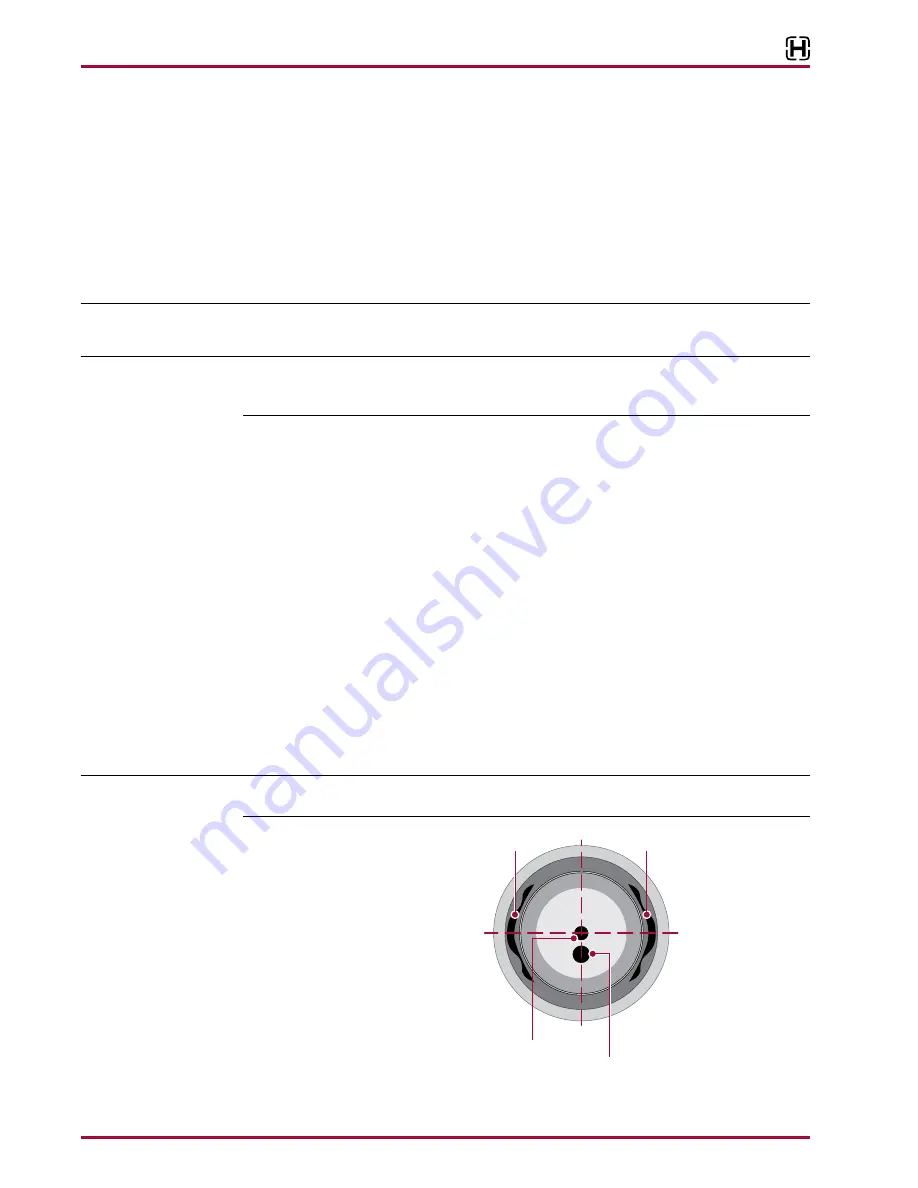
NOTE
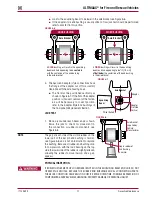
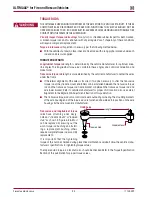
ULTIMAAX center bushing is designed with voids at front and rear, see Figure 6-1 . These voids are
not an indication of wear .
FIGURE 6-1
1 . Visually inspect the center bush-
ing for signs of movement or
excessive wear such as frayed,
bulging or distorted rubber in the
center bushing .
2 . Replacement is necessary if:
■
Any metal to metal contact is
visible .
■
Any signs that the bushing
inner metal is not centered in
the bushing .
■
Any equalizing beam to sad-
dle contact .
CL
Void
Void
Center
Hole
Verify the voids are
perpendicular to the
horizontal centerline
and the second locating
hole is on the bottom
Horizontal Centerline
Second Locating
Bottom Hole


