


Component Replacement
34
17730-299
ULTIMAAX
®
for Fire and Rescue Vehicles
SERVICE HINT
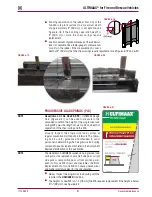
Use a rachet strap attached to each saddle half and the frame or vehicle body to secure the
saddle halves during removal .
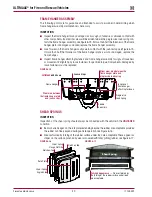
10 . Snug the saddle disassembly tool .
NOTE
The shear springs are in each frame hanger are compressed when installed .
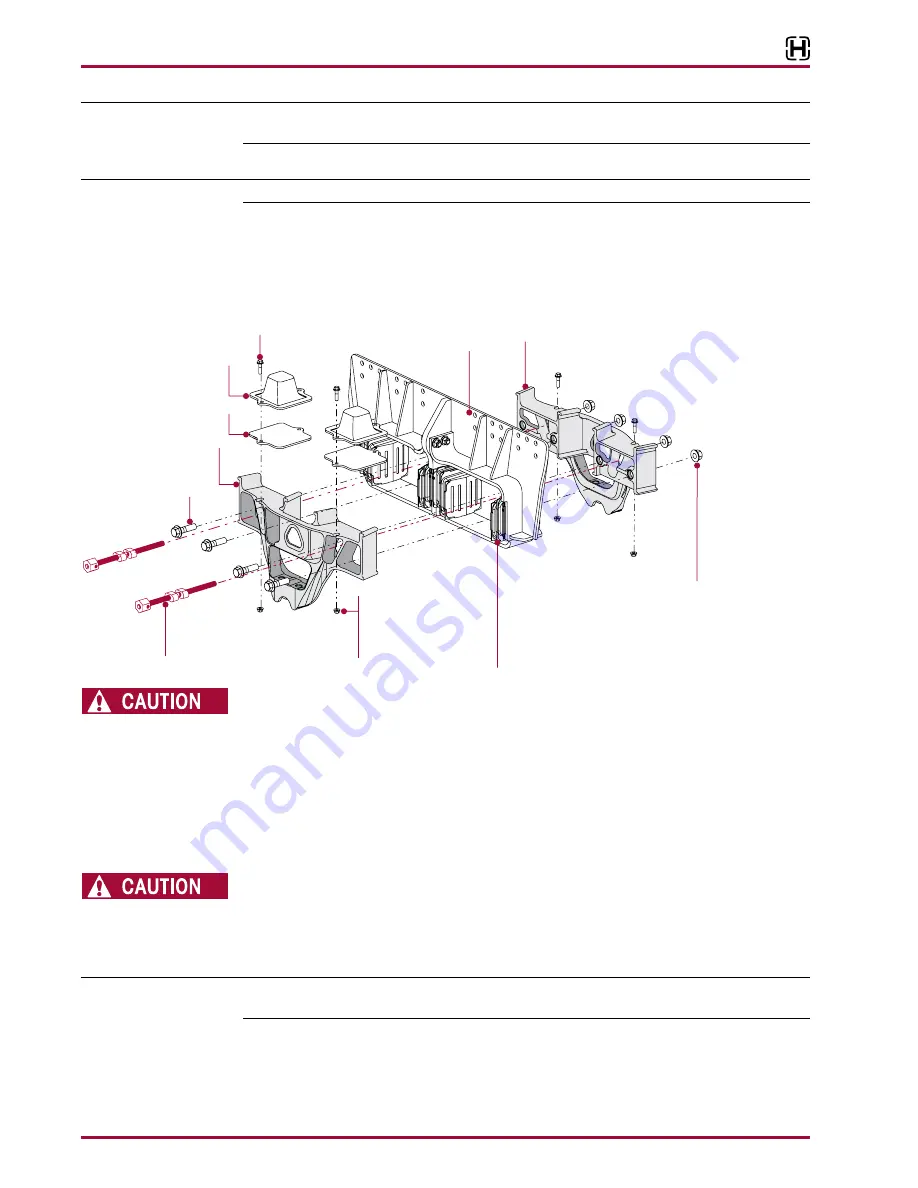
11 . Remove and discard the M20 saddle fasteners, see Figure 8-6 .
12 . To separate the two saddle halves, evenly rotate the threaded rod nut to tighten the saddle
disassembly tool, see Figure 8-6 .
13 . Remove the saddle halves and / or shear springs for replacement .
FIGURE 8-6
EACH FRAME HANGER ASSEMBLY WEIGHS APPROXIMATELY 104 TO 140 POUNDS (47 TO 63
KILOGRAMS), USE APPROPRIATE LIFTING DEVICES TO REMOVE OR INSTALL THE FRAME HANGER
ASSEMBLY . FAILURE TO DO SO CAN RESULT IN DAMAGE TO THE VEHICLE OR PERSONAL INJURY .
14 . If replacing the frame hanger, remove the frame fasteners per the vehicle manufacturer’s
instructions . Remove frame hanger .
ASSEMBLY
1 . If installing a new frame hanger continue to Step 2 . If installing or servicing shear springs or
saddle assembly , proceed to Step 3 .
EACH FRAME HANGER ASSEMBLY WEIGHS APPROXIMATELY 104 TO 140 POUNDS (47 TO 63
KILOGRAMS), USE APPROPRIATE LIFTING DEVICES TO REMOVE OR INSTALL THE FRAME HANGER
ASSEMBLY . FAILURE TO DO SO CAN RESULT IN DAMAGE TO THE VEHICLE OR PERSONAL INJURY .
2 . Position the frame hanger assembly against the frame rail . Install fasteners per the vehicle
manufacturer’s instructions .
SERVICE HINT
During assembly, it may be necessary to use tape to hold the shear springs in position . After instal-
lation is complete remove tape .
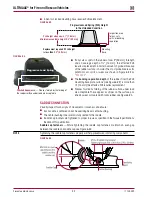
3 . Position the shear springs with the flanged flat side against the frame hanger with the shear
spring angled downward, see Figure 8-7 .
Frame Hanger
Progressive Rate
Spring
Saddle Assembly Half
(Outboard)
M20 Flange Bolt
M10 Flange Bolt
M20 Flange Locknut
Tightening Torque
325 ft. lbs (440 Nm)
a 90° rotation,
560 ± 30 ft. lbs
(760± 40 Nm)
PLUS
OR
M10 Flange Locknut
Tightening Torque
30 ± 2 ft. lbs
(41 ± 3 Nm)
Shear Spring
During assembly, it
may be necessary to use tape
to hold the shear spring in
position. After installation is
complete remove tape.
NOTE:
Saddle Disassembly Tool
Part Number 66086-113L
Spacer (if equipped)
Saddle Assembly Half
(Inboard)
63K Shown
ULTIMAAX


