


17730-299
35
Component Replacement
ULTIMAAX
®
for Fire and Rescue Vehicles
FIGURE 8-7
FIGURE 8-8
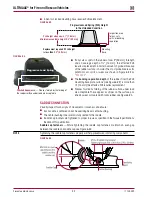
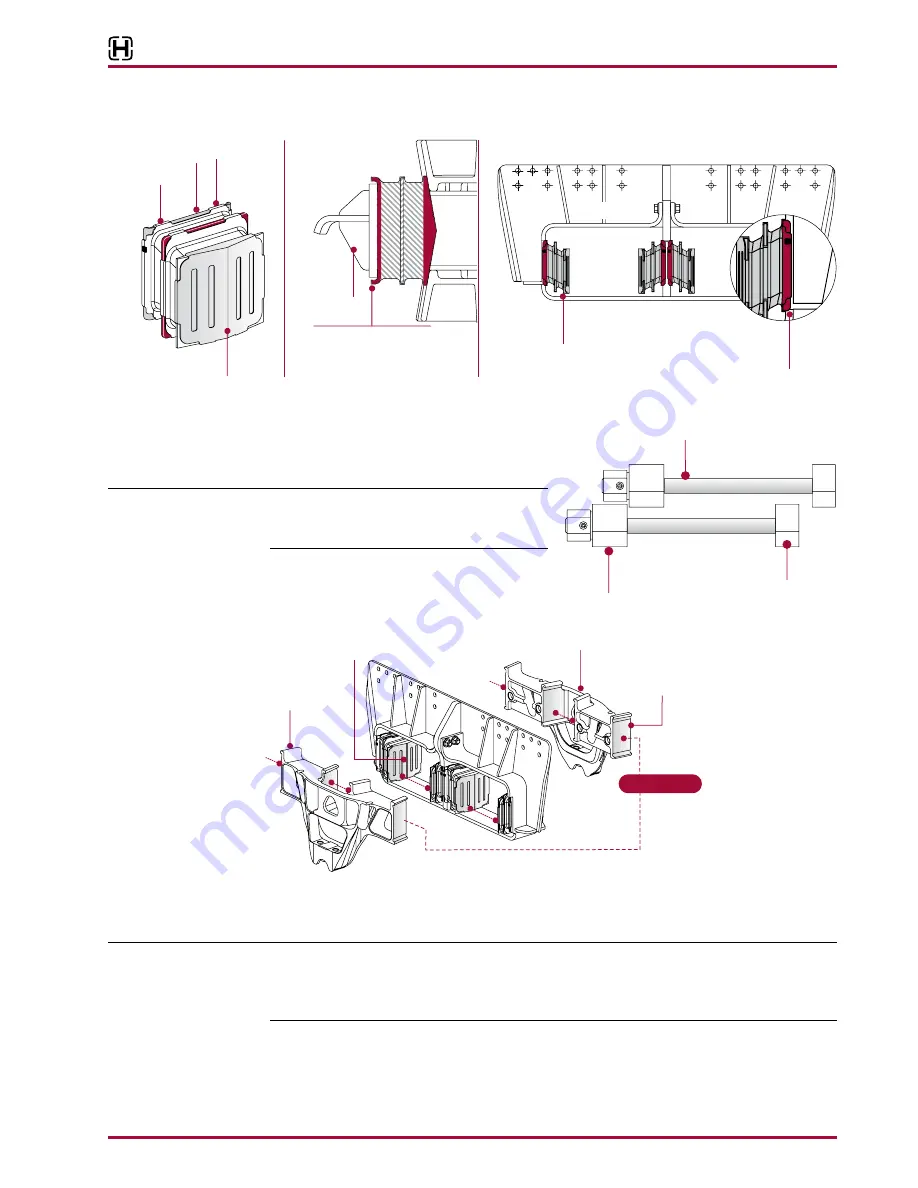
4 . Apply NLGI #2–EP (Extreme Pressure) chas-
sis lubricant to the threaded rod of the
Saddle Assembly Tool No . 66086-108L, see
Figure 8-8 .
NOTE
The threaded rod spacer and spacer nut are
designed and orientated to fit into the saddle
assembly openings, see Figure 8-10 .
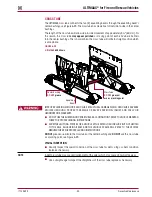
5 . Apply P-80 lubricant to the shear spring’s
angled face and to the mating face of the
saddle halves, see Figure 8-9 .
FIGURE 8-9
6 . On each side of one saddle assembly, rotate the threaded rod spacers and spacer nuts of the
saddle assembly tool until each are oriented properly into the saddle assembly openings, see
Figure 8-10 .
SERVICE HINT
Use a mechanism to attach to the frame to aid in holding the saddle up while performing pro-
cedure (such as a strap or rope) attached to each saddle half and the frame or the vehicle body
to secure the saddle halves during installation or have an additional person assist to align the
saddle halves properly .
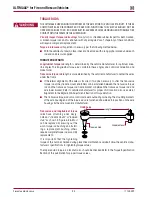
7 . Position the inner saddle half into the frame hanger along with the shear springs, outer saddle
half and the saddle assembly tool, see Figure 8-11 .
8 . Bring both saddle halves together with the
saddle assembly tool
. Evenly tightening the saddle
assembly tool until both saddle halves are seated against each other .
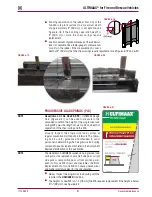
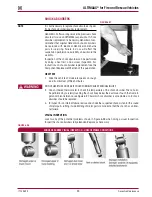
Shear Springs
Angled downward
TOP VIEW
SIDE VIEW
Shear Springs
Flanged Flat Side
Position shear springs
anged at side against
the frame hanger
Frame
Hanger
Frame Hanger
Angled
Side
Flange Flat Side
Notch
on Top
Notch
on Top
SHEAR SPRING
63K Shown
ULTIMAAX
Apply
#2–
NLGI
EP
Chassis Lubricant
Threaded Rod
Spacer
Threaded Rod
Spacer Nut
Saddle Assembly Tool
Hendrickson Part No. 66086-108L
Threaded Rod
Threaded Rod
Apply P-80 lubricant to the angled
face area of the Shear Springs and
mating faces of the Saddle Assembly
Mating faces of
Saddle Assembly
Shear Spring
Angled Face Area
Saddle Assembly Half
(Outboard)
Saddle Assembly Half
(Inboard)
63K Shown
ULTIMAAX
Lubrication


