


17730-299
49
Component Replacement
ULTIMAAX
®
for Fire and Rescue Vehicles
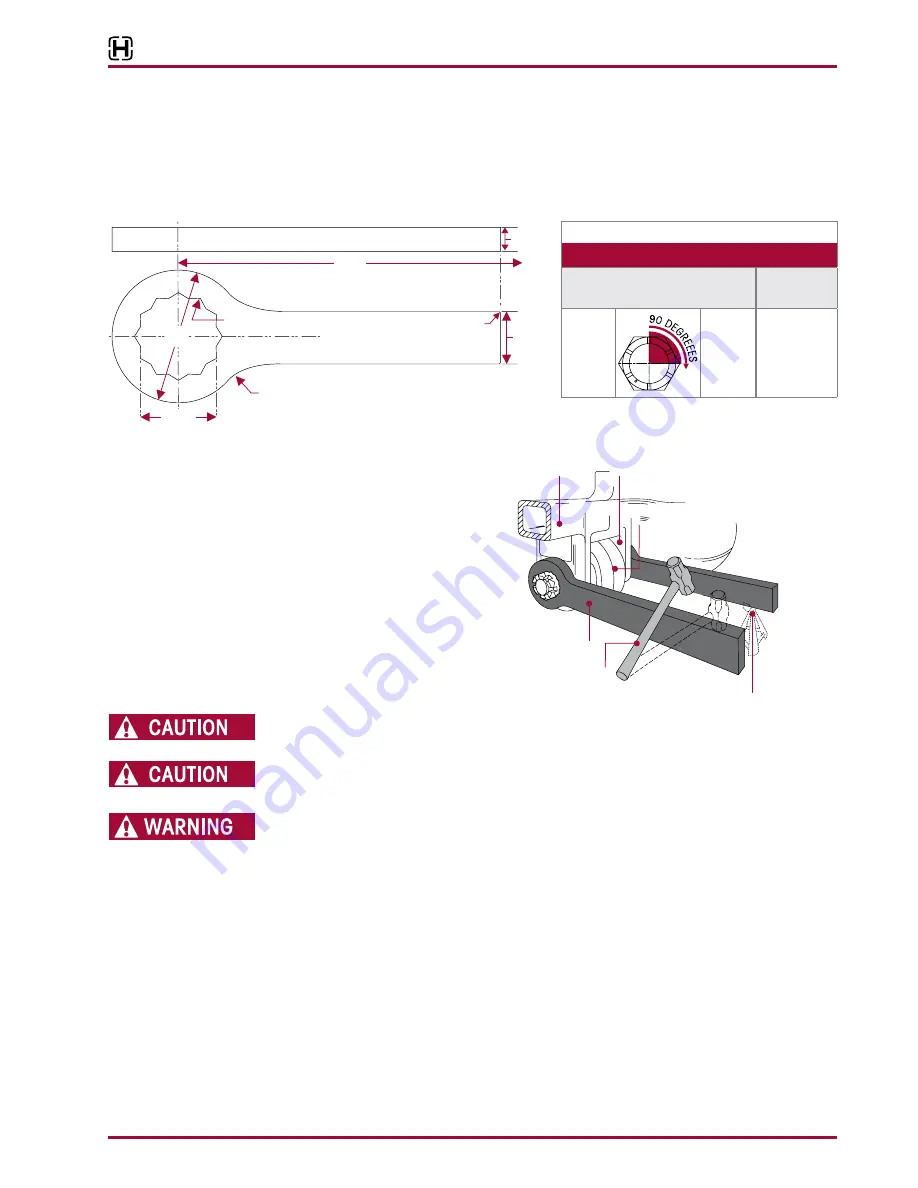
METHOD B:
SLUG WRENCH
You will need:
■
Two slug wrenches (see Figure 8-42)
■
4 pound hammer
FIGURE 8-42
FIGURE 8-43
a . Assemble the opposite nut and
using a torque wrench, tighten
the nut to the initial torque
value shown in Table 1 .
b . Remove torque wrench and
replace with the Slug Wrench .
Using a four pound hammer,
tighten the assembly by hit-
ting the slug wrench near the
handle as shown in Figure 8-43
until the nut has been turned to
the degrees specified in Table 1 .
DO NOT BACK OFF NUT TO INSTALL COTTER PIN, DOING SO MAY REDUCE THE TIGHTENING TORQUE
BELOW THE REQUIRED SPECIFICATION .
REPEATED HAMMERING BEYOND THE DEGREE SPECIFIED CAN CAUSE COMPONENT DAMAGE .
c . Install cotter pin . The nut may be advanced to the next nut slot,
DO NOT
back off nut .
INSUFFICIENT TIGHTENING TORQUES CAN CAUSE PREMATURE WEAR AND DAMAGE TO THE AXLE
BRACKET LEGS, HOLES AND/OR BEAM END CONNECTION COMPONENTS, THIS CAN FURTHER CAUSE
FAILURE AND SEPARATION OF COMPONENTS, AND RESULT IN ADVERSE VEHICLE HANDLING, SEVERE
PERSONAL INJURY OR DEATH . MAINTAIN PROPER TIGHTENING TORQUES AT ALL TIMES .
TABLE 1
TORQUE SPECIFICATIONS
SLUG WRENCH METHOD
TORQUE
MULTIPLIER
125 Foot
Pounds
1
⁄
4
or
90º turn
on castle
nut
700 ± 50 Foot
Pounds
Min. Hex 12 Point
¾"
2"
2 / "
13
16
2½"
1
16
/ " R
5"
14¾"
1
8
/ " R
Axle Bracket Legs
Slug Wrench
Locked in Place
(Braced)
Axle
Equalizing Beam
End Hub
4 lb. Hammer


