17730-299
53
Component Replacement
ULTIMAAX
®
for Fire and Rescue Vehicles
DISASSEMBLY
1 . Remove torque rods as detailed in Torque Rod Disassembly instructions in this section .
DO NOT USE HEAT OR USE A CUTTING TORCH TO REMOVE THE BUSHINGS FROM THE TORQUE ROD . THE
USE OF HEAT WILL ADVERSELY AFFECT THE STRENGTH OF THE TORQUE ROD, HEAT CAN CHANGE THE
MATERIAL PROPERTIES . A COMPONENT DAMAGED IN THIS MANNER CAN RESULT IN ADVERSE VEHICLE
HANDLING AND POSSIBLE PERSONAL INJURY OR PROPERTY DAMAGE .
2 . Support the torque rod end tube centered on the receiving tool . Be sure the torque rod is
squarely supported on the press bed for safe ty .
3 . Push directly on the straddle mount bar pin, until the top of the pin is level with the top of
torque rod end tube . Place the push out tool directly on top of the bar pin and press until the
bushing clears the torque rod end tube .
4 . Remove the fasteners from the tapered bar pin bushing, and support the torque rod end on
the receiving tool with the tapered stud pointing up and the end tube centered on the tool . Be
sure the torque rod is squarely supported on the press bed for safety .
5 . Push directly on the tapered stud until the bushing clears the torque rod end tube .
ASSEMBLY
1 . Clean and inspect the inner diameter of the torque rod end tubes .
NOTE
DO NOT
use paraffinic oil, or soap base lubricant . Such lubricants can cause adverse reactions
with the bushing, such as deterioration of the rubber, causing premature failure . Use
ONLY
a light
Naphthenic base oil, such as 60 SUS at 100°F .
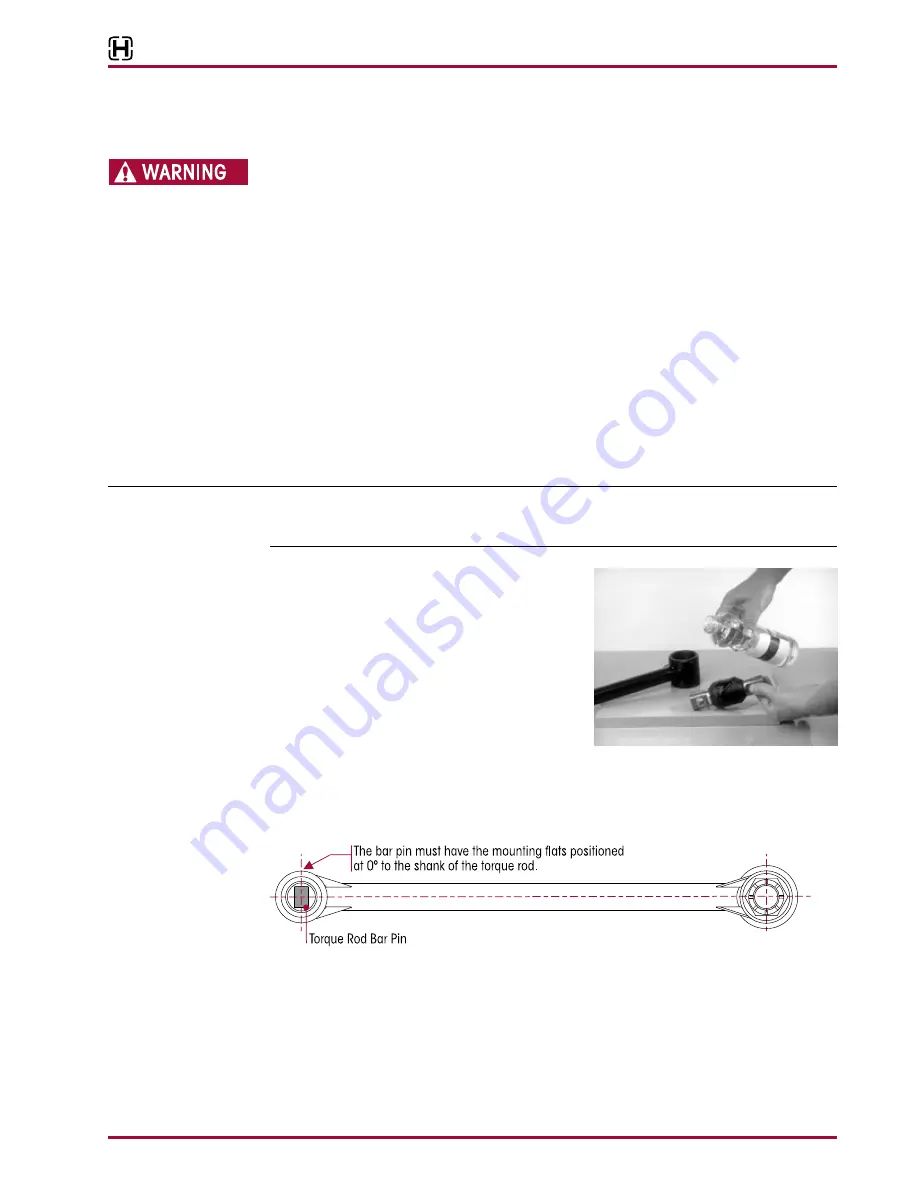
FIGURE 8-48
2 . Lubricate the inner diameter of the torque rod
end tubes and the new rubber bushings with
a light Naphthenic base oil, such as 60 SUS at
100°F, see Figure 8-48 .
3 . Support the torque rod end tube centered on the
receiving tool . Ensure the torque rod is squarely
supported on the press bed for safety .
4 . Place the assembly funnel tool centered on the
torque rod end hub, see Figure 8-50 .
5 . Place the torque rod bushing centered in the assembly funnel .
6 . The straddle mount bar pin bushings must have the mounting flats positioned at zero degrees to
the shank of the torque rod, see Figure 8-49 .
FIGURE 8-49
7 . Press the bar pin through the assembly funnel into torque rod end hub until the rubber clears
the assembly funnel, see Figure 8-51 .
8 . Push directly on the straddle mount bar pin, or the tapered stud . The bushing must be cen-
tered within the end hubs of the torque rod .
■
When pushing in the new rubber bushings, overshoot the desired final position by approx-
imately
3
/
16
" (4 .76 mm), see Figure 8-52 .


