


Component Replacement
44
17730-299
ULTIMAAX
®
for Fire and Rescue Vehicles
BAR PIN STYLE END BUSHINGS
You will need:
■
A shop press with a capacity of at least 100 tons
■
End bushing service kit, refer to the Parts List Section of this publication .
■
End bushing tools – Receiving Tool No . 66086-111, Installation Tool No . 66086-106 and
Removal Tool No . 66086-109, see Special Tools Section of this publication .
DISASSEMBLY
WHEN REMOVING AND INSTALLING BUSHINGS IN THE EQUALIZING BEAMS, FOLLOW THE PROCEDURES
OUTLINED IN THIS PUBLICATION . DO NOT USE A CUTTING TORCH TO REMOVE THE BUSHING OUTER
METALS PRESSED IN THE BEAM BORES OR FASTENERS . WELDING, TORCHING OR ATTACHING MATERIAL
TO THE EQUALIZING BEAM MUST NEVER BE PERFORMED . THE USE OF HEAT CAN ADVERSELY AFFECT
THE STRENGTH OF THE EQUALIZING BEAMS AND CAN CAUSE DAMAGE TO THE EQUALIZING BEAM
ASSEMBLY, ADVERSE VEHICLE HANDLING AND POSSIBLE PERSONAL INJURY OR PROPERTY DAMAGE .
DISCARD USED FASTENERS . ALWAYS USE NEW FASTENERS TO COMPLETE A REPAIR . FAILURE TO DO SO
COULD RESULT IN FAILURE OF THE PART OR MATING PARTS, ADVERSE VEHICLE HANDLING, PERSONAL
INJURY, OR PROPERTY DAMAGE .
NOTE
Hendrickson recommends the use of Grade 8 bolts, hardened washers, and Class C locknuts .
Hardened washers are not necessary when flange head fasteners are used .
NOTE
Whenever an equalizing beam is removed for repair or inspection of the equalizing beam end
connection reveals movement, measure the distance between the axle bracket legs for correct
width . Refer to Axle Bracket in Preventive Maintenance Section of this publication for measurement
location and dimensions . An axle bracket outside of the measurement range must be repaired or
replaced . Consult the vehicle manufacturer for inspection, component repair and replacement
instructions .
1 . Remove equalizing beam assembly from vehicle as detailed in the equalizing beam disas-
sembly instructions in this section .
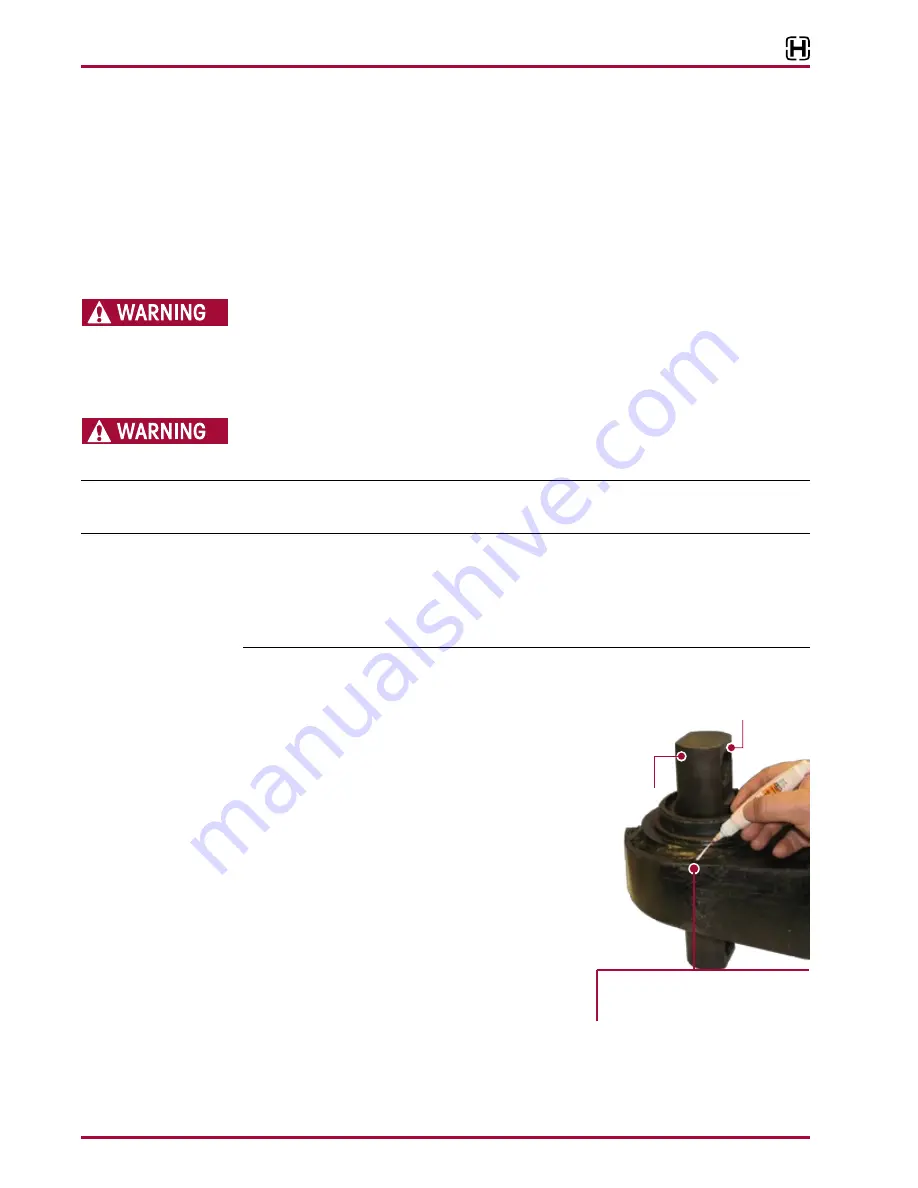
FIGURE 8-29
2 . Place the equalizing beam in the shop press with the
beam end hub squarely supported on the receiving
tool (Part No . 66086-111) or press bed .
3 . Prior to removal, mark the orientation of the bar pin
flats on the equalizing beam with a paint stick, see
Figure 8-29 .
4 . Support the beam end hub with it centered on the
receiving tool . Be sure the equalizing beam is squarely
supported on the press bed for safe ty .
5 . Press on the end bushing inner metal, see Figure 8-29,
of the end bushing until the inner metal is flush with
the top of the equalizing beam end hub . This will move
the bushing rubber away from the outer metal of the
bushing so the removal tool (Part No . 66086-109)
can be installed .
6 . Center the bushing removal tool directly on the bush-
ing’s outer metal and press the bushing out of the equalizing beam end hub .
Mark the location of the bar pin flats
with a paint stick on the equalizing
beam end hub
Bar Pin
Flat
Inner
Metal


