


Figure 8 - Adjust Swing Arm to Position Head Roller
10.
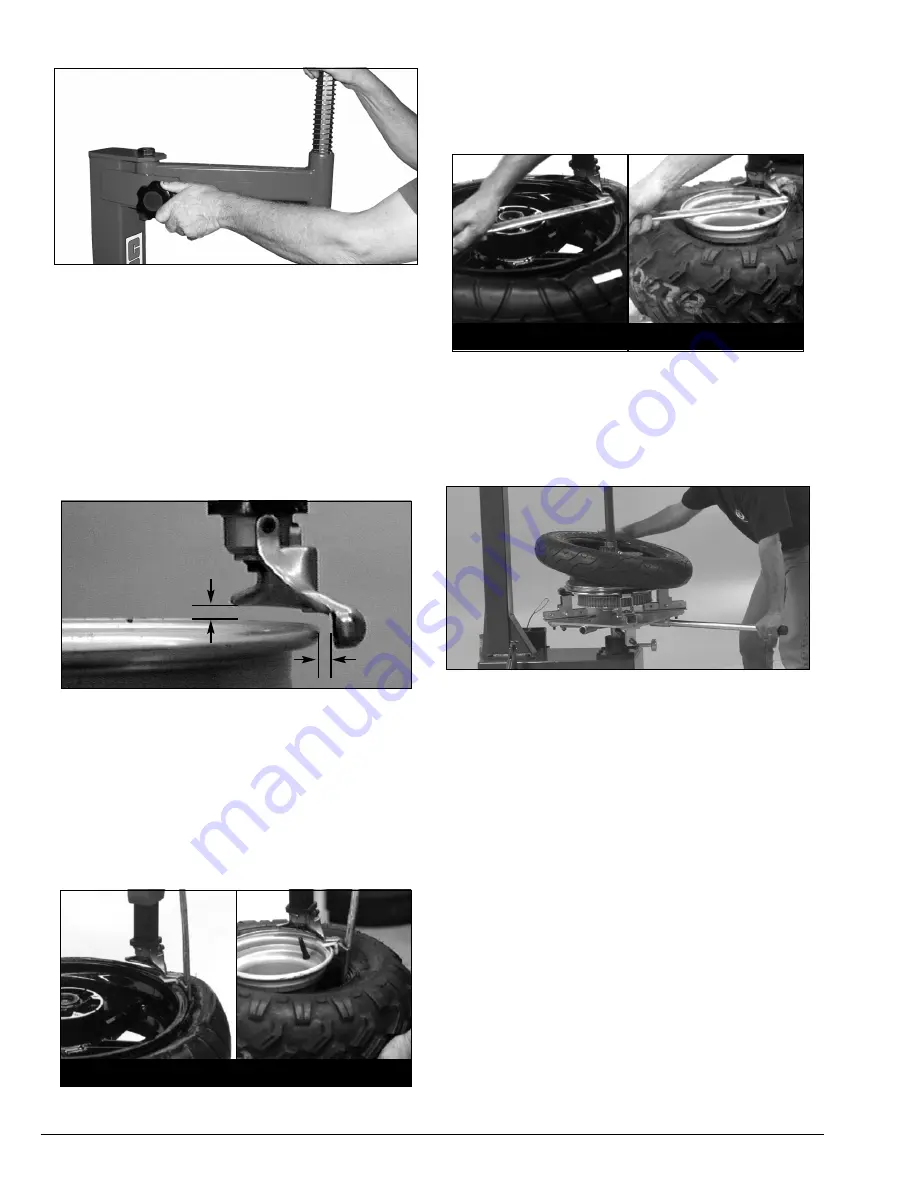
Check duckhead
®
positioning. Mount/demount
head should be positioned with 1/8 to 3/16-inch clear-
ance between the top of the rim edge and the bottom
of the head (with plastic duckhead it is recommended
the vertical clearance be limited to a maximum of 1/16-
inch) and 1/8 to 1/4-inch clearance between rim edge
and the head. This clearance will be maintained as long
as locking handle and adjustment knob are not
changed. The operator may swing the arm out of the
way and back into place again without needing to repo-
sition the head (when clamping a like set of wheels).
Figure 9 - Proper Mount/Demount Head Position
Important:
The vertical tool clearance may change
with machine use and should be inspected often.
Failure to maintain the proper clearance may result in
finish/painted/plated damage to the wheel rim.
11.
Insert the smooth curved end of the bead lifting
tool over the forward end of the demount head and
below the top bead of the tire. Use your free hand to
press down on the tire opposite the head to help with
tool insertion.
Figure 10 - Insert Bead Lifting Tool
12.
Rotate the bead lifting tool down towards the
wheel to lift the tire bead up and over the knob portion
of the demount head. The lift tool may be removed if
desired (figure 11).
Figure 11 - Lift Bead Over Demount Head
13.
Rotate the wheel clockwise. If additional lever-
age is needed, insert the table top rotating handle into
the receiver and use the handle to rotate the table top.
The demount head will guide the upper bead up and
over the edge of the wheel.
Figure 12 - Use Table Top Rotating Handle For Leverage
Note:
Push down on the tire across from the
demount head during table top rotation to utilize the
drop center area of the wheel. This reduces the ten-
sional force on the bead during demount.
14.
Lift and hold the tire at an angle so that the
lower bead is resting in the drop center directly across
from the demount head, and is loose below the
demount head. Insert the smooth curved end of the
bead lifting tool down over the forward end of the
mount/demount tool and below the lower bead. Lift
the bead up and over the knob on the demount head
(figure 13).
4 •
Important: Always read and follow the operating instructions.
1/8" to 1/4"
1/8" to 3/16"
Motorcycle
ATV
Motorcycle
ATV


