background image

3


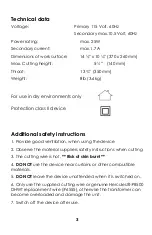
Technical data 

Voltage: 


Primary 115 Volt, 60Hz


Secondary max.10.5 Volt,


60Hz


Power rating:  


max. 25W 

Secondary current:   


max.1.7 A


Dimensions of work surface:     

14 ½”x 10 ¼” (370 x 260 mm)


Max. Cutting height: 


5 ½” 


(140 mm)


Throat: 


13 ¾” (350 mm)


Weight: 


8lb (3.6kg)


For use in dry environments only                                 

Protection class ll device                                              


Additional safety instructions 

1. Provide good ventilation, when using the device


2. Observe the material suppliers safety instructions when cutting 
3. The cutting wire is hot. 

** Risk of skin burn! **


4. 

DO NOT

 use the device near curtains or other combustible 

materials. 
5. 

DO NOT

 leave the device unattended when it is switched on. 

6. Only use the supplied cutting wire or genuine Hercules® #8500 

DHWT replacement wire (

#6555)

, otherwise the transformer can 

become overloaded and damage the unit. 
7. Switch off the device after use. 
 

Summary of Contents for 8500 DHWT

Page 1: ...0 Deluxe Hot Wire Table 8500 DHWT Manual...

Page 2: ...tension rail circle cutting attachment foot pedal switch WARNING Some fumes or gases created by soldering welding or cutting when using these products can contain chemicals known to the State of Calif...

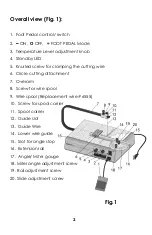
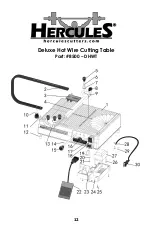
Page 3: ...he cutting wire 6 Circle cutting attachment 7 Overarm 8 Screw for wire spool 9 Wire spool Replacement wire 6555 10 Screw for spool carrier 11 Spool carrier 12 Guide slot 13 Guide Wire 14 Lower wire gu...

Page 4: ...nal safety instructions 1 Provide good ventilation when using the device 2 Observe the material suppliers safety instructions when cutting 3 The cutting wire is hot Risk of skin burn 4 DO NOT use the...

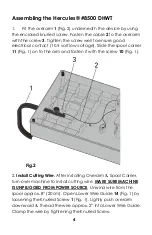
Page 5: ...l carrier 11 Fig 1 on to the arm and fasten it with the screw 10 Fig 1 Fig 2 2 Install Cutting Wire After installing Overarm Spool Carrier turn over machine to install cutting wire MAKE SURE MACHINE I...

Page 6: ...ed shapes will tend to bend the wire Note It is normal that the wire extends somewhat after being heated for the first time Stretch the wire slightly by the first heating and tension it again The wire...

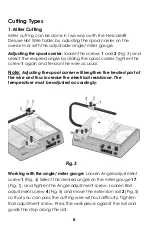
Page 7: ...al Note Adjusting the spool carrier will lengthen the heated part of the wire and thus increase the electrical resistance The temperature must be adjusted accordingly Fig 3 Working with the angle mite...

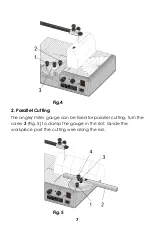
Page 8: ...7 Fig 4 2 Parallel Cutting The angle miter gauge can be fixed for parallel cutting Turn the screw 3 Fig 5 to clamp the gauge in the slot Guide the workpiece past the cutting wire along the rail Fig 5...

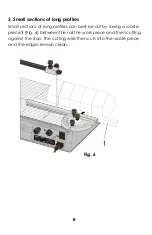
Page 9: ...iles Small sections of long profiles can best be cut by laying a waste piece 1 Fig 6 between the rail the work piece and then cutting against the stop The cutting wire then cuts into the waste piece a...

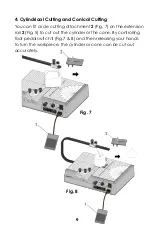
Page 10: ...circle cutting attachment 2 Fig 7 on the extension rail 2 Fig 5 to cut out the cylinder or the cone By controlling foot pedal switch 1 Fig 7 8 and then releasing your hands to turn the workpiece the...

Page 11: ...e cleaning measure or repair Cleaning the Machine Clean the wire and bushing around Lower Wire Guide to prevent unnecessary build up of polystyrene residue Maintenance Check adjust wire tension before...

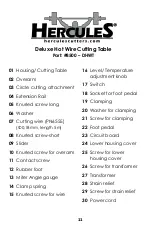
Page 12: ...0 Knurled screw for overarm 11 Contact screw 12 Rubber foot 13 Miter Angle gauge 14 Clamp spring 15 Knurled screw for wire 16 Level Temperature adjustment knob 17 Switch 18 Socket for foot pedal 19 Cl...

Page 13: ...12 Deluxe Hot Wire Cutting Table Part 8500 DHWT...

Reviews: