background image

Hercules Wireless N PCMCIA

        HWNPCM-300

6/79 – User Manual

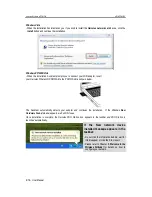
Windows Vista

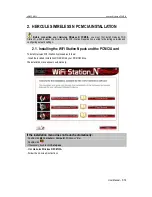
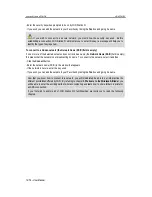
- When the installation Assistant asks you if you wish to install the 

Hercules network card

device, click the 

Install

button and continue the installation.

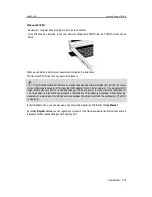
Windows XP/2000/Vista

- When the installation Assistant prompts you to connect your WiFi adapter, insert 
your Hercules Wireless N PCMCIA into the PCMCIA slot as shown below.

The Assistant automatically detects your adapter and continues the installation.  If the Windows 

New 

Hardware Found 

window appears, wait until it closes.

Once installation is complete, the Hercules WiFi Station icon appears in the taskbar and WiFi Station is 
launched automatically.

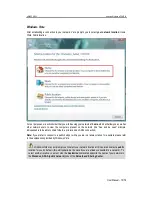
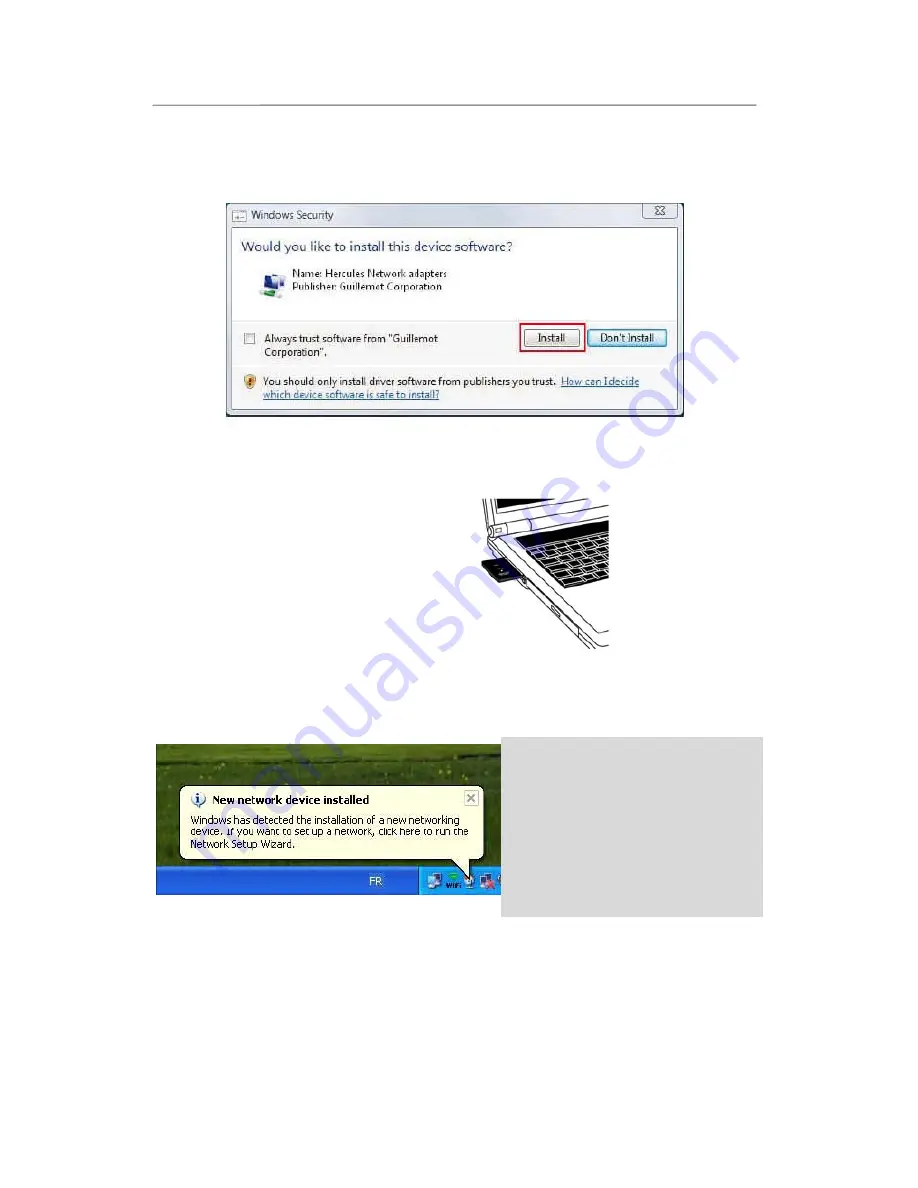
If the New network device 
installed message appears in the 
taskbar:

- Do not click the information bubble: wait for 

it to disappear or click the X to close it.

- Please refer to Chapter 

5. Welcome to the 

Wireless Attitude!

for details on how to 

configure your network.

Summary of Contents for HWNPCM-300

Page 1: ...tupTM 10 4 3 1 Connecting to a network with the WPS button located on the Hercules Wireless N card 10 4 3 2 Connecting to a network with the WPS button in WiFi Station N 11 4 3 3 Connecting to a network with a PIN code 12 4 4 Connecting to a network via the list of networks 13 4 5 Connecting to a network using the Connection Assistant 16 4 6 Adding a network to your Favorites 16 4 7 Scanning for n...

Page 2: ...Manually enabling or disabling your adapter s WiFi connection advanced users 50 5 4 Computers running Windows 2000 Sharing folders a printer or an ADSL connection 50 5 4 1 Creating a workgroup in Windows 2000 50 5 4 2 Windows 2000 Sharing folders 51 5 4 3 Computers running Windows 2000 Accessing shared folders 51 5 4 4 Windows 2000 Sharing a printer 52 5 4 5 Windows 2000 Modifying a workgroup name...

Page 3: ...ng Windows 98 SE Accessing shared folders 66 5 6 4 Windows 98 SE Sharing a printer 66 5 6 5 Windows 98 SE Sharing an ADSL connection in an Infrastructure network 68 5 6 6 Windows 98 SE Sharing an ADSL connection in an Ad hoc network 69 5 6 7 Windows 98 SE Manually enabling or disabling your adapter s WiFi connection advanced users 71 6 GLOSSARY 72 7 TECHNICAL SUPPORT 76 8 WARRANTY 76 9 ENVIRONMENT...

Page 4: ...e 2 4GHz band 802 11g 6 9 12 18 24 36 48 and 54Mbits s data rates in the 2 4GHz band 802 11n draft 1 0 and 2 0 data rates in the 2 4GHz band varying depending on the bandwidth of the channel used 20 or 40MHz Values are classified from MCS0 to MCS15 and vary from 7 2 to 144 44Mbits s for 20MHz and from 15 to 300Mbits s for 4MHz DSSS CCK frequency range and OFDM modulation from 2 412GHz to 2 484GHz ...

Page 5: ...etworks and configuring network settings 2 1 Installing the WiFi Station N pack and the PCMCIA card To install Hercules WiFi Station N proceed as follows Insert the included installation CD ROM into your CD ROM drive The installation menu appears automatically If the installation menu does not launch automatically Double click My Computer or Computer Windows Vista Double click If necessary double ...

Page 6: ...e PCMCIA slot as shown below The Assistant automatically detects your adapter and continues the installation If the Windows New Hardware Found window appears wait until it closes Once installation is complete the Hercules WiFi Station icon appears in the taskbar and WiFi Station is launched automatically If the New network device installed message appears in the taskbar Do not click the informatio...

Page 7: ...an Infrastructure network or from another WiFi adapter for an Ad hoc network The maximum WiFi range indoors may vary from 10 to 30m depending on the router s power the type of antenna directional or not its position in a room and the presence of obstacles such as paper a bookcase metal water an aquarium or a wall made of reinforced concrete between the access point and the antenna e of the WiFi co...

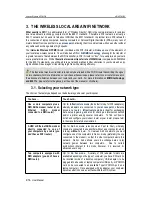
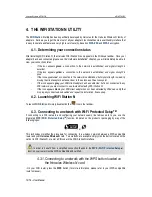
Page 8: ...lossary at the end of the manual or click here 3 1 Selecting your network type The choice of network type depends on the hardware you have at your disposal You have You should One or more computers plus a WiFi ADSL modem router or an Ethernet ADSL modem connected to a WiFi router Opt for Infrastructure mode the default mode for WiFi adapters whereby adapters are connected to your access point othe...

Page 9: ...gy does not simply mean connecting computers to one another without the presence of wires All computers in a wireless network communicate with one another exchange data and share an Internet connection It is therefore imperative that you secure your system in the best way possible Why secure your system Imagine a neighbor who lives in the same building as you and is also equipped with a WiFi netwo...

Page 10: ...apter has been detected but is not connected to any WiFi network you must connect to a network detected by WiFi Station N If the icon appears black your WiFi client adapter has not been detected by Windows verify that it is properly connected and enabled and repeat the installation if necessary 4 2 Launching WiFi Station N To launch WiFi Station N simply double click the icon in the taskbar 4 3 Co...

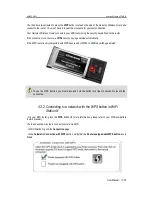
Page 11: ...generated automatically If the WPS router is only compatible with WPA keys and not WPA2 a WPA key will be generated To use the WPS function you must press and hold the button for at least 2 seconds to launch the connection 4 3 2 Connecting to a network with the WPS button in WiFi Station N On your WiFi router press the WPS button for more information please refer to your WPS compatible router s ma...

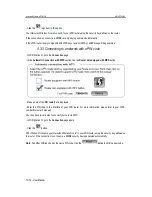
Page 12: ...utomatic Connection with WPS section tick the Router not equipped with WPS button Make a note of the PIN code that is displayed Enter this PIN code in the interface of your WiFi router for more information please refer to your WPS compatible router s manual You then have two minutes to connect your card via WPS In WiFi Station N go to the Connection page again Click the button WiFi Station N conne...

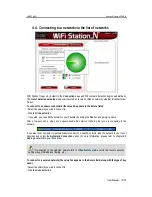
Page 13: ...Favorites by ticking the Yes box and giving it a name After a few seconds a green icon appears beside the network indicating that you are connected to the network If you want your computer to automatically reconnect to a specific network add the network to your list of Favorites and select the Automatic Connection option for more information please refer to chapter 4 6 Adding a network to your Fav...

Page 14: ...e SSID field is empty this means that the network is not broadcasting its name To connect to this network select it and then Click the Connect button Enter the network name SSID in the window that appears If the network is secure enter the key used If you wish you can add the network to your Favorites by ticking the Yes box and giving it a name Now that you know how to connect to a network you wil...

Page 15: ...spensable to be able to share folders a printer and an ADSL connection Note If you prefer to connect to a public hotspot while you are in a railway station for example please refer to the explanations provided by Windows Vista Windows Vista may not prompt you to select your network location at this point and select a public location for you by default this will typically be the case if you are alr...

Page 16: ... automatically filling in certain windows with the settings supplied by WiFi Station N All you have to do then is enter the following information the Favorite s name Step 1 the security key Step 4 if the network is secured and whether or not to automatically connect to the network Step 5 For more information on this Assistant please refer to chapter 4 9 Viewing modifying or adding Favorites Creati...

Page 17: ...you to verify that you are using your own access point Name the Favorite name you have entered if the network has already been saved Security type The WiFi security standard allows you to secure the information exchanged over your network The security types supported by WiFi Station N are WEP WEP Shared WPA PSK TKIP WPA PSK AES and WPA2 TCP IP Details information relating to the TCP IP Internet pr...

Page 18: ...curity types supported by WiFi Station N Type Level of security Key used WEP The lowest level of security in which a single encryption key is used for the data exchanged Each wireless client in the network must use the same key to decode the transmission 64 bit 10 characters or 128 bit 26 characters key in hexadecimal format WEP Shared Level of security based on WEP moreover employing an authentic...

Page 19: ...t key An alphanumeric character corresponds either to a number 0 9 or a letter a z or A Z 4 9 2 View Modify Favorites The View Modify Favorites button displays a window containing Favorites that have already been saved View Modify Favorites window In this window you can Delete a Favorite from the list Modify the basic security or advanced settings for your Favorite Connect to the network correspon...

Page 20: ... clients must be switched on to be able to communicate with one another Preamble Ad hoc mode only a signal allowing for time synchronization between WiFi adapters The value Auto is selected by default RTS threshold and Fragment threshold these values are set to the maximum levels by default If you have modified them on the router you must also modify them here 4 9 3 Adding a new Favorite manually ...

Page 21: ...ters without an access point one of the computers creates the network while the other only detects it If you have already clicked the Add to Favorites button the fields will already be filled in If you opt for Ad hoc mode you must select the RF channel from a list of available channels 1 to 13 channel 1 being the default channel Step 3 enter the name of your network SSID name If you have already c...

Page 22: ...ave to add your network to the list of Favorites In Infrastructure mode If the network is not detected or if you are already connected to this network the network is simply saved in the list of Favorites If the network is detected but you are not currently connected to it a dialog box prompts you to connect In Ad hoc mode If the network is not detected a dialog box prompts you to enable the networ...

Page 23: ...t detection of the 802 11n standard slightly increases processing time Similarly you should select 802 11b g mixed mode if you encounter any difficulties connecting to the Hercules Wireless N card If you don t know whether your products are 802 11b g and or n select the 802 11b g n option Enable Boost mode this mode consists of sending data packets when bandwidth is less in demand in order to impr...

Page 24: ...ply enter the MAC address of the devices you wish to connect you can define a timeout period as well during which direct communication remains valid The Apply button validates the selected settings 4 11 About The About button located in the top right hand corner of the window displays information regarding the version of the WiFi Station N utility and the version of drivers used by the WiFi client...

Page 25: ...n the knowledge that any intrusions onto your network are impossible When you return all you have to do is switch WiFi back on To disable the WiFi function while you are away In the Windows taskbar right click the Hercules WiFi Station N icon and select Switch ON my WiFi To re enable the WiFi function In the Windows taskbar right click the Hercules WiFi Station N icon and select Switch OFF my WiFi...

Page 26: ...L connection To create a network of computers share data a printer or an ADSL connection between computers running Windows Vista it is not imperative that the computers belong to the same workgroup However if you wish to share between Windows Vista and an earlier operating system make sure to define the same workgroup on all computers For information on how to create a workgroup please refer to th...

Page 27: ...r link Enabling file sharing In the Sharing and Discovery zone click the Off link or the button located opposite File sharing Select the Turn on file sharing radio button Click Apply In the Windows Vista confirmation window click Continue Enabling public folder sharing Note A public folder is a folder which can be shared by other users of the same computer or of the same network ...

Page 28: ... viewing making changes and additions or other actions Click Apply In the Windows Vista confirmation window click Continue Enabling printer sharing Note To enable printer sharing you must first have installed a printer In the Sharing and Discovery zone click the Off link or the button located opposite Printer sharing Select the Turn on printer sharing radio button Click Apply In the Windows Vista ...

Page 29: ...personal folders Reminder In Windows Vista there are two types of folders personal or local folders and public folders A personal folder is a folder belonging to a specific user created on the computer whereas a public folder is a folder that can be shared by any other user of the same computer or the same network In essence a public folder is shared and therefore available to everyone for viewing...

Page 30: ... 79 User Manual 1 Select the folder that you wish to share without opening it Here your Pictures folder 2 Right click the folder Select Share 3 In the File Sharing window select the user s who will be able to access this folder then click Add ...

Page 31: ...e links in the Network and Sharing Center 5 2 3 Computersrunning WindowsVista Accessing sharedfolders 1 In the file explorer accessible via Start Computer double click Network You access the list of the computers on the same network Use the path indicated by Windows when setting up sharing for example PC WIFI Users My documents Shared Pictures Folders 2 Double click the computer sharing the folder...

Page 32: ...9 User Manual On the computer connected to the printer 1 Click Start Control Panel 2 Under the Hardware and Sound heading click the Printer link The list of installed printers is displayed 3 Right click the printer and select the Sharing option ...

Page 33: ...ndow click Continue 6 Tick the Share this printer box 7 Select the name of the printer which will be displayed on the network under Share name 8 Click Apply then OK 5 2 5 Computers running Windows Vista Accessing the shared printer On the computers that will use the shared printer 1 Click Start Control Panel 2 Under the Hardware and Sound heading click the Printer link ...

Page 34: ...Hercules Wireless N PCMCIA HWNPCM 300 34 79 User Manual 3 Click the Add a printer button The Add a printer assistant appears 4 Click Add a network wireless or Bluetooth printer ...

Page 35: ... WiFi adapters are connected to your access point which might be your Livebox your Hercules Modem Router or your Hercules Router connected to a modem Infrastructure mode is ideal for exchanging data playing online and also for sharing an Internet connection and or printer among several computers Follow the instructions below to finally free yourself from the cable that connects you to your modem w...

Page 36: ...r Manual 4 In the Wireless Network Connection Status window click Properties 5 In the Windows Vista confirmation window click Continue 6 In the Wireless Network Connection Properties tab select Internet Protocol version 4 TCP IPv4 7 Click Properties ...

Page 37: ...ection A simple solution for sharing folders a printer or an ADSL connection in Windows XP is to use the Network Setup Wizard This Wizard will help you create a real home network Note the access paths mentioned below may vary slightly if you have modified the default display configuration in Windows XP meaning the Start menu properties and Control Panel display 5 3 1 Windows XP Using the Network S...

Page 38: ...y clicking Cancel and establish the connection from your network device to your router for more information please refer to chapter 4 The WiFi Station N utility The window opposite may appear if The Wizard found a shared Internet connection on the computer 4 Select No let me choose another way to connect to the Internet then click Next 5 In the Select a connection method window select the Other op...

Page 39: ...lick Next 8 When this warning screen appears ignore it by clicking Next If you are using the Hercules modem router your computers are already protected by the integrated firewall 9 If your computer has at least three connections or network devices the window opposite appears In this case let the Wizard determine the appropriate connections 10 Click Next ...

Page 40: ...ase of letters for all computers you wish to link together in a network 14 Click Next 15 Verify the configuration settings you have entered in the window that appears then click Next The Wizard configures the computer for the home network This may take a few minutes 16 Before completing the procedure you may select the Create a Network Setup Disk option This consists of copying this Wizard onto a ...

Page 41: ...etwork Setup Wizard in an Ad hoc network Proceed as follows for each computer 1 Click Start All Programs Accessories Communications Network Setup Wizard The Network Setup Wizard is launched 2 Click Next twice The window opposite may appear if The Wizard found disconnected network hardware 3 If your Hercules Wireless N Adapter wireless network connection is not displayed in the list tick the Ignore...

Page 42: ...odem 5 In the Select a connection method window select the This computer connects directly to the Internet The other computers on my network connect to the Internet through this computer option 6 Click Next then select the Internet connection corresponding to your modem Click Next again 7 If your computer has at least three connections or network devices the window opposite appears In this case se...

Page 43: ...e computers that will use the shared Internet connection 5 In the Select a connection method window select the This computer connects to the Internet through another computer on my network or through a residential gateway option 6 Click Next 7 If your computer has at least three connections or network devices the window opposite appears In this case select the Determine the appropriate connections...

Page 44: ...network 12 Click Next 13 Verify the configuration settings you have entered in the window that appears then click Next The Wizard configures the computer This may take a few minutes If your network is only composed of computers running Windows XP 14 Select the Just finish the wizard option If your network is composed of computers running Windows XP and or computers running Windows 98 SE Me 2000 15...

Page 45: ...by step instructions in the next chapters the subtleties involved will no longer remain a mystery to you With some Internet service providers it may happen that your shared connection is not established automatically when you launch your Internet browser If this occurs you must first establish an Internet connection on the computer equipped with the modem The procedures described in this chapter a...

Page 46: ...k the Allow network users to change my files box In this case the user will be able to read files and save any changes If this box is not ticked the shared files can only be read and not changed The Shared folder name Properties window is divided into two sections Local sharing and security only allows for the sharing of files among several users on the same PC The files are then placed in a Share...

Page 47: ...a printer on the network and share it with all computers in the house equipped with a WiFi adapter To access a printer on the network the printer must be set up for sharing on the computer where it is connected and installed On the computer connected to the printer 1 Click Start Control Panel Printers and Other Hardware Printers and Faxes 2 Right click the printer and select Sharing 3 In the Shari...

Page 48: ...printer attached to another computer option then click Next 4 In the window that appears click Next to launch the search for shared printers 5 In the list displayed double click the computer connected to the printer 6 Select the shared printer then click Next 7 If you wish set the shared printer as the default printer then click Next 8 Click Finish to exit the Wizard You can now use the network pr...

Page 49: ...4 In the Computer Name zone enter a name sufficiently distinctive that it can easily be recognized in the list of computers for the workgroup my computer wifi computer or julie for example 5 In the Workgroup zone enter a name for the group HOME OFFICE or HERCULES for example The workgroup name must be identical be sure to respect the case of letters for all computers you wish to link together in a...

Page 50: ...sted If its status is Disabled right click your Wireless Network Connection and select Enable If its status is Enabled right click your Wireless Network Connection and select Disable 5 4 Computers running Windows 2000 Sharing folders a printer or an ADSL connection To create a network of computers share data a printer or an ADSL connection in Windows 2000 it is preferable that the computers belong...

Page 51: ...lders 1 Select the folder you wish to share without opening it 2 Right click the folder Select Sharing 3 In the Sharing tab select Share this folder 4 On the Share name line enter the folder name as it will be displayed on the network 12 characters maximum to ensure compatibility with other operating systems You can also limit access to the folder by selecting a limited number of users and the typ...

Page 52: ... printer Give the printer a name that is unique and sufficiently distinctive making it easy to recognize my printer or home laser printer for example If one of your computers is running Windows 98 SE we recommend that the sharing name not exceed 12 characters without spaces in order to ensure its compatibility with this operating system 4 Click Apply then OK On the computers that will use the shar...

Page 53: ...Panel Double click System 2 In the System Properties window select the Network Identification tab 3 Click the Properties button 4 In the Computer name zone enter a name sufficiently distinctive that it can easily be recognized in the list of computers for the workgroup my computer wifi computer or julie for example 5 In the Workgroup zone enter a name for the group HOME OFFICE or HERCULES for exam...

Page 54: ...al area network corresponding to your Hercules Wireless N device 3 Right click the connection and select Properties 4 In the Local Area Connection Properties window select Internet Protocol TCP IP 5 Click Properties 6 In the Internet Protocol TCP IP Properties window select Obtain an IP address automatically and Obtain DNS server address automatically 7 Click OK to close the windows Windows may pr...

Page 55: ...o find out how to configure the computer equipped with the ADSL modem please refer to chapter 6 2 2 Windows XP Using the Network Setup Wizard in an Ad hoc network Proceed as follows for each computer that will use the shared Internet connection 1 Click Start Settings Network and Dial up Connections 2 Select the connection to the local area network corresponding to your Hercules Wireless N device 3...

Page 56: ... equipped with the modem 5 4 8 Windows 2000 Manually enabling or disabling your adapter s WiFi connection advanced users You can manually enable or disable your adapter s WiFi connection for a variety of reasons to temporarily avoid connecting to networks save battery power etc To manually enable or disable your Hercules Wireless N adapter s WiFi connection in Windows 2000 Access the Device Manage...

Page 57: ... 1 Click Start Programs Accessories Communications Home Networking Wizard The Wizard is launched 2 Click Next If you have already used this Wizard on this computer the Setup Options panel appears Select I want to edit my Home Networking settings on this computer then click Next 3 In the Internet Connection window select the A direct connection to my ISP using the following device option 4 Select y...

Page 58: ...uments folder by ticking the My Documents folder and folders in it box In this case the Wizard will prompt you to enter a password 11 If you wish you can enable sharing of your printer by selecting it in the list 12 Click Next 13 Before completing the procedure you may copy this Wizard onto a setup disk so that it can be launched on computers equipped with operating systems other than Windows Me I...

Page 59: ...efer to chapter 6 2 2 Windows XP Using the Network Setup Wizard in an Ad hoc network Proceed as follows for each computer that will use the shared Internet connection 1 Click Start Programs Accessories Communications Home Networking Wizard The Wizard is launched 2 Click Next If you have already used this Wizard on this computer the Setup Options panel appears Select I want to edit my Home Networki...

Page 60: ... My Documents folder by ticking the My Documents folder and folders in it box In this case the Wizard will prompt you to enter a password 9 If you wish you can enable sharing of your printer by selecting it in the list 10 Click Next 11 Before completing the procedure you may copy this Wizard onto a setup disk so that it can be launched on computers equipped with operating systems other than Window...

Page 61: ...s long as the user has authorized access 1 Select the folder you wish to share without opening it 2 Right click the folder Select Sharing 3 In the Sharing tab select Shared As 4 On the Share Name line enter the folder name as it will be displayed on the network 12 characters maximum You can also limit access to the folder by selecting the type of access and a password If the Sharing tab does not a...

Page 62: ...o access All shared folders appear 5 5 5 Windows Me Sharing a printer It is possible to put a printer on the network and share it with all computers in the house equipped with a WiFi adapter To access a printer on the network the printer must be set up for sharing on the computer where it is connected and installed On the computer connected to the printer 1 Click Start Settings Printers 2 Right cl...

Page 63: ...Printers Double click the Add Printer icon 2 The Add Printer Wizard is launched Click Next 3 Select the Network printer option then click Next 4 Click Browse to locate the shared printer 5 In the list displayed double click the computer connected to the printer 6 Select the shared printer then click OK 7 Click Next 8 If you wish set the shared printer as the default printer then click Next 9 Click...

Page 64: ...k together in a network 5 Click OK A Windows message indicates that the task has been carried out successfully and that you must restart the computer 6 Repeat this procedure for each computer 5 5 7 Windows Me Manually enabling or disabling your adapter s WiFi connection advanced users You can manually enable or disable your adapter s WiFi connection for a variety of reasons to temporarily avoid co...

Page 65: ...ple 4 In the Workgroup zone enter a name for the group HOME OFFICE or HERCULES for example The workgroup name must be identical be sure to respect the case of letters for all computers you wish to link together in a network 5 Click OK Windows prompts you to restart your computer 6 Repeat this procedure for each computer Note to modify the name of a workgroup follow the same procedure 5 6 2 Windows...

Page 66: ...omputersrunningWindows98SE Accessingsharedfolders 1 Click Start Programs Windows Explorer 2 Double click Network Neighborhood and expand it You access the list of the computers in your workgroup 3 Double click the computer that is sharing the folders you wish to access All shared folders appear 5 6 4 Windows 98 SE Sharing a printer It is possible to put a printer on the network and share it with a...

Page 67: ...lick Apply then OK If the Sharing tab does not appear you must enable file sharing 1 Click Start Settings Control Panel Double click Network 2 In the Network window click the File and Print Sharing button 3 Tick the I want to be able to allow others to print to my printer s box Windows prompts you to restart your computer On the computers that will use the shared printer 1 Click Start Settings Pri...

Page 68: ...he Wizard You can now use the network printer thanks to your WiFi connection For more information on sharing a printer please refer to your printer s manual 5 6 5 Windows 98 SE Sharing an ADSL connection in an Infrastructure network Proceed as follows for each computer that will use the shared Internet connection 1 Click Start Settings Control Panel Double click Network 2 In the Configuration tab ...

Page 69: ...t you can now simply launch your Internet browser 5 6 6 Windows 98 SE Sharing an ADSL connection in an Ad hoc network The computer equipped with the ADSL modem must be running Windows XP Windows 98 SE has difficulties managing Internet connection sharing The computers that will use the shared Internet connection can be running Windows 98 SE To find out how to configure the computer equipped with t...

Page 70: ...uter that will use the shared Internet connection 1 Click Start Settings Control Panel Double click Network 2 In the Configuration tab of the Network window select the TCP IP Hercules Wireless N component 3 Click Properties 4 In the IP Address tab select Obtain an IP address automatically ...

Page 71: ...7 Windows 98 SE Manually enabling or disabling your adapter s WiFi connection advanced users You can manually enable or disable your adapter s WiFi connection for a variety of reasons to temporarily avoid connecting to networks save battery power etc To manually enable or disable your Hercules Wireless N adapter s WiFi connection in Windows 98 SE Access the Device Manager Select your Hercules Wire...

Page 72: ...ngineers an American organization in the 802 11 family whose goal is to improve security by integrating WPA PSK authentication into AES encryption This Hercules client is compatible with this standard 802 11n Standard established by the IEEE Institute of Electrical and Electronics Engineers an American organization in the 802 11 family allowing for theoretical transfer rates of 300Mbits s in the 2...

Page 73: ...he company Cisco for the world of Windows The format used is identifier password MAC address Message Authentication Code Unique address created by the builder of the client adapter or router serving to identify this element within a network MIMO technology Multiple In Multiple Out Technology used in the 802 11n standard allowing for the WiFi signal to be shared over several antennas with a corresp...

Page 74: ...sponsible for maintaining the interoperability of equipment in a wireless local area network WLAN compliant with the IEEE 802 11 standard Thus a WiFi network is actually a 802 11 network In practice WiFi allows for the connection of laptop computers desktop computers or Personal Digital Assistants PDAs many tens of meters distant from one another via an access point allowing them to communicate wi...

Page 75: ...or use in environments such as a small office or the home based on a pre shared key a single password This key is also used for TKIP or AES data encryption WPS Wi Fi Protected Setup Technology standardized by the Wi Fi Alliance which aims to simplify the connection and configuration of a wireless network while at the same time maintaining a high level of security This technology allows the user to...

Page 76: ...ears from the original date of purchase Should the product appear to be defective during the warranty period immediately contact Technical Support who will indicate the procedure to follow If the defect is confirmed the product must be returned to its place of purchase or any other location indicated by Technical Support Within the context of this warranty the consumer s defective product will at ...

Page 77: ...comply with Directive 1999 5 EC of the European Parliament and of the Council on radio equipment and telecommunications terminal equipment and the mutual recognition of their conformity After assessment the equipment has been found to comply with the following standards EN 300 328 radio EN 301 489 1 EN 301 489 17 electromagnetic compatibility and EN 60950 safety This equipment may be used in all E...

Page 78: ...RU UHORFDWH WKH UHFHLYLQJ DQWHQQD QFUHDVH WKH VHSDUDWLRQ EHWZHHQ WKH HTXLSPHQW DQG receiver RQQHFW WKH HTXLSPHQW LQWR DQ RXWOHW RQ D FLUFXLW GLIIHUHQW IURP WKDW WR ZKLFK WKH UHFHLYHU LV FRQQHFWHG RQVXOW WKH GHDOHU RU DQ H SHULHQFHG UDGLR 79 WHFKQLFLDQ IRU KHOS This device complies with Part 15 of the FCC Rules Operation is subject to the following two conditions 1 This device may not cause harmful...

Page 79: ...s for any third party Software documentation and related material included in the Software package Guillemot Corporation S A reserves the right to terminate this license in the event of failure to comply with any of the terms or conditions laid out in the present Agreement On termination all copies of the Software shall immediately be returned to Guillemot Corporation S A the purchaser remaining l...

Reviews: