2
13
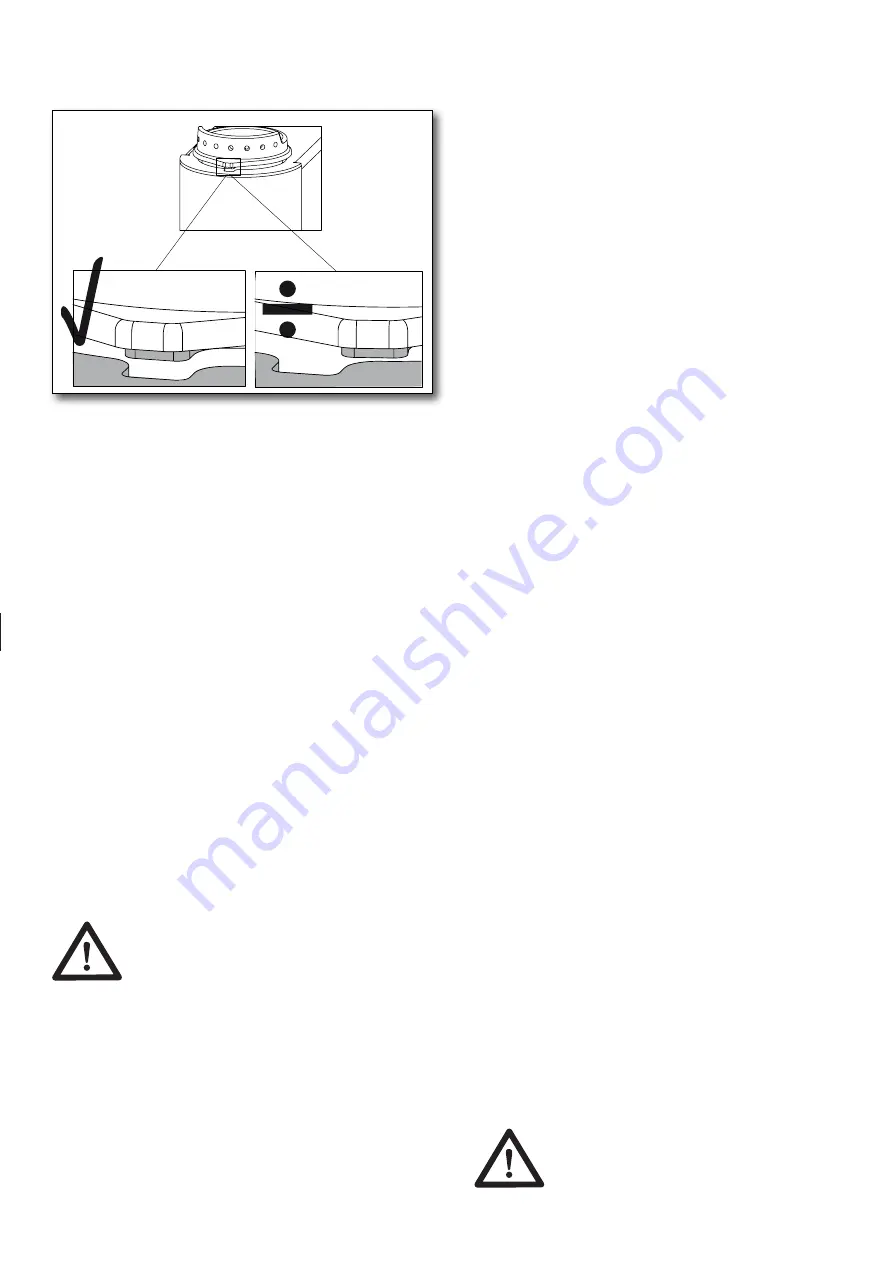
Inserting the burn pot after cleaning.
Fig. 2
Cleaning the glass
Clean the glass whenever necessary. Depen-
ding on the pellet quality and heat level used
(a low heat level leads to more dirt/deposits),
deposits will eventually form on the glass. The-
se can be removed using paper or a cloth and
glass cleaning agent.
Cleaning the display
The display can be cleaned gently using a dry
cloth. Grease stains are removed by drying the
unit with a cloth and a mild detergent.
Monthly cleaning
Emptying the combustion chamber
The combustion chamber must be vacuumed
approximately once a month depending on how
often the stove is in operation and the quality of
the pellets. The stove requires light but regular
cleaning to ensure stable operation.
Note: This is done when both the
stove and the ashes are cold.
Glass door seal and gaskets
It is important that the glass door seal, the ash
pan gasket and pellet tank cover seals tightly,
as the stove requires underpressure in the
combustion chamber for correct operation.
The glass seals must be replaced if worn, or
glued in place using ceramic glue if loose.
Ask your dealer if you need assistance.
Emptying/Cleaning of the pellet tank (*)
Pellettank should be emptied and vacuumed for
dust and pellet remains at least monthly.
Semi annually / Annually
Internal flue pipe and chimney fan (*)
The stove’s internal flue pipe must be kept free
from ash and soot. Clean the pipe with a clea-
ning brush and vacuum the ash room. Remove
the chimney fan and clean any ash or soot off
the housing and blades.
Cleaning the Pressostat: (*)
The pressostat is connected to the chimney fan
by a silicone hose. Clean the silicone hose if
dirty using water and soap (ensure it is complet-
ely dry before reinstalling). Apply suction to the
pressostat inlet and listen to hear if it clicks.
Cleaning the convection fan (*)
Check that the convection fan turns easily by
turning it with your fingers. Clean off dust and
any other dirt, for example using a soft brush.
Cleaning the flue gas channel (*)
Clean the flue with a cleaning brush. Vacuum
and clean any soot and ash from the inspection
hole, which is located behind the ash pan.
Items marked (*)
should only be made by an authorized dealer,
however, there may be special circumstances
that cause the frequency of cleaning these com-
ponents to be more frequent than indicated here
if the environment where the oven is installed re-
quires this. This can be done by the customer by
agreement.
Service interval
There is a built-in service counter.
The status of this SERVICE COUNTER can be
found in the information menu.
This SERVICE COUNTER counts down from
1,800 hours. An alarm will sound when this time
has expired. This alarm will continue to flash un-
til an authorised service technician has serviced
the stove and reset the service counter.
The stove can still be used in this period.
Service interval 1800 operating
hours or at least once a year.


