Hettich AG, Seestrasse 204a, 8806 Baech, Switzerland
Operator Manual_DancerPlus_EN_rev, 1.1
Page 26
3.1.2
Housing parts
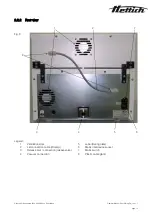
Check the ventilation slots (Fig. 6 no. 1) for any residual dust and clean them with a dry brush, or remove the dust
using a vacuum cleaner.
Never blast the device interior with compressed air, nor use it to blow dust away. This may lead
to excessive dust accumulation in the device interior, which is a fire hazard.
A cloth moistened with mild, soapy water must be used to clean the housing parts, but in the
case of severe contamination, the Scotch-Brite® professional sponge must be used.
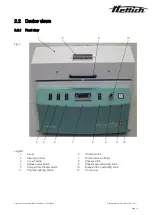
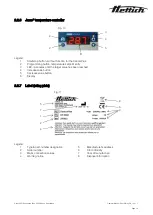
If methylated spirits, alcohol or benzine, etc. are used, you will destroy the switch labelling (Fig. 5
no. 4 to no. 9) on the front panel (Fig. 5 no. 12).
3.1.3
Vacuum chamber
Regular cleaning of the easy-to-clean vacuum chamber prevents the accumulation of deposits which, over time,
can detract from the appearance and functionality, particularly of the shaking drive. The vacuum chamber of the
DancerPlus can, depending on the degree of contamination, may be cleaned with glass cleaning agents, ethanol
70% and, if required, with standard stainless-steel cleaning agents. Ensure that no rusty objects come into contact
with the vacuum chamber. Rust deposits lead to contamination of the stainless-steel. If rust spots appear on the
surface of the vacuum chamber due to contamination, the affected areas must be cleaned and polished
immediately (contact the manufacturer or authorised supplier if required).
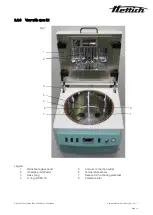
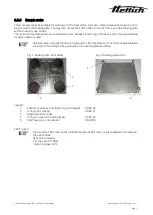
Remove and clean the O-ring (Fig. 7 no. 4) with a glass cleaning agent or ethanol 70% and check the O-ring for
bends and cuts; it may need to be replaced. Also clean the O-ring guide slot on the vacuum chamber.
Clean the glass surfaces and side walls of the four recesses for the shaking plate feet (Fig. 7 no. 7) until no deposits
are visible. Deposits may impede the shaking drive, or completely block it. If the shaking drive is impeded, its
service life will be reduced.
Never pull on the temperature sensor cable during any cleaning work, as this may cause
leakages. To clean the cable and sensor, hold the cable in one hand, and clean the cable and
sensor with the other hand using a cloth or rag moistened with mild, soapy water. Check the
sleeve of the cable and sensor for bends or cuts; the temperature sensor may need to be
replaced.
Do not use knives, screwdrivers, scissors or similar tools to remove hard encrustations. Instead,
soak the encrustation with soapy water, disinfectant or ethanol 70% for 15 to 30 minutes and
remove it with a dry cloth, using a wooden or plastic spatula if required.
3.1.4
Glass panel
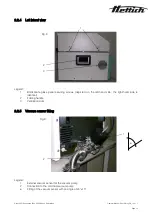
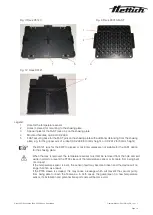
To clean the glass panel (Fig. 7 no. 1), close the lid and remove the four securing screws (Fig. 8 no. 1). Then,
carefully open the lid. The glass panel is left on the vacuum chamber and can be cleaned on both sides with
standard glass cleaning agents, soapy water or, if required, with ethanol 70%. The Scotch-Brite® professional
sponge may be used for significant encrustation.
The IR lamps and the reflector (Fig. 7 no. 2) may only be cleaned by an authorised technician.
Improper handling may cause the IR lamps to malfunction, and the reflector to become bent and
/ or scratched.

