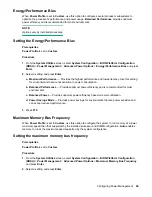
a. Auto
— Memory runs at the maximum speed supported by the system configuration. Use this
setting for best NVDIMM-N performance.
(default)
b. 1333MHz
c. 1066MHz
d. 800MHz
3.
Press
F10
.
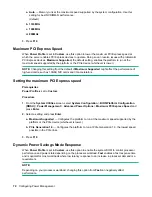
Maximum PCI Express Speed
When
Power Profile
is set to
Custom
, use this option to lower the maximum PCI Express speed at
which the server enables PCI Express devices to operate. Doing so can resolve issues with problematic
PCI Express devices.
Maximum Supported
, the default setting, enables the platform to run at the
maximum speed supported by the platform or the PCIe device (whichever is lower.)
NOTE:
Changing this setting from the default of
Maximum Supported
might affect the performance of
high-end cards, such as 10GbE NIC cards and I/O accelerators.
Setting the maximum PCI Express speed
Prerequisites
Power Profile
is set to
Custom
.
Procedure
1.
From the
System Utilities
screen, select
System Configuration
>
BIOS/Platform Configuration
(RBSU)
>
Power Management
>
Advanced Power Options
>
Maximum PCI Express Speed
and
press
Enter
.
2.
Select a setting and press
Enter
.
a. Maximum Supported
— Configures the platform to run at the maximum speed supported by the
platform or the PCIe device (whichever is lower.)
b. PCIe Generation 1.0
— Configures the platform to run at PCIe Generation 1.0, the lowest speed
possible in the PCIe links.
3.
Press
F10
.
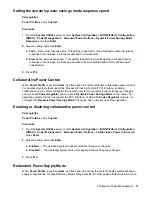
Dynamic Power Savings Mode Response
When
Power Profile
is set to
Custom
, use this option to enable the system ROM to control processor
performance and power state depending on the processor workload.
Fast
enables a fast response time,
and is optimal for most workloads where low latency response to an increase in processor demand is a
requirement.
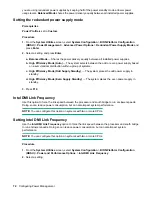
NOTE:
Depending on your processor workload, changing this option from
Fast
can negatively affect
performance.
70
Configuring Power Management

