Enroll Signature (Forbidden DB)
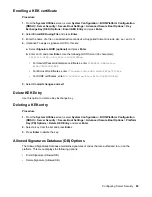
Use this option to enroll a signature in the Forbidden Signatures Database. The Forbidden Signatures
Database maintains signatures of codes that are not authorized to run on the platform.
Enrolling a signature in the Forbidden Signatures Database
Procedure
1.
From the
System Utilities
screen, select
System Configuration
>
BIOS/Platform Configuration
(RBSU)
>
Server Security
>
Secure Boot Settings
>
Advanced Secure Boot Options
>
Forbidden
Signatures Database (DBX) Options
>
Enroll Signature
and press
Enter
.
2.
Select
Enroll Signature Using File
and press
Enter
.
3.
Enter the name of a file on an attached media device. Supported formats include .der, .cer, and .crt.
4.
(Optional) To apply a signature GUID to this signature:
a.
Select
Signature GUID (optional)
and press
Enter
.
b.
Enter an ID and press
Enter
. Use the following GUID format (36 characters):
11111111-2222-3333-4444-1234567890ab
.
• For Hewlett Packard Enterprise certificates, enter
F5A96B31-DBA0-4faa-
A42A-7A0C9832768E
• For Microsoft certificates, enter
77fa9abd-0359-4d32-bd60-28f4e78f784b
• For SUSE certificates, enter
2879c886-57ee-45cc-b126-f92f24f906b9
5.
Select
Commit changes and exit
.
Delete Signature (Forbidden DB)
Use this option to delete a signature from the Forbidden Signatures Database.
Deleting a signature from the Forbidden Signatures Database
Procedure
1.
From the
System Utilities
screen, select
System Configuration
>
BIOS/Platform Configuration
(RBSU)
>
Server Security
>
Secure Boot Settings
>
Advanced Secure Boot Options
>
Forbidden
Signatures Database (DBX) Options
>
Delete Signature
and press
Enter
.
2.
Select a signature from the list and press
Enter
.
3.
Press
Enter
to delete the signature.
Delete all keys (PK, KEK, DB, DBX)
Use this option to delete all keys in the system, including the Platform Key.
NOTE:
Changing the default security certificates can cause the system to fail booting from some devices,
or to fail launching certain software.
Configuring Server Security
87


