4
5
MA-EN-OSMOSIS XENA10.1-RO-0220-22-FLC-21-V01.0
MA-EN-OSMOSIS XENA10.1-RO-0220-22-FLC-21-V01.0
•
The installation should be done by professionally qualified personnel and should not be installed
close to a heat source.
• The XENA 10.1 osmosis system needs a mains current of 220 – 240V less than 1 metre away.
• Do not repair or take the system apart on your own. If the system is not working correctly, contact
your distributor. Any tampering of the equipment by unauthorized personnel will result in the
warranty being void.
• Make sure the water passage is closed when a repair or maintenance is being carried out.
•
During the first installation or after changing the cartridges, black powder coming from the carbon
filter will enter the water. This is normal. Run the water until it’s clear.
•
Do not bend the tubes to prevent flow and pressure blockages.
• Use original spare parts to assure the correct performance of the system.
• For installation, maintenance and cartridge change, please follow this manual; otherwise the
warranty will be void.
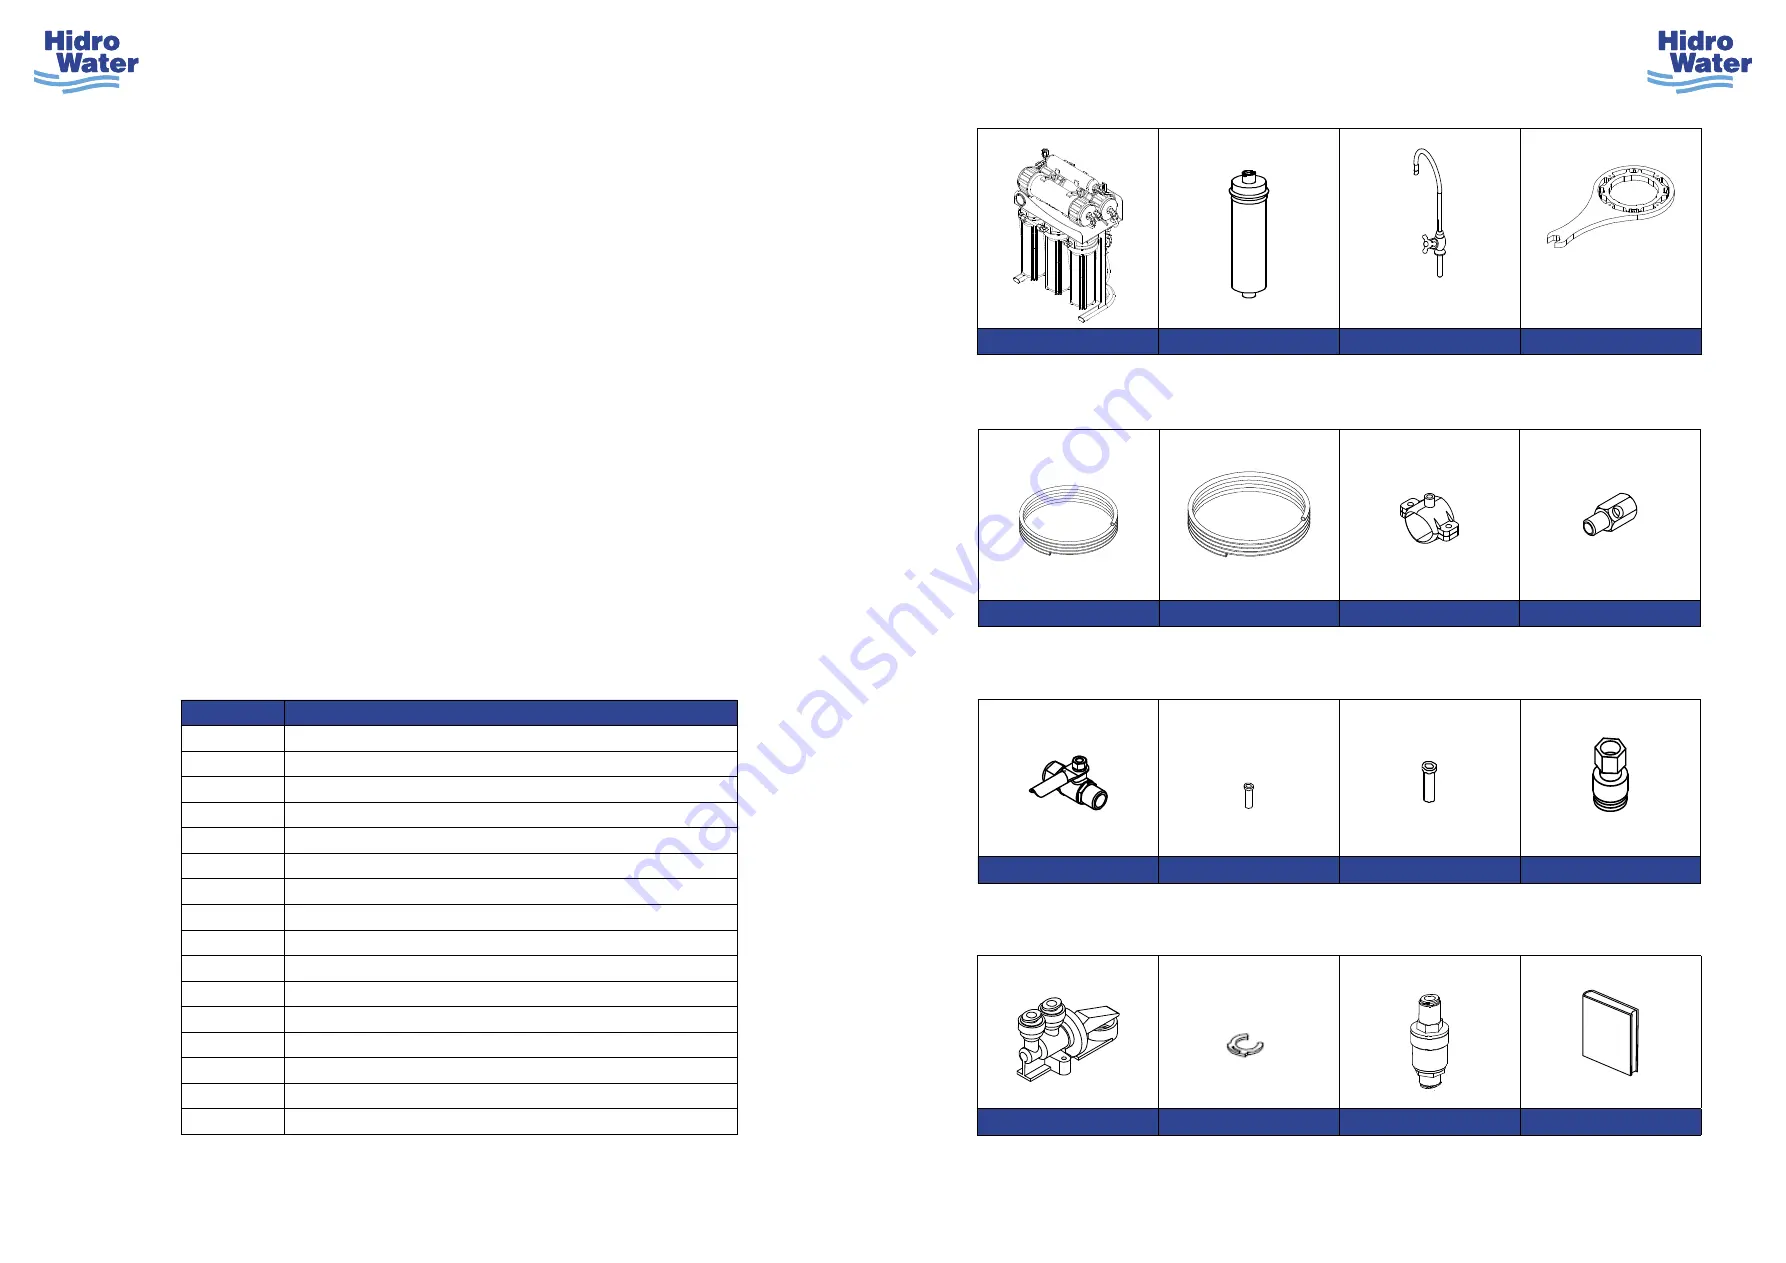
3.- CHECKING THE CONTENTS
Open the packaging and make sure that all of the components are inside, ready for the installation.
FIGURE
DESCRIPTION
1
XENA 10.1 Osmosis system main unit
2
23x12 200 GPD membrane
3
Margarita faucet
4
Filter/membrane housing wrench.
5
¼” PE Tube
6
⅜” PE Tube
7
Waste clamp
8
Feed adaptor
9
¼” M x ¼” T Brass ball valve
10
¼” Plastic insert
11
⅜” Plastic insert
12
⅜” Faucet tube adaptor
13
⅜” WATER STOP Antileak system
14
⅜” security clip
15
⅜” pressure redactor
16
Instruction manual & warranty
X-1
X-2
X-1
X-1
FIGURE 1
FIGURE 2
FIGURE 3
FIGURE 4
X-1
X-1
X-1
X-1
FIGURE 5
FIGURE 6
FIGURE 7
FIGURE 8
X-1
X-2
X-3
X-1
FIGURE 9
FIGURE 10
FIGURE 11
FIGURE 12
X-1
X-1
X-1
X-1
FIGURE 13
FIGURE 14
FIGURE 15
FIGURE 16


