background image


Kingkong III Pro USER MANUALS                           www.hifei.com


 Mounting the ESC 

Recommend to use Velcro to fix the ESC on fuselage for easy 

removal. keep the good airflow around the ESC.


Parameters features 

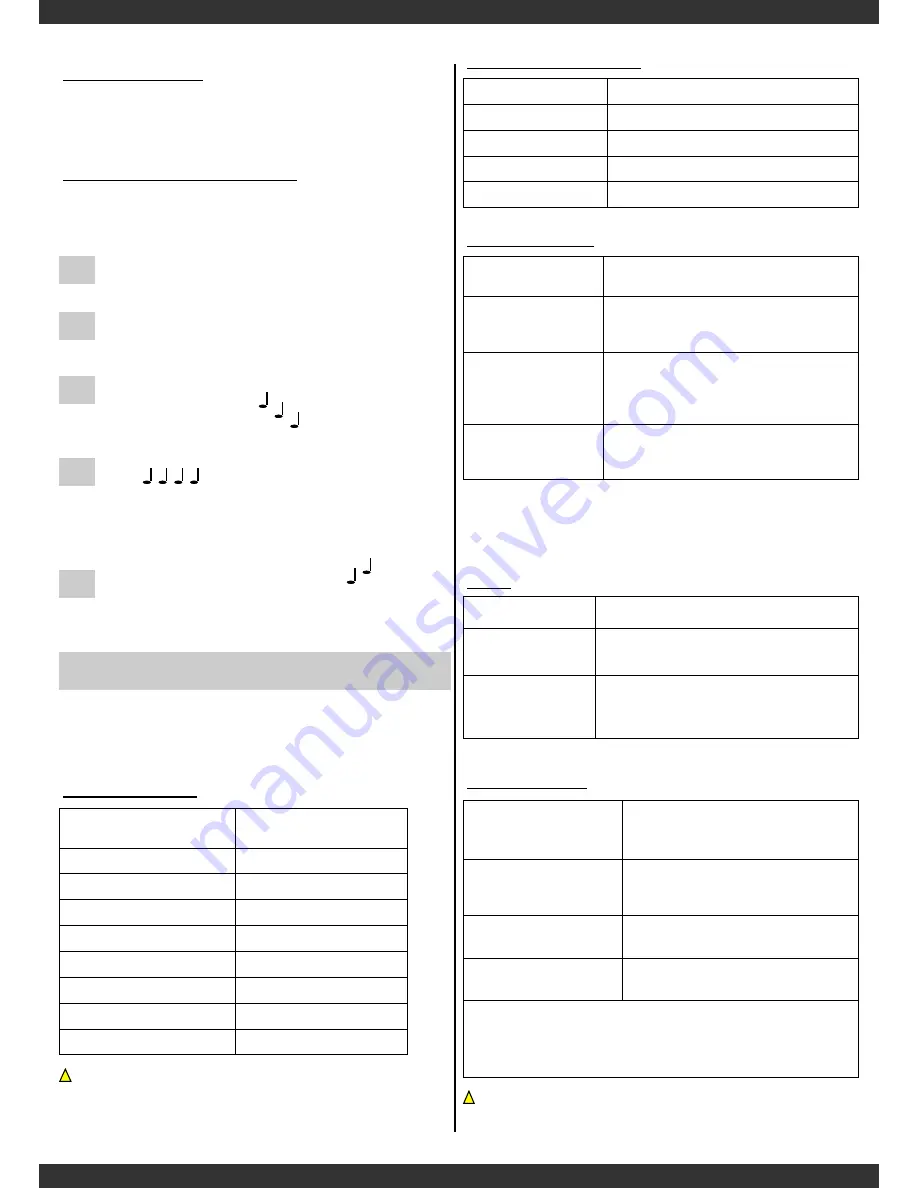
Calibrating throttle range of TX


You 

MUST

  complete  throttle  range  calibration  before  use  a 

new ESC at first time, and when change a new radio. 

Kingkong  III  Pro  ESC  come  with  default  factory  settings 

which  are  recommended  for  most  applications. The  program-

ming options are provided for obtain optimum performance in 

different setup.


Low voltage cutoff


Option 1:  

very sensitivity 


Low  over-current  threshold,  will  shut 

down rapidly


Option  2:  standard 

(default)


Moderate  over-current  threshold,  will 

shut  down  after  a  slight  delay.  Recom-

mended for inrunner motors. 

Option 3: 

 Insensitivity 


High  over-current  threshold,  will  shut 

down after a slight delay,. Recommended 

for outrunner motors.  Only experienced 

modelers should use this  option.


Option 4: disabled


Current limiting detection disabled. Only 

experienced  modelers  should  use  this 

option. 

Current Limiting


Default setting is recommended. If you change the setting, damage to the 

controller as a result of over current will be not covered by the manufactur-

er’s warranty.


Option 1: 

Disabled (default) 

Brake  disabled  is  mainly  used  for  heli-

copters. 

Option 2: 

Soft brake 

Soft  brake  provides  50%  of  full  braking 

power. General aircraft use, with fixed or 

folding prop 

Option 3: 

Hard brake 

Hard brake is 70% braking power. Direct 

drive  applications  where  more  braking 

power  is  required.  Hard  brake  should 

only be used below 12V. 

Brake


Option 1: Low  

              (0°~15°) 

Recommended  for  lower  pole  count 

motors. Gives more power and slight-

ly less efficient. 

Option 2: middle  

              (5 °~ 20 °) 

Recommended 

for 

most 

mo-

tors  .Gives  a  good  balance  of  power 

and efficiency. 

Option 3: High  

              (15° ~ 30 °) 

Recommended  for  most  of  higher 

pole count motors 

Option4:Auto(default)

  Recommended  for  most  of  all  brush-

less motors. 

Option 5: 0°; Option 6: 2°; Option 7: 4°; Option 8: 6°; Option 9: 

8°; Option 10: 10°; Option 11: 12°; Option 12: 14°; Option 13: 

16°; Option 14: 18°; Option 15: 20°; Option 16: 22°; Option 17: 

24°; Option 18: 26°; Option 19: 28°; Option 20: 30°


Timing Advance


Option 1: Auto  

Option 

2: 

4s 

Lipo

(default)


Option 3: 5s Lipo 

Option 4: 6s Lipo 

Option 5: 7s Lipo 

Option 6: 8s Lipo 

Option 7: 9s Lipo 

Option 8: 10s Lipo 

Option 9: 11s Lipo 

Option10: 12s Lipo 

Option 11: 13s Lipo 

Option12: 14s Lipo 

Option 13: 15s Lipo 

Option14: 16s Lipo 

Option 15: 17s Lipo 

Option16: 18s Lipo 

Option 17: 19s Lipo 

Option18: 20s Lipo 

Recommended to set LVC at exact Lipos series number for 

better  protect  Lipo  packs  from  over

-

discharging.  ONLY 

WHEN battery packs are fully charged, ‘Auto’ can detect 

Lipo cells number correctly and it is  suggested under this 

condition.


0° and 30° timings are for special motors. ONLY when mo-

tor  manufacturer  requests  the  special  timings,  they  can  be 

used.


Option 1: 2.5v  

Option 2: 2.6v 

Option 3: 2.7v 

Option 4: 2.8v 

Option 5: 2.9v 

Option 6: 3.0v (default) 

Option 7: 3.1v 

Option 8: 3.2v 

Option 9: 3.3v 


Lipo cell Cutoff Voltage


Page 2


1st: 


Connect  ESC  to  motor,  plug  receiver  lead  of  ESC  to 

throttle channel of receiver.


2nd

Push  joystick  of  transmitter  to  max  throttle  position, 

power on transmitter.


3rd: 


Power on receiver, connect ESC to battery.  Motor emits  

three beeps in drop tones. 


4th: 


In the following, motor will emit four long beeps in flat 

tones.


During  any  one  beep  of  the  four  long  beeps,  pull  down 

joystick to zero position immediately.


5th: 


Then motor emits two beeps in up tones. 


Calibrating is completed, it‟s ready to fly.


Summary of Contents for 100A-KIII Pro-6S Lite

Page 1: ... battery black wire Follow the instructions provided with battery connector Connect ESC to motor Suggested to solder quality and corresponding size golden bul let connectors for your motor to the motor wires coming from ESC Swapping any two motor wires connection can change rota tion direction Connect to receiver Connect the receiver lead consisted of brown red and orange small wires with a black ...

Page 2: ...power and slight ly less efficient Option 2 middle 5 20 Recommended for most mo tors Gives a good balance of power and efficiency Option 3 High 15 30 Recommended for most of higher pole count motors Option4 Auto default Recommended for most of all brush less motors Option 5 0 Option 6 2 Option 7 4 Option 8 6 Option 9 8 Option 10 10 Option 11 12 Option 12 14 Option 13 16 Option 14 18 Option 15 20 O...

Page 3: ...h as VBar Skookum MB BeastX etc Option 3 Governor ESC Internal Governor PWM rate Option 1 8 KHz default Recommended for most brushless mo tors Option 2 10KHz Option 3 12KHz Option 4 16 KHz Recommended for very low inductance motors Option 5 20 KHz Option 6 24 KHz Option 7 28 KHz Option 8 32 KHz Active FreeWheeling Option 1 default OFF Option 2 ON helicopter mode than its body diode so much less he...

Page 4: ...n Spool Up Rate indicates the startup spool up rate the default setting is Level 3 higher level numbers means to approach the head speed faster Governor Gain The default setting is grade 9 the higher grade number means the higher gain Head Speed Change Rate The default setting is standard this setting indicates the change rate between 2 different head speed switching for example throttle curve swi...

Page 5: ... pinion or Inc Dec the Desired Head Speed to get the best match results Please carefully check your heli configuration make sure the desired heed speed is under control Furthermore fill out the battery voltage and motor KV can help you find out the ESC power output match with the pre set head speed HiFei recommends for optimum the ESC output to motor about 80 power it ensure the ESC has enough res...

Page 6: ...al size Because big size font would possi bly cause software interface cannot be showed in full Connect ESC to PC Kingkong III Pro USER MANUALS www hifei com HiFei Software V5 0 operation V5 0 tab 2 Parameter setting Click on tab 2 Parameter Setting to get into programming in terface select the options you want to change by down arrow then click on Update to save the setting V5 0 tab 5 Upgrade In ...

Page 7: ...space is filled up it continue logging data indefinitely by overlapping the for mer data and do a cycle Default setting is Not Reverse Sampling rate means the times that data logger samples per second Default setting is 3ps Higher sampling rate will fill up the memory space quickly and thus reduce the logging time when in not reverse record type Sampling Rate Max logging Time Mini running Time Not...

Page 8: ...n device is wrong or occupied by other devices Please open Device manager of My computer to check the right com port number or change the com port number which be occupied to an available port number Then open V5 0 select the right com port number and save it Q It cannot upload data and pops up a box C Program files V5 0 xxx cannot be found A It because ESC run too short time and the logged data c...

Page 9: ... Dongle Connecting the cable to ESC and WiFi dongle Figure 1 Power on the ESC waiting about 30 seconds until the green LED on WIFI dongle blink Option HiFei KIII in the WLAN list of your smart termi nal Open your browser and input the default IP address password as following IP address 192 168 1 16 2015 Password 12345678 Entered into the Home Page Page 9 Reserve Mini USB Reset Attena Home Page Par...

Page 10: ...Dawn Urban Industrial Park Gang An 2 Street Cun Tan Jiang Bei Chongqing 400025 Tel 86 23 6862 1580 6862 6070 Fax 86 23 6862 6070 Note After Updated the The AP name and IP Address Please press Reset button in 1 second and release the red LED will blink in 5 seconds and go to steady light af ter that you have to re power up the WiFi dongle to make the change available ...

Reviews: