background image

6

Chimneys that were constructed in homes built before the advent of oil and gas-

fi

 red central hea  ng systems were 

invariably constructed within the walls of the home, typically centrally located, and exited the roof at or near the ridge.  
The principals that applied then apply today.  A chimney is best located within the envelope of the home to keep it 
warm, and it should be installed as close to the peak of the roof as possible.  If you have a modern 

fi

 replace that was 

constructed with the chimney outside the home, exposed to the cold, and with a rela  vely short chimney, it may not 
be your best choice for use with a modern, e

  cient wood stove.  As central hea  ng became prevalent 

fi

 replaces and 

their chimneys were moved outside the walls of the home to conserve 

fl

 oor space.  If they didn't draw well it was not 

considered a major problem because the central hea  ng system kept the home warm.

D

:


 The Environmental Protec  on Agency de

fi

 nes dra   this way:  ‘‘Dra   is the force which moves air from the 

appliance up through the chimney."  Simply stated, heated air (wood stove exhaust or any heated gas for that ma  er) 
becomes more buoyant and tends to rise.  The ho  er the gasses contained in a chimney 

fl

 ue are, compared to the tem-

perature of the air outside, the greater the dra   should be.  There are many variables and the scien  

fi

 c explana  on can 

become complicated.  (There are books and scien  

fi

 c papers wri  en for those who would like to know more.)  Su

  ce 

to say that you need it; and without it your wood heater cannot perform well.  The dra   of the chimney provides the 
suc  on that pulls air into the stove to support combus  on.  A wood heater provided with adequate dra   cannot leak 
smoke, as air is being drawn into the heater, connector pipe, and chimney.  If a wood stove is leaking smoke or spills a 
lot of smoke during refueling, inadequate dra   is most likely the culprit.

A complete explana  on of all of the elements that may a

 ect dra   are beyond the scope of this manual but, brie

fl

 y, 

some factors that contribute to a properly dra  ing chimney are these:
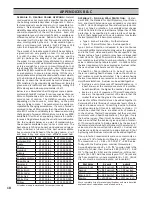
• F

 S

:


 We recommend that the 

fl

 ue size of the chimney be the same size as the 

fl

 ue outlet on the stove.  

Theore  cally a larger chimney 

fl

 ue should have a greater 

fl

 ow capacity than a smaller 

fl

 ue.  In prac  ce though, 

the heated 

fl

 ue gases are diluted by the extra air in the larger 

fl

 ue and cool faster  Dra   is decreased and, if 

cooled too much, creosote may be deposited in the 

fl

 ue.  The Model 1300 has a 6" 

fl

 ue collar and 6" factory-built 

HT chimney is readily available.  With an exis  ng masonry chimney it can be more challenging.  A typical masonry 

fl

 ue   le is 8" square; considerably larger than the 6" 

fl

 ue recommended.  Consider that the cross-sec  onal area 

of a 6" 

fl

 ue is @ 28¼ sq. in.  (Area = 

π

r

2  

or A = 

π

3

2  

or A = 3.14 X 9) where Pi = 3.14 (enough for this purpose.)  The 

cross sec  onal area of an 8" round 

fl

 ue is 50¼ sq. in.; the cross sec  onal area of an 8" square masonry 

fl

 ue   le is 

@ 64 sq. in.  In addi  on, the masonry construc  on tends to cool more quickly with cold outside temperatures.  If 
a new masonry chimney is being constructed, ask the mason to try to source round 

fl

 ue   les.  They are available 

and can be insulated with vermiculite or other approved chimney insula  on materials.  The performance of an 
exis  ng masonry chimney may be improved with the installa  on of an insulated chimney liner that is the same 
size as the 

fl

 ue outlet of the stove.  

• I

:


A chimney 

fl

 ue that is kept warm is more likely to dra   well than a cold chimney.  Keeping the 

chimney within the walls of the home is the best solu  on if space allows.  If the chimney must be constructed 
outside the home, then insula  ng it is strongly recommended.  Factory-built HT chimneys are packed with in-
sula  ng material and can be further protected by installing them inside an insulated chimney chase (enclosure) 
outside the home.  Masonry chimneys may require an insulated 

fl

 ue liner to provide adequate dra   in all sea-

sons.  Consider that when it is cold (say 20 degrees for example) outside the home, the air inside the 

fl

 ue of an 

outdoor chimney will be the essen  ally same temperature.  When ligh  ng the 

fi

 re it will be necessary to provide 

enough heat to overcome that column of cold air ac  ng like a plug in the chimney 

fl

 ue.  Once the wood heater 

is lit and burning hot 

fl

 ue gasses will be cooled more quickly in a chimney exposed to the elements and dra   will 

be nega  vely a

 ected; perhaps to the point were the dra   becomes inadequate to maintain an e

  cient 

fi

 re.  

• H

:


A tall chimney is more likely to dra   well than a short chimney.  The taller column of heated gas cre-

ates a greater temperature and pressure di

 eren  al with the outside atmosphere and be  er dra   is the result.  

As above, the 

fl

 ue size and insula  on also play signi

fi

 cant roles in the process.  We recommend a minimum 

chimney height of @ ten feet (10') and a maximum height of @ thirty feet (30') measured from the top of the 
wood heater.  Loca  ng the chimney where it will project above the ridge of the roof, rather than near the eaves 
of the home, will net the tallest chimney height prac  cal for your home.  External elements like tall trees, hills, 
tall buildings, and the like can a

 ect dra   when the wind is blowing from a par  cular direc  on.  Loca  ng a short 

chimney at the eaves of the home may result in dra    problems when the wind blows across your own roof ridge.  
Height alone is not the only factor to consider when specifying a chimney but, in general, taller is be  er.

C

 P

Summary of Contents for 1300

Page 1: ...pera ng this wood heater If you have ques ons please contact your High Valley Dealer for assistance SAVE THIS OWNER S MANUAL FOR FUTURE REFERENCE Safety No ce If this wood heater is not properly installed a house fire may result For your safety please carefully read and follow the installa on direc ons Contact the local Building or Fire Official or other Authority Having Jurisdic on AHJ about code r...

Page 2: ... paint thinners or asphalt products Materials containing asbestos Construc on or demoli on debris Railroad es or pressure treated wood Manure or animal remains Salt water dri wood or other previously salt water saturated materials Unseasoned wood or Paper products cardboard plywood or par cleboard The prohibi on against burning these materials does not prohibit the use of fire starters made from p...

Page 3: ...hroughout this manual you will find important safety no ces and other informa on may be repeated a number of mes The repe on is inten onal in an effort to reinforce safety instruc ons and to place them in context U S EPA E S T I P 2 T C Page 3 G S I S P Page 4 I P P 5 C P P 6 C R G P 7 C C D P 8 M 1300 S C P 9 P I A P 10 W H I P 11 C C P 12 M H I P 12 P O G P 13 M 1300 F C P 13 O G P 14 O A M P 16 ...

Page 4: ...r Keep all such liquids well away from the heater at all mes Storing these or other flam mable liquids near a wood heater could cause a fire DO NOT BURN GARBAGE OR FLAMMABLE FLUIDS SUCH AS GASOLINE NAPHTHA OR ENGINE OIL Cord wood is the only fuel approved for use in this wood heater DO NOT CONNECT THIS UNIT TO A CHIMNEY FLUE SERVICING ANOTHER APPLIANCE DO NOT CONNECT A WOOD HEATER TO OR USE IN CON...

Page 5: ... sized wood heaters throughout the space to be heated rather than a single large wood heater The number would depend on the size and layout of the home We do not recommend installing your wood heater in an uninsulated basement Much of the heat produced will be lost to the uninsulated walls of the basement NEVER cut holes or vents in a ceiling floor in an a empt to get warm air to rise to the rooms...

Page 6: ...uare considerably larger than the 6 flue recommended Consider that the cross sec onal area of a 6 flue is 28 sq in Area πr2 or A π32 or A 3 14 X 9 where Pi 3 14 enough for this purpose The cross sec onal area of an 8 round flue is 50 sq in the cross sec onal area of an 8 square masonry flue le is 64 sq in In addi on the masonry construc on tends to cool more quickly with cold outside temperatures ...

Page 7: ... ceiling supports insulation shields fire stops roof support packages roof flashings chimney caps etc must be installed exactly to the manufacturer s in structions Installation specification and clearances may vary from manufacturer to manufacturer and must be carefully adhered to according to the individual manufacturer s instructions If a new masonry chimney is to be constructed we strongly reco...

Page 8: ...m combus bles by a minimum of 6 inch 152mm of glass fiber insula on Opening shall be covered and thimble supported with a sheet steel support minimum 24 gauge 0 024 inch 0 61mm in thickness Supports shall be securely fastened to wall surfaces on all sides and shall be sized to fit and hold chimney sec on Fasteners used to secure chimney sec on shall not penetrate chimney flue liner Solid insulated...

Page 9: ...5mm w x 1092mm d CN F P Use UL 1618 Type 2 Floor Protector R 1 19 or con nuous non combus ble material equivalent to 1 thickness k 0 42 NOTE Clearances to combus ble materials may be reduced using shielding methods as described in the current edi on of NFPA 211 Standard for Chimneys Fireplaces Vents and Solid Fuel Burning Appliances Any reduc on of clearances must be approved by the local Authorit...

Page 10: ...ct your High Valley Dealer for assistance DO NOT proceed with installa on un l the stove has been inspected and replacement parts obtained P I If your Model 1300 was not assembled before delivery the stove body must be fastened to the pedestal base USE EXTREME CAUTION The wood heater is very heavy At least two strong individuals will be needed to li the stove body onto the pedestal base Personal i...

Page 11: ...heater Remove the cardboard before ligh ng the first fire in the wood heater The wood heater should be centered on the chimney if possible to allow for the shortest and most direct connec on The wood heater does not necessarily need to be centered on the floor protec on as long as the minimum side pro tec on requirement 8 is met An asymmetrical installa on may provide more usable space to one side...

Page 12: ...eater must be kept closed at all mes except for star ng and refueling the fire H I U S W P Center the wood heater flue collar in line with the wall thimble if possible All Clearances to combus bles must be maintained Confirm that the factory built wall pass through or masonry thimble meets manufacturer instruc ons and or NFPA 211 See Page 8 Limit the 90 bends to one 1 elbow and the 90 bend where t...

Page 13: ... of air fed to the fire and thereby regulates the burn rate Pull out to open and push in to close using the spring handle A U S B P B This wood heater is designed and approved for the burning of cord wood fuel only Never burn any type of coal in this heater Burning any type of fuel other than cord wood in this wood heater is against all safety tes ng and will void all warran es D Never use gasolin...

Page 14: ...er in a fully closed posi on If the fire seems uncontrollable consult your dealer A hand damper installed in the connector pipe will allow for manual control under high dra condi ons CAUTION Before ligh ng your wood heater please read and or re read the safety informa on on pages 2 4 13 and elsewhere throughout this manual Ensure that the wood heater has been installed according to the in struc on...

Page 15: ...curred Contact your High Valley dealer or local chimney sweep if you are uncertain how to inspect the system for any build up I C C F If your wood heater is op erated properly to maintain clean efficient combus on connected to a good chimney burning good dry wood and inspected as needed a chimney fire should be an un likely occurrence A chimney fire can create a loud rushing sound and perhaps bangin...

Page 16: ... the wood heater and lay it flat on a well padded work surface Remove the retaining screws from the door and wear ing gloves remove any remaining pieces of ceramic Remove a short sec on of paper backing covering the gasket adhesive from the gasket Center gasket mate rial on the edge of the replacement ceramic and firmly press the gasket onto the edge Con nue around all four sides of the ceramic Tr...

Page 17: ...ake 9 months for so woods and up to 24 months for hard woods to air dry thoroughly C Clean efficient combus on in your wood heater depends on good quality well seasoned fuel Buying seasoned wood during the burning season is most o en very disappoin ng The best advice is to get green wood in spring and air dry it yourself If you don t cut your own wood find a reputable reliable wood seller So wood sp...

Page 18: ...an dard 1618 the Standard for Wall Protectors Floor Protec tors and Hearth Extensions was adopted as a standard in 2011 UL 1618 categorizes floor and wall protectors as Type 1 or Type 2 protec on A seemingly minor change in UL 1618 calls for the actual thermal proper es of floor protec on to be specified in R value in place of k value In fact that change makes it one step simpler to calculate ther...

Page 19: ...of corrosive fuel etc Damage caused by unauthorized modifica on use or repair Damage caused by the use of non High Valley spare parts or accessories Damage caused by lack of regular maintenance and cleaning by the owner as outlined in the Opera ng Instruc ons or due to negligence or carelessness Damage caused by misuse accident neglect or willful abuse of the product damage caused by the use of an...

Page 20: ... 201 Abbeville SC 29620 www highvalleystoves com High Valley Model 1300 Serial Number High Valley Dealer Date of Purchase Installed by Installa on Date Inspected by Date of Inspec on NOTES OWNER RECORD HL1350 Rev 05 2015 ...

Reviews: