background image


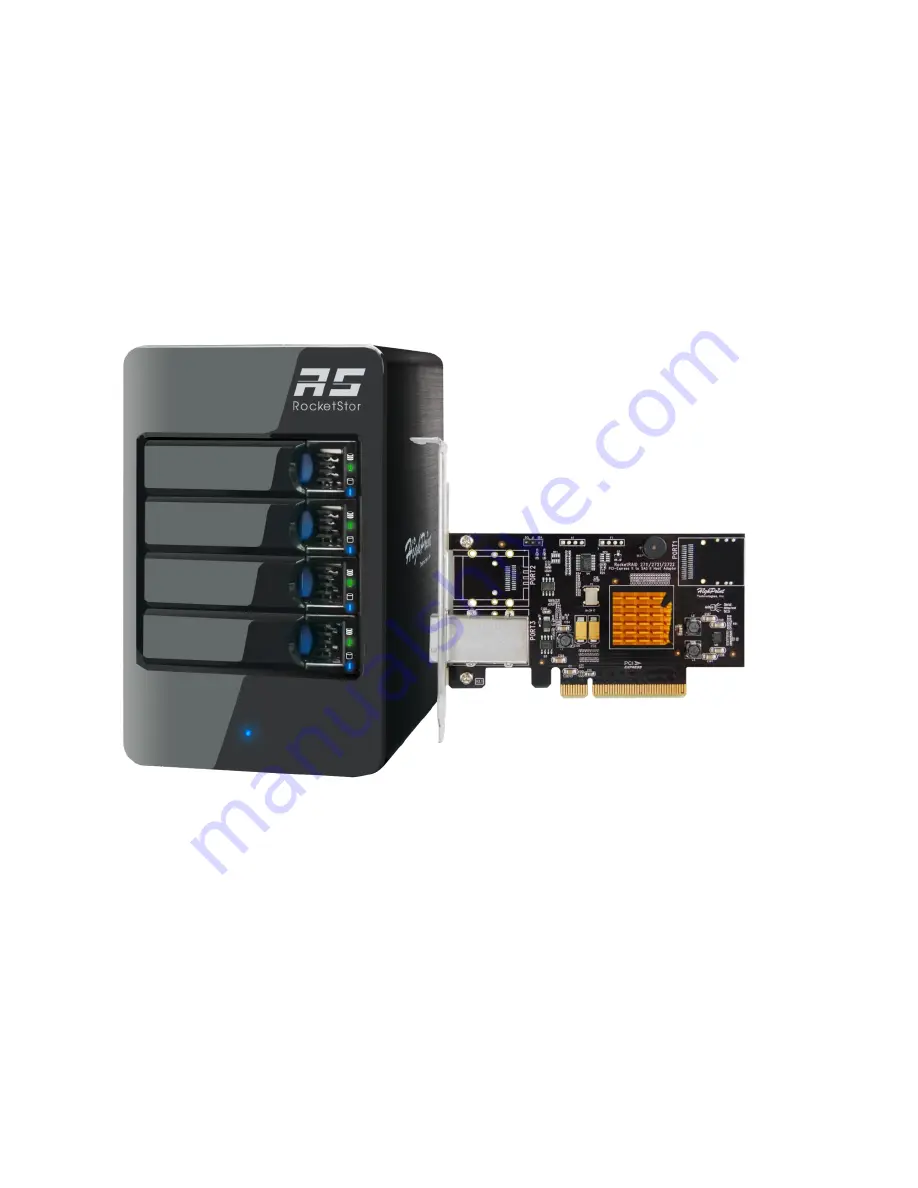
RocketStor 6414TS 

User Manual 


January 15

th

, 2016 

Revision 1.5 
HighPoint Technologies, Inc.


Summary of Contents for RocketStor 6414TS

Page 1: ...1 RocketStor 6414TS User Manual January 15th 2016 Revision 1 5 HighPoint Technologies Inc ...

Page 2: ...CC Rules These limits are designed to provide reasonable protection against harmful interference in a residential installation This equipment generates uses and can radiate radio frequency energy and if not installed and used in accordance with the instructions may cause harmful interference to radio communications However there is no guarantee that interference will not occur in a particular inst...

Page 3: ...e your RAID array 28 RAID Spare Pool 28 WebGUI Remote Login 30 Storage Health Inspector SHI 32 Utilizing the Health Inspector Scheduler 33 RAID Expansion OCE ORLM 35 Troubleshooting Hardware 36 Enclosure Mute Button 36 LED Activity 36 Replacing a Failed Disk 38 Troubleshooting Software 39 WebGUI Connection cannot be established 39 Troubleshooting RAID 39 Critical Arrays 39 Disabled Arrays 41 Frequ...

Page 4: ... 3 Logical Tab 48 Appendix A 4 Setting Tab 57 Appendix B 5 Recover Tab 60 Appendix A 6 Event Tab 62 Appendix A 7 SHI Storage Health Inspector 63 Appendix B WebGUI Icon Guide 64 Appendix C RAID Level Quick Reference 66 Help 67 HighPoint Recommended List of Hard Drives 67 Contacting Technical Support 67 ...

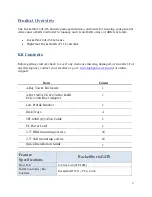
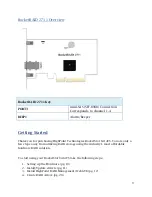
Page 5: ...items are missing damaged or incorrect For any discrepancy contact your reseller or go to www highpoint tech com for online support Item Count 4 Bay Tower Enclosure 1 4 Port SATA 6Gb s Turbo RAID PCIe 2 0x8 Host Adapter 1 Low Profile Bracket 1 Disk Trays 4 SFF 8088 Q SATA Cable 1 UL Power Cord 1 3 5 HDD mounting screws 16 2 5 SSD mounting screws 16 Quick Installation Guide 1 Feature Specifications...

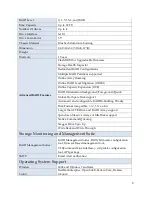
Page 6: ...ackground Foreground Quick Global Hot Spare Disk support Automatic and configurable RAID Rebuilding Priority Disk Format compatible 512 512e 4Kn Larger than 2 TB Drive and RAID Array support Spin down Massive Arrays of Idle Disks support Native Command Queuing Stagger Drive Spin Up Write Back and Write Through Storage Monitoring and Management Suite RAID Management Suites RAID Management Suites BI...

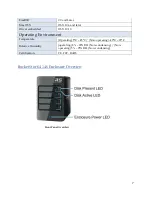
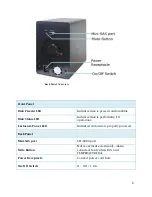
Page 7: ...edded OS X 10 10 Operating Environment Temperature Operating 5 C 45 C Non operating 40 C 65 C Relative Humidity operating 8 90 RH Non condensing Non operating 5 95 RH Non condensing Certification CE FCC RoHS RocketStor 6414S Enclosure Overview Front Panel Overview ...

Page 8: ... LED Indicates disk is performing I O operations Enclosure Power LED Indicated enclosure is properly powered Back Panel Mini SAS port SFF 8088 port Mute Button Mutes enclosure alarm only Alarm sounds off only when FAN and TEMPERATURE fail Power Receptacle Connect power cord here On Off Switch O Off I On ...

Page 9: ...sing HighPoint Technologies RocketStor 6414TS You are only a few steps away from utilizing RAID storage using the industry s most affordable hardware RAID solution To start using your RocketStor 6414TS take the following steps 1 Setting up the Hardware pg 10 2 Install Update drivers pg 11 3 Install HighPoint RAID Management WebGUI pg 17 4 Create RAID Arrays pg 20 ...

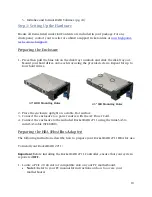
Page 10: ...s 3 5 HDD Mounting Holes 2 5 SSD Mounting Holes 2 Place the enclosure upright on a stable flat surface 3 Connect the enclosure to a power source with the AC Power Cord 4 Connect the enclosure to the included RocketRAID 2711 using the mini SAS to mini SAS cable SFF 8088 Preparing the HBA Host Bus Adapter The following instructions describe how to prepare your RocketRAID 2711 HBA for use To install ...

Page 11: ...slots Step 2 Install Update Drivers Installing Drivers on an Existing Operating System Drivers provide a way for your operating system to communicate with your new hardware Updating to the latest drivers ensures your product has the latest performance stability and compatibility improvements Drivers are updated regularly at www highpoint tech com For Windows Users 1 Download the latest driver file...

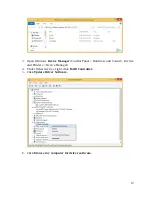
Page 12: ...ows Device Manager Control Panel Hardware and Sound Devices and Printers Device Manager 4 Under Other devices right click RAID Controller 5 Click Update Driver Software 6 Click Browse my computer for driver software ...

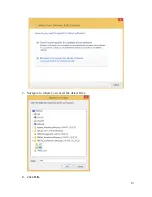
Page 13: ...13 7 Navigate to where you saved the driver files 8 Click OK ...

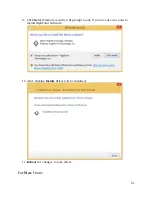
Page 14: ...9 Click Next Windows security will prompt to ask if you are sure you want to install HighPoint Software 10 After clicking Install driver will be installed 11 Reboot for changes to take effect For Mac Users ...

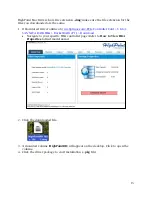
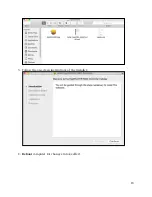
Page 15: ...www hptmac com PCIe Controller Card 6 Gb s SAS SATA RAID HBA RocketRAID 2711 Download Navigate to your specific HBA controller page Refer to How to View HBA Properties to find model name 2 Click the downloaded file 3 A mounted volume HighPointRR will appear on the desktop Click to open the volume 4 Click the driver package to start installation pkg file ...

Page 16: ...16 5 Follow the on screen instructions of the installer 6 Reboot computer for changes to take effect ...

Page 17: ...er Installed is Yes Click Apple Icon About this Mac System Report PCI Step 3 Install HighPoint RAID Management WebGUI The HighPoint RAID Management WebGUI software is necessary to create maintain and view your RAID arrays ...

Page 18: ...te at www highpoint tech com Support Documents and Downloads RocketStor 6414TS Windows WebGUI 2 Extract and open the contents of the downloaded file 3 Double click HighPoint RAID Management exe 4 Follow the on screen instructions to complete the WebGUI installation ...

Page 19: ...sitive For Mac Users 1 Download the latest WebGUI from our website www hptmac com PCIe Controller Card 6 Gb s SAS SATA RAID HBA RocketRAID 2711 Download 2 Double Click the downloaded Mac WebGUI file 3 Double click the HighPointWebGUI pkg to start he WebGUI installer 4 Follow the installer on screen instructions to complete the WebGUI installation 5 Double click the HighPoint RAID Management deskto...

Page 20: ...Open Control Panel 2 Click Uninstall a program 3 Select HighPoint RAID Management to uninstall For Mac Users 1 Navigate to Applications HPTWEBGUI uninstall 2 Click on the uninstall script 3 Type in the Administrator password when prompted Step 4 Create RAID Arrays using WebGUI For both Mac and Windows users 1 Login to WebGUI Default username RAID password hpt 2 Once logged in click the Logical tab...

Page 21: ...ray 7 Select Quick Init as the initialization method Note Quick Init gives immediate access to the array by skipping parity synchronization Recommended for testing verification purposes or when new disks are used 8 Select Write Back as the Cache Policy for better disk write performance 9 Select 64K as the Block Size 10 Select all 4 available disks 11 Leave the Capacity maximum so all disk space wi...

Page 22: ...22 13 Once created the WebGUI will acknowledge the array has been created and the system will prompt you to initialize the new volume Array disk is created ...

Page 23: ...23 The new volume needs to be initialized before use Array successfully created Windows For Windows platforms user will be prompted to initialize disks in Disk Management ...

Page 24: ...itialize and format the RAID Array Before using the newly created RAID array you must initialize and format the new volume For Windows Users 1 After creating the RAID array open Windows Disk Management 2 Disk Management will ask to initialize unknown disks either in MBR format or GPT Windows Disk Management asks to initialize the disks before use As a general rule select MBR for disks less than 2T...

Page 25: ...isk and click properties 4 In properties check and make sure it is a HPT VD HighPoint Virtual Disk Disk properties show HPT VD 0 0 5 Once the disk has been confirmed right click the unallocated space and click New Simple Volume ...

Page 26: ... configure and format the drive 7 Once finished the new volume will receive a drive letter and be available for use RAID array is now formatted as NTFS and drive letter E For Mac Users 1 After creating a RAID array click Initialize when prompted Note If you ignored the prompt simply open Disk Utility ...

Page 27: ...27 Disk Utility for Mac 2 In Disk Utility select the Volume you created on the right then click the Erase tab ...

Page 28: ...aintain your arrays to prevent any critical failures from occurring Spare Pool pg 28 Email Notifications pg 29 WebGUI Remote Login pg 30 Storage Health Inspector pg 33 Health Inspector Scheduling pg 33 RAID Spare Pool Physical drives marked as a spare will automatically be added to a redundant RAID array RAID levels 1 10 5 and 6 whenever there is a disk failure Enabling this feature minimizes the ...

Page 29: ...Notification box 2 Enter the ISP server address name or SMTP name 3 Type in the email address of the sender email account that is going to send the alert 4 Type in the account name and password of the sender 5 Type in the SMTP port default 25 6 Check support SSL box if SSL is supported by your ISP port value will change to 465 refer to your ISP if you have a specific SMTP port Note After you click...

Page 30: ...y in under Recipients The email will send to your recipients the output recorded in the event log Example event log email message WebGUI Remote Login A user connected to a local network can remotely access the WebGUI using the IP address of the host device To obtain your IP address For Windows Users 1 Open a command prompt window on the host computer 2 Type ipconfig 3 Look for the section that con...

Page 31: ... access the WebGUI using any other computer that is in your local network by opening any web browser and typing http IP address of host computer 7402 default port is 7402 For Mac Users 1 Open a terminal window on the host computer computer that is connected to the RocketStor 6414TS enclosure 2 Type ifconfig 3 Look for the connection that has status active 4 Write the IP address located after inet ...

Page 32: ...torage Health Inspector monitors each individual disk s health Monitoring disk SMART attributes can prevent critical RAID failures from occurring This section covers the following Enabling SMART Monitoring Disabling SMART Monitoring Changing HDD Temperature Threshold Enabling SMART Monitoring ...

Page 33: ...ange the disk status to Failed The alarm will not alert you when this setting is changed And any potential warnings due to S M A R T attribute technology will not Changing HDD Temperature Threshold To ensure hard disk temperatures remain within safe operating temperatures enable Storage Health Inspector to monitor disk temperatures In SHI you can set a threshold so that the WebGUI or controller al...

Page 34: ...fy task 6 Type the name in Task Name entry box 7 Choose whether you want to schedule One time verify task on specific date YYYY MM DD at HH MM SS 24 hr clock Or a specific schedule you can adjust based on Daily Weekly or Monthly options 8 Click Submit 9 Your entry will appear under Tasks List Note New Verify Task box only appears if you have normal status arrays If you have a critical array New Re...

Page 35: ...ct desired controller from drop down menu on top left 3 Click Logical 4 Click Maintenance for the array you want to change Select a different RAID level to Migrate Select the same RAID level to Expand 5 Important Record all the physical drives currently in array 6 Click ORLM 7 Select the physical drives you recorded earlier and the drives you want to add 8 Click Submit Upon submission you will rec...

Page 36: ...mute button on the back will mute the alarm for enclosure related issues such as enclosure FAN or TEMPERATURE failures Failures associated with the RAID controller will trigger the RAID card alarm and cannot be muted with the enclosure mute button LED Activity The following information tells you how to interpret LED activity seen on the enclosure and disk trays Table 1 LED Status Information LED S...

Page 37: ...grity Transferring data STABLE BLUE Enclosure is properly powered UNLIT Unit is powered OFF Disk tray is empty No disk I O occuring Table 2 LED Diagrams Icon Normal Faulty Disk Tray Top LED When powered on the LED will be a STABLE GREEN N A Disk Tray Bottom LED When disk is busy LED will be BLINKING BLUE N A ...

Page 38: ...ify N A Replacing a Failed Disk When a disk in your array fails it is important to get it replaced or rebuilt as soon as possible to prevent any data loss 1 Identify the faulty disk Look at the front panel for the RED disk error LED to be LIT Log in to WebGUI and check the Logical Tab 2 Once disk has been identified press the disk tray blue tab and slide the failed drive out 3 Replace the failed d...

Page 39: ...S RAID Controller is not listed check to see if RAID Controller is under Unknown devices If RAID Controller is under unknown devices re install RocketRAID drivers If no RAID Controller is present recheck your hardware and cables b For Mac Users Click the Apple Icon on the menu bar Click About this Mac System Report Click PCI Check to see the Type RAID Controller and Driver Installed Yes If Driver ...

Page 40: ...h a new disk make sure the new disk capacity is equal to or greater than the faulty disk capacity Also make sure previous RAID configurations on the replacement disk are deleted 4 Once a new disk is added add the new disk into the critical array Log in to WebGUI Click Logical Tab Click Maintenance Add disk select the appropriate disk 5 Rebuild should start automatically If rebuild does not start c...

Page 41: ...ur array go offline due to an error or physical disconnection your array will become disabled To recover a disabled array using the Recover Tab will yield the best results To utilize the Recover tab you will need to insert the exact physical drives that are listed on the recover list The goal of using recover is to get the RAID status back to critical normal allowing you to access and back up your...

Page 42: ...en Terminal 2 Type or navigate to cd usr share hpt 3 Type rm hptuser dat to remove the file Note must be root user mode to remove this file 4 Reboot Online Array Roaming One of the features of all HighPoint RAID controllers is online array roaming Information about the RAID configuration is stored on the physical drives So if the RocketStor 6414S fails or you wish to use another RAID controller th...

Page 43: ...les in each driver package for steps to install The latest drivers can be found at www highpoint tech com Appendix A Navigating the HighPoint WebGUI The HighPoint WebGUI management utility allows you to do several key things Tab Name Function Global View View HBA Host Bus Adapter and ...

Page 44: ...or View and schedule S M A R T monitoring Recover Revert to previously created arrays Logout Logout of WebGUI Help Additional WebGUI documentation Online Web Support How to Login HighPoint WebGUI You can reach the HighPoint WebGUI log in page either by Double clicking on the HighPoint RAID Management icon created on your desktop Opening your preferred web browser and typing http localhost 7402 in ...

Page 45: ...roperties Storage Properties On the top left of the page is a drop down menu that allows you to select which controller you want to manage if you have multiple HighPoint controllers connected HBA Properties Host Adapter model the model name of the controller Enclosure Count number of external enclosures detected Physical drives number of drives seen by the controller Legacy Disks number of Legacy ...

Page 46: ... the controller you are using Information about the firmware BIOS and operating temperatures are all located here This information is useful for identifying what RAID controller model you have and to make sure you have the most updated version available Controller Information Lists the controller model name BIOS version and vendor Model Name RocketRAID 2711 SAS Controller BIOS Version v1 0 Vendor ...

Page 47: ...ity Total capacity of the physical drive Revision HDD device firmware revision number Read Ahead Enable Disable Disk read ahead Location Device location example 1 2 states controller 1 slot 2 Write Cache Enable Disable the disk write cache Max Free space on disk that is not configured in an array Status Normal disabled critical status of the disk ...

Page 48: ... ahead will speed up read operations by pre fetching data and loading it into RAM Write Cache Enabling write cache will speed up write operations NCQ Native Command Queuing A setting that allows disks to queue up and reorder I O commands for maximum efficiency Identify LED N A Rescan Clicking rescan will immediately signal the controller to scan for any changes in the connection Clicking this butt...

Page 49: ...pare pool The logical tab has the following settings Create Array Spare Pool Logical Device Rescan Beeper Mute An array is a collection of physical disks that will be seen as one virtual drive by your Operating System OS The RocketStor 6414TS has a RocketRAID 2711 controller capable of creating the following array types ...

Page 50: ...on the application you use it for Note Refer to RAID level Quick Reference Array Name the name that will be displayed in Logical Device Information Default RAID_ level _ array number Initialization Method Keep Old Data This option skips the initialization process and all data on each physical disk of the array will be untouched Quick Init Grants immediate access to the array volume This option wil...

Page 51: ...sk when a power outage occurs any data in the cache will be lost Write Through Data written to an array is directly written onto the disk meaning lower write performance for higher data availability Without cache acting as a buffer write performance will be noticeably slower but data loss due to power outages or other failures is significantly minimized Block Size default 64K A block size of 64 KB...

Page 52: ... is in critical status Disks added to the spare pool will show under Spare Pool and can be removed by checking the disk checkbox from Spare Pool Click Remove Spare Logical Device Information Logical device tab is the default page upon clicking the Logical tab of the WebGUI This page contains information about your RAID arrays and individual disks your system detects Logical Device Information Arra...

Page 53: ... Maintenance options for Normal Arrays Delete deletes the selected RAID array Unplug powers off the selected RAID array Verify verifies the integrity of the RAID array Change Cache Policy Toggles between Write through and Write back cache Change Margin Adjust margin when DV mode is enabled Rename renames the RAID array OCE ORLM Online Capacity Expansion Online RAID Level Migration ...

Page 54: ...k replaces the Verify disk option Once array status changes to critical the faulty disk will be taken offline and you can either Reinsert the same disk Insert new disk Reinserting the same disk should trigger rebuilding status since data on the disk would be recognized If you insert a new disk clicking add disk will give you the option to select that disk and add it to the array ...

Page 55: ...function Your data will be inaccessible Rebuilding will not trigger since RAID does not have enough parity data to rebuild upon Your options in Maintenance of a Disabled array are Delete will delete the array Unplug will take array offline making it safe to remove Recover will attempt to recover the array using the list from the recover tab ...

Page 56: ...click rescan until all physical drives are detected and appear under Logical Device Information Beeper Mute The controller emits a beeping sound whenever an Array falls into critical status Array falls into disabled status You unplug a disk Your disk fails due to bad sectors SMART sensors anticipate drive failure If device is currently beeping clicking Beeper Mute will mute the sound immediately N...

Page 57: ...g Tab Under this tab user can Enable auto rebuilding Enable rebuilding on error Turn audible alarm on off Set spindown time for idle disks Restrict to localhost Set rebuild priority Change port number Change WebGUI password ...

Page 58: ...ble audible alarm default Enabled When a physical disk fails the controller will emit an audible sound signaling failure This option mutes the alarm Set Spindown Idle Disk minutes default Disabled When set physical drives will spindown a certain amount of time after disk activity ceases Only 10 20 30 60 120 180 240 minutes setting are available Restrict to localhost access default Enabled Remote a...

Page 59: ...vent Tab trigger SMTP settings To set up email alerts 1 Check the Enable Event Notification box 2 Enter the ISP server address name or SMTP name 3 Type in the email address of the sender email account that is going to send the alert 4 Type in the account name and password of the sender 5 Type in the SMTP port default 25 6 Check support SSL box if SSL is supported by your ISP port value will change...

Page 60: ...ype s of events will trigger an email in the respective Event Level check boxes 4 Optional Click test to confirm settings are correct by sending out a test email 5 Click add to add the recipient to recipient list 6 The added recipient will display in under Recipients The email will send to your recipients the output recorded in the event log Example email message Example event log email Appendix B...

Page 61: ...tion of physical drives Model of physical drives Important When recovering an array it is important to note the location and model of each physical drive because you can only recover using those exact positions and drive model Backup your Recover List The recover list is a record of your previously created arrays containing the model and location information of your physical drives Recovering from...

Page 62: ...up recover list will completely replace the current recover list 5 Click Submit Appendix A 6 Event Tab In the event tab you can see log entries associated with the HighPoint device The event log provides useful information when troubleshooting your set up In the event tab there are four options available Download save the log file on your computer Clear clears all log entries Prev view previous lo...

Page 63: ... basic error logging tool built into the HighPoint WebGUI Appendix A 7 SHI Storage Health Inspector S M A R T Attributes HDD Temperature Threshold Storage Health Inspector Scheduling The SHI outputs information collected using SMART Self Monitoring Analysis and Reporting Technology Hard Drive Technology The data provided on this tab helps you to anticipate any disk failures based on a variety of m...

Page 64: ...aning more than one disk failed and the array is no longer accessible Initializing The array is initializing The two types of initialization is Foreground and Background See Initialization Uninitialized The array initialization process has been interrupted and the process is incomplete Not Initialized Disk is not initialized yet and needs to be initialized before use OCE ORLM Array is performing a...

Page 65: ... is currently rebuilding Verifying The array is performing a data consistency check Array status will show verifying Disabled The array does not have enough disks to maintain the RAID level A disabled array is not accessible OCE ORLM Array is expanding its capacity or migrating to a different raid level Status will display Expanding Migrating OCE ORLM stopped The Expansion Migrating process has be...

Page 66: ...owed by stripe 4 50 High read performance and medium write performance with data protection for up to 2 drive failures Useable storage capacity equals total capacity of all drives in the array minus two Fast database and application servers which need performance and data protection RAID 5 Disk Striping with Rotating parity 3 67 94 High read performance and medium write performance with data prote...

Page 67: ...t every hard drive in the market can be tested this list is meant to be a general guideline for selecting hard drives operating in a RAID environment Regular desktop grade drives are highly not recommended for RAID use http highpoint tech com PDF Compatibility_List RocketRAID_600_2700_3600_and_4500_Series_RAID _HBA_Hard_Drive_Compatiblity_List pdf Contacting Technical Support For any help and supp...

Reviews: