background image

HSL Mini-Matrix Quick Setup Guide 

Table of Contents

SECTIONS

1

2

3

INSTALLATION

Step 2 - Power ON the Mini-Matrix

1.

Turn ON all the PCs.

2.

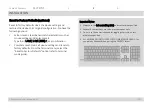
Connect the power supply and power ON the Mini-Matrix 
(approximate boot time is 10 seconds).

The Mini-Matrix boots into default mode, 
where the source number 1 is presented on
both displays.

9

Note: In case no picture is presented after powering ON, switch
between the primary and secondary displays, or connect an alternate
display, or perform a reset to factory default.

Summary of Contents for Mini-Matrix SX22D-3

Page 1: ...3 Secure 2P to 2P DVI I Video KVM Mini Matrix PP 3 0 SX22H 3 Secure 2P to 2P HDMI Video KVM Mini Matrix PP 3 0 SX22PH 3 Secure 2 Port x 2 DP HDMI to DP HDMI Video KVM Mini Matrix PP 3 0 SX22PP 3 Secur...

Page 2: ...2 3 TABLE OF CONTENTS 2 Introduction 3 HSL Secure Mini Matrix 3 Package Contents 4 Before Installation 5 Tamper Evident Labels 6 Active Anti Tampering System 7 Installation 8 Installing the Mini Matri...

Page 3: ...ing multi computer 3 environments where users are required to view and interact with several computers while maintaining the highest isolation between computers and peripherals Eliminates the need for...

Page 4: ...ide Table of Contents SECTIONS 1 2 3 INTRODUCTION Package Contents Inside the product packaging is the following 4 Model Description Qty SX22x 3 Secure 2P to 2P DVI I HDMI DP HDMI DP Video KVM Mini Ma...

Page 5: ...packaging seal looks suspicious contact the HSL support team and do not use the product After seal removal inspect the packaging content to verify that the required components are included See the pac...

Page 6: ...case of enclosure intrusion attempts These labels indicate white dots or the text VOID once removed When opening the product s packaging inspect the tampering evident label If for any reason one or mo...

Page 7: ...ini Matrix KVM Switch is equipped with an always on active antitampering system If mechanical intrusion is detected by this system the switch is permanently disabled and the LED blinks continuously If...

Page 8: ...o support user authentication across multiple isolated sources 2 Connect the computer source channel ports For each source connect the video keyboard mouse fUSB and audio cables to the Mini Matrix sou...

Page 9: ...ower supply and power ON the Mini Matrix approximate boot time is 10 seconds The Mini Matrix boots into default mode where the source number 1 is presented on both displays 9 Note In case no picture i...

Page 10: ...Type the L Ctrl L Ctrl F11 r key combination Complete reset Clears all device settings and resets to factory defaults From the Terminal menu select the Reset to Factory Defaults option refer to termi...

Page 11: ...the primary panel and 3 is selected on the secondary panel the selected sources are presented accordingly A source can be duplicated by selecting its number on both panels By default mouse keyboard a...

Page 12: ...ith cursor navigation the user can move from one highly isolated computer system to another by simply moving the mouse cursor across display borders Once the cursor crosses the display border the keyb...

Page 13: ...ir respective owners Images for demonstration purposes only This document may contain confidential and or proprietary information of HSL Corporation and its receipt or possession does not convey any r...

Reviews: