English
54
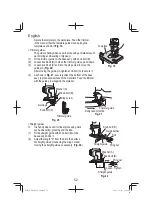
(3) Installation to the tool is the same as that for straight
line processing.
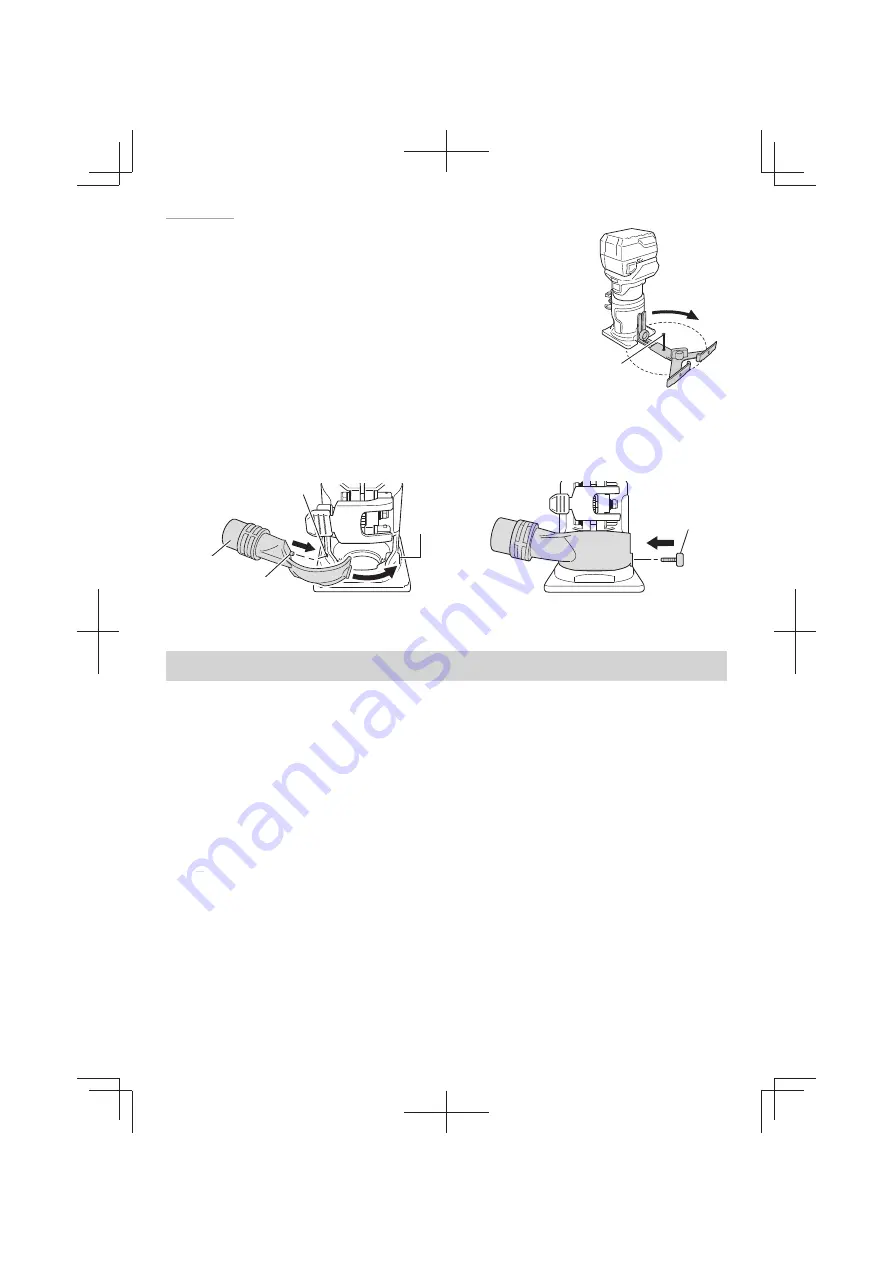
(4) Align the hole of the straight guide left in the center position of the
circle processing, and
fi
rmly secure with a nail less than 6 mm in
diameter which will act as a rotation axis.
Rotate the body towards the right. (
Fig. 26
)
<Dust Collector Set>
Connect the dust collector set cleaner to collect dust.
(1) Slot the protrusion on the inside of the dust collector to the
positioning hole at the front lower left of the base ass’y, and
attach it to cover the front of the base ass’y. (
Fig. 27-a
)
(2) Using the included knob bolt (D) to secure the dust collector hole to the body’s screw hole.
(
Fig. 27-b
)
Fig. 27
Screw hole
Knob bolt (D)
Dust collector
Positioning hole
Protrusion
a
b
OPERATION
WARNING
●
To avoid a serious accident, press the power button located on the switch panel to
turn the power OFF, and pull out the battery.
●
Wear eye protection when operating this tool.
●
Keep your hands, face and other body parts away from the bits and any other
rotating parts, while operating the tool.
CAUTION
●
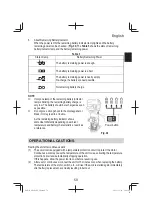
To extend the lifetime, the lithium-ion battery equips with the protection function to
stop the output. Therefore, if the tool is overloaded, the motor may stop. However,
this is not the trouble but the result of protection function. In this case, release the
switch of tool and eliminate the causes of overloading.
●
Pull out the battery after completing operation.
Fig. 26
Body feed
direction
Nail
(rotation axis)
00Book̲M1808DA̲ChS.indb 54
00Book̲M1808DA̲ChS.indb 54
2021/12/01 14:42:47
2021/12/01 14:42:47


