English
35
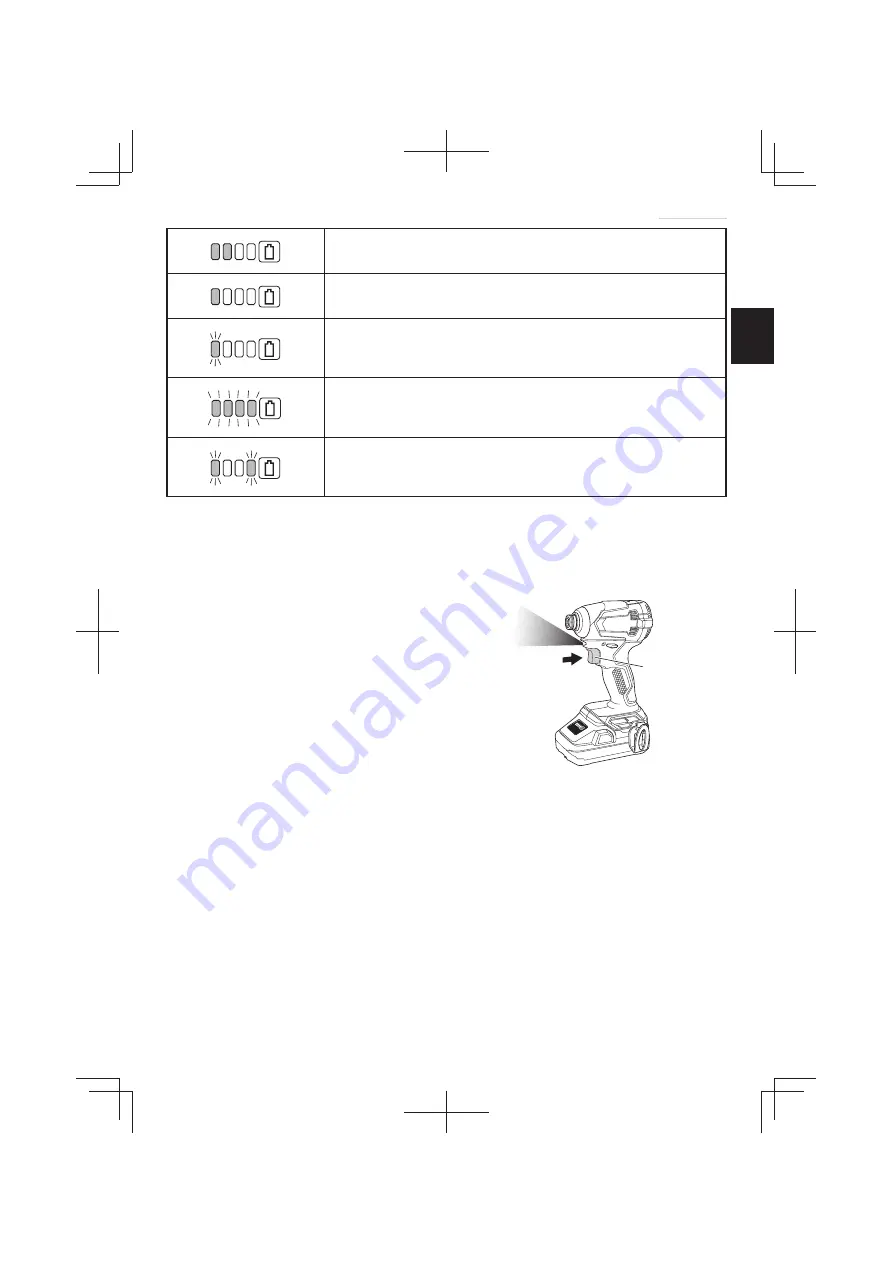
Lights ;
The battery remaining power is 25%–50%.
Lights ;
The battery remaining power is less than 25%
Blinks ;
The battery remaining power is nearly empty. Recharge the battery
soonest possible.
Blinks ;
Output suspended due to high temperature. Remove the battery
from the tool and allow it to fully cool down.
Blinks ;
Output suspended due to failure or malfunction. The problem may
be the battery so please contact your dealer.
As the remaining battery indicator shows somewhat di
ff
erently depending on ambient
temperature and battery characteristics, read it as a reference.
NOTE
Do not give a strong shock to the switch panel or break it. It may lead to a trouble.
5. How to use the LED light
While the switch is pulled, the LED light will
automatically light up the tip portion of the tool.
(
Fig. 12
)
The LED light will automatically turn o
ff
10 seconds after the switch is released.
The LED light also functions as a warning signal
that lights up during use.
For details, see “8. LED light warning signals”.
CAUTION
○
Do not expose directly your eye to the light by looking into the light.
If your eye is continuously exposed to the light, your eye will be hurt.
○
Wipe
o
ff
any dirt or grime attached to the lens of the LED light with a soft cloth,
being careful not to scratch the lens.
Scratches on the lens of the LED light can result in decreased brightness.
6. Tightening and loosening screws
Install the bit that matches the screw, line up the bit in the grooves of the head of the screw,
then tighten it.
Push the impact driver just enough to keep the bit
fi
tting the head of the screw.
Fig. 12
Trigger switch
00Book̲WH18DE̲ChS.indb 35
00Book̲WH18DE̲ChS.indb 35
2022/01/28 9:54:42
2022/01/28 9:54:42


