User Manual of Digital Video Recorder
27
1.6
Starting Up and Shutting Down the Device
Purpose:
Proper startup and shutdown procedures are crucial to expanding the life of the device.
Before you start:
Check that the voltage of the extra power supply is the same with the device’s requirement, and the ground
connection is working properly.
Starting up the device:
Steps (for 7200 series):
1.
Check the power supply is plugged into an electrical outlet. It is HIGHLY recommended that an
Uninterruptible Power Supply (UPS) be used in conjunction with the device.
2.
Press the POWER button on the rear panel. The Power indicator LED should turn green indicating that the
device begins to start up.
3.
After startup, the Power indicator LED is solid green. A splash screen with the status of the HDD appears
on the monitor. The row of icons at the bottom of the screen shows the HDD status. ‘X’ means that the
HDD is not installed or cannot be detected.
Steps (for other series):
1.
Check the power supply is plugged into an electrical outlet. It is HIGHLY recommended that an
Uninterruptible Power Supply (UPS) be used in conjunction with the device.
2.
Turn on the Power Switch on the rear panel and press the
POWER
button on the front panel. The Power
indicator LED should turn blue indicating that the device begins to start up.
3.
After startup, the Power indicator LED is solid blue. A splash screen with the status of the HDD appears
on the monitor. The row of icons at the bottom of the screen shows the HDD status. ‘X’ means that the
HDD is not installed or cannot be detected.
Shutting down the device:
Steps:
There are two proper ways to shut down the device.
• Task 1: Standard shutdown
1.
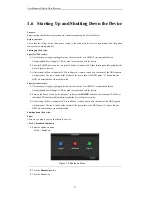
Enter the Shutdown menu.
Menu > Shutdown
Figure 1. 8
Shutdown Menu
2.
Click the
Shutdown
button.
3.
Click the
Yes
button.
Summary of Contents for DS-7208HWI-SV DS-7216HWI-SV
Page 1: ...Digital Video Recorder User Manual UD 6L0202D1336A01 ...
Page 15: ...User Manual of Digital Video Recorder 14 Chapter 1 Introduction ...
Page 30: ...User Manual of Digital Video Recorder 29 Chapter 2 Getting Started ...
Page 42: ...User Manual of Digital Video Recorder 41 Chapter 3 Live View ...
Page 50: ...User Manual of Digital Video Recorder 49 Figure 3 9 Information ...
Page 56: ...User Manual of Digital Video Recorder 55 Chapter 4 PTZ Control ...
Page 66: ...User Manual of Digital Video Recorder 65 Chapter 5 Record and Capture Settings ...
Page 79: ...User Manual of Digital Video Recorder 78 Figure 5 27 Record Schedule ...
Page 92: ...User Manual of Digital Video Recorder 91 Chapter 6 Playback ...
Page 104: ...User Manual of Digital Video Recorder 103 mode ...
Page 117: ...User Manual of Digital Video Recorder 116 Chapter 7 Backup ...
Page 136: ...User Manual of Digital Video Recorder 135 Chapter 8 Alarm Settings ...
Page 142: ...User Manual of Digital Video Recorder 141 Figure 8 12 Copy Settings of Alarm Input ...
Page 153: ...User Manual of Digital Video Recorder 152 Figure 8 27 Copy Settings of Alarm Output ...
Page 155: ...User Manual of Digital Video Recorder 154 Chapter 9 Network Settings ...
Page 182: ...User Manual of Digital Video Recorder 181 Chapter 10 RAID Configuration ...
Page 189: ...User Manual of Digital Video Recorder 188 Figure 10 14 Hot Spare Disk ...
Page 196: ...User Manual of Digital Video Recorder 195 Figure 10 28 Upgrade the Firmware ...
Page 197: ...User Manual of Digital Video Recorder 196 Chapter 11 HDD Management ...
Page 217: ...User Manual of Digital Video Recorder 216 Chapter 12 Camera Settings ...
Page 223: ...User Manual of Digital Video Recorder 222 Chapter 13 Device Management and Maintenance ...
Page 234: ...User Manual of Digital Video Recorder 233 Chapter 14 Others ...
Page 247: ...User Manual of Digital Video Recorder 246 Chapter 15 Appendix ...


