background image

Face Recognition Terminal

User Manual

Summary of Contents for DS-K1T642E

Page 1: ...Face Recognition Terminal User Manual...

Page 2: ...BY YOU IS AT YOUR OWN RISK IN NO EVENT WILL HIKVISION BE LIABLE TO YOU FOR ANY SPECIAL CONSEQUENTIAL INCIDENTAL OR INDIRECT DAMAGES INCLUDING AMONG OTHERS DAMAGES FOR LOSS OF BUSINESS PROFITS BUSINESS...

Page 3: ...vacy by design principles For example for device with facial recognition features biometrics data is stored in your device with encryption method for fingerprint device only fingerprint template will...

Page 4: ...avoided will or could result in death or serious injury Caution Indicates a potentially hazardous situation which if not avoided could result in equipment damage data loss performance degradation or...

Page 5: ...hich can be determined by turning the equipment off and on the user is encouraged to try to correct the interference by one or more of the following measures Reorient or relocate the receiving antenna...

Page 6: ...ed collection points For more information see www recyclethis info 2006 66 EC battery directive This product contains a battery that cannot be disposed of as unsorted municipal waste in the European U...

Page 7: ...or ceiling the device shall be firmly fixed If smoke odors or noise rise from the device turn off the power at once and unplug the power cable and then please contact the service center 1 Risk of expl...

Page 8: ...vice cover because the acidic sweat of the fingers may erode the surface coating of the device cover Please use a soft and dry cloth when clean inside and outside surfaces of the device cover do not u...

Page 9: ...l Manufacturer Standard ADS 26FSG 12 12024EPG Shenzhen Honor Electronic Co Ltd PG MSA C2000IC12 0 24P DE MOSO Technology Co Ltd PDE ADS 26FSG 12 12024EPB Shenzhen Honor Electronic Co Ltd PB ADS 26FSG...

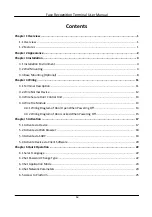
Page 10: ...3 4 4 Wire Fire Module 13 4 4 1 Wiring Diagram of Door Open When Powering Off 13 4 4 2 Wiring Diagram of Door Locked When Powering Off 15 Chapter 5 Activation 17 5 1 Activate via Device 17 5 2 Activat...

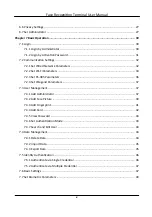
Page 11: ...ters 37 7 3 User Management 37 7 3 1 Add Administrator 37 7 3 2 Add Face Picture 39 7 3 3 Add Fingerprint 41 7 3 4 Add Card 42 7 3 5 View Password 43 7 3 6 Set Authentication Mode 43 7 3 7 Search and...

Page 12: ...er from Device 60 7 11 3 Call Device from Client Software 61 7 11 4 Call Room from Device 62 7 11 5 Call Mobile Client from Device 62 Chapter 8 Operation via Web Browser 63 8 1 Login 63 8 2 Live View...

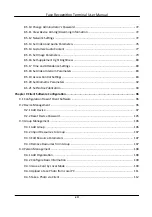
Page 13: ...ters 92 8 5 21 Set Notice Publication 94 Chapter 9 Client Software Configuration 96 9 1 Configuration Flow of Client Software 96 9 2 Device Management 96 9 2 1 Add Device 97 9 2 2 Reset Device Passwor...

Page 14: ...es 121 9 4 18 Delete Registered Pictures 121 9 4 19 Get Person Information from Access Control Device 121 9 4 20 Move Persons to Another Organization 122 9 4 21 Issue Cards to Persons in Batch 123 9 4...

Page 15: ...t Center 155 9 10 1 Enable Receiving Event from Devices 155 9 10 2 View Real Time Events 156 9 10 3 Search Historical Events 158 9 11 Time and Attendance 161 9 11 1 Configure Attendance Parameters 161...

Page 16: ...ntenance 188 Appendix A Tips for Scanning Fingerprint 189 Appendix B Tips When Collecting Comparing Face Picture 191 Appendix C Tips for Installation Environment 193 Appendix D Dimension 194 Appendix...

Page 17: ...drive to the device or export pictures events from the device to the USB flash drive Stand alone operation Manage search and set device data after logging in the device locally Connects to one externa...

Page 18: ...ce vary according to different models Refers to the actual device Here takes face recognition terminal as example Figure 2 1 Face Recognition Terminal Diagram Table 2 1 Description of Face Recognition...

Page 19: ...ait one half hour after switching off before handling parts It is to indicate that the marked item can be hot and should not be touched without taking care For device with this sticker this device is...

Page 20: ...w of the device Avoid device reflection Face recognition distance shall be greater than 30 cm Keep the camera clean Note For details about installation environment see Tips for Installation Environmen...

Page 21: ...oles on the wall or other surface according to the instructions on the mounting template 3 Align the holes to the mounting plate and secure the mounting plate on the wall with the 4 supplied screws Fa...

Page 22: ...oute the cable through the cable hole of the mounting plate and connect to corresponding external devices cables 5 Align the device with the mounting plate and hang the device on the mounting plate Fa...

Page 23: ...Figure 3 3 Hang Device 6 Use one supplied screw to secure the device and the mounting plate Face Recognition Terminal User Manual 7...

Page 24: ...ure 3 4 Secure Device 3 3 Base Mounting Optional Steps 1 Align the hole of the mounting bracket with the device interfaces on the back Note The bracket is optional Face Recognition Terminal User Manua...

Page 25: ...Figure 3 5 Align Bracket and Device 2 Push the bracket from bottom to top Make sure the device is buckled with the bracket Figure 3 6 Buckle Face Recognition Terminal User Manual 9...

Page 26: ...gh the cable hole of the mounting plate and connect to corresponding external devices cables 4 Insert two non slip silicone pads 5 Put the mounted device on the desk or other surface Face Recognition...

Page 27: ...ice should be no more than 60 m when wiring a single device And the door lock and the other peripherals should connect to a 12 VDC external power supply If connecting to a 12 VDC door lock the distanc...

Page 28: ...NO Lock Wiring NO D4 Yellow Green SENSOR Door Contact D5 Black GND Ground D6 Yellow Gray BUTTON Exit Door Wiring D7 Yellow Black GND Ground 4 2 Wire Normal Device You can connect the terminal with nor...

Page 29: ...pply directly 4 3 Wire Secure Door Control Unit You can connect the terminal with the secure door control unit The wiring diagram is as follows Figure 4 2 Secure Door Control Unit Wiring Note The secu...

Page 30: ...e Figure 4 4 Wire Secure Door Control Unit Type 2 Note The fire system NO and COM normally open when powering off is connected with the lock and the power supply in series When an fire alarm is trigge...

Page 31: ...rol Unit 4 4 2 Wiring Diagram of Door Locked When Powering Off Lock Type Cathode Lock Electric Lock and Electric Bolt NC Security Type Door Locked When Powering Off Scenario Installed in Entrance Exit...

Page 32: ...COM normally closed when powering off is connected with the lock and the power supply in series When an fire alarm is triggered the door remains open In normal times NC and COM are open Figure 4 7 Dev...

Page 33: ...t port No 8000 The default user name admin 5 1 Activate via Device If the device is not activated you can activate the device after it is powered on On the Activate Device page create a password and c...

Page 34: ...APP you should scan the QR code to link to the APP For details see After activation if you need to add administrator to manage the device parameters you should set administrator For details see Add Ad...

Page 35: ...nual of SADP for details Steps 1 Run the SADP software and search the online devices 2 Find and select your device in online device list 3 Input new password admin password and confirm the password Ca...

Page 36: ...ired to create the password to activate them before they can be added to the software and work properly Steps Note This function should be supported by the device 1 Enter the Device Management page 2...

Page 37: ...rder to increase the security of your product And we recommend you change your password regularly especially in the high security system changing the password monthly or weekly can better protect your...

Page 38: ...nge the system language the device will reboot automatically 6 2 Set Password Change Type After activating the device you can set the password change type as reserved email address or security questio...

Page 39: ...ions and enter the answers Click Next Note You can only select one type to change password If you need you can enter the web page to set both of the changing types 6 3 Set Application Mode After activ...

Page 40: ...the application mode and tap Next the system will select Indoor by default If you activate the device via other tools remotely the system will select Indoor as the application mode by default 6 4 Set...

Page 41: ...sable DHCP you should set the IP address the subnet mask and the gateway Wi Fi Select a Wi Fi and enter the Wi Fi s password to get connected Or tap Add Wi Fi and enter the Wi Fi s name and the passwo...

Page 42: ...onnect 2 Tap Next 3 Optional Tap Skip to skip the step 4 Optional Tap Previous to go to the previous page Note If you tap Previous to return to the Wi Fi configuration page you need to tap the connect...

Page 43: ...Picture The registered face picture will be saved to the system if you enable the function Upload Pic After Linked Capture Upload Picture After Linked Capture Upload the pictures captured by linked ca...

Page 44: ...the instructions on the device screen Click to confirm Enter the card No or present card on the card presenting area Click OK 4 Click OK You will enter the authentication page Status Icon Description...

Page 45: ...tings Scan QR code to authenticate Note The QR code can be obtained from the visitor terminal Enter the device room No and tap OK to call Tap to call the center Note The device should be added to the...

Page 46: ...or the device only the administrator can login the device for device operation Steps 1 Long tap on the initial page for 3 s and slide to the left right by following the gesture to enter the admin logi...

Page 47: ...ogin the system before other device operations If you do not configure an administrator you should follow the instructions below to login Steps 1 Long tap on the initial page for 3 s and slide to the...

Page 48: ...tion settings page 7 2 1 Set Wired Network Parameters You can set the device wired network parameters including the IP address the subnet mask the gateway and DNS parameters Steps 1 Tap Comm Communica...

Page 49: ...eway automatically Disable DHCP and you should set the IP address subnet mask and gateway manually Note The device s IP address and the computer IP address should be in the same IP segment 4 Set the D...

Page 50: ...set the Wi Fi related parameters Steps Note The function should be supported by the device 1 Tap Comm Communication Settings on the Home page to enter the Communication Settings page 2 On the Communic...

Page 51: ...the target Wi Fi is not in the list tap Add Wi Fi Enter the Wi Fi s name and password And tap OK Note Only digits letters and special characters are allowed in the password 5 Set the Wi Fi s paramete...

Page 52: ...on the Home page to enter the Communication Settings page 2 On the Communication Settings page tap RS 485 to enter the RS 485 tab Figure 7 6 Set RS 485 Parameters 3 Select an peripheral type accordin...

Page 53: ...devices will transmit the card No via Wiegand 26 or Wiegand 34 Input A face recognition terminal can connect a Wiegand card reader 5 Tap to save the network parameters Note If you change the external...

Page 54: ...ase letters lower case letters and special characters are allowed in the user name Up to 32 characters are allowed in the user name 5 Optional Add a face picture fingerprints or cards for the administ...

Page 55: ...ures can be added 1 Long tap on the initial page for 3 s and slide to the left right by following the gesture and log in the backend 2 Tap User to enter the Add User page 3 Edit the employee ID Note T...

Page 56: ...tured face picture will be displayed at the upper right corner of the page 7 Tap Save to save the face picture 8 Optional Tap Try Again and adjust your face position to add the face picture again 9 Se...

Page 57: ...ase letters lower case letters and special characters are allowed in the user name The suggested user name should be within 32 characters 5 Tap the Fingerprint field to enter the Add Fingerprint page...

Page 58: ...name on the soft keyboard Note Numbers upper case letters lower case letters and special characters are allowed in the user name The suggested user name should be within 32 characters 6 Tap the Card f...

Page 59: ...d special characters are allowed in the user name The suggested user name should be within 32 characters 5 Tap the Password to view the password Note The password cannot be edited It can only be appli...

Page 60: ...ng the user you can search the user and edit it Search User On the User Management page Tap the search area to enter the Search User page Tap Card on the left of the page and select a search type from...

Page 61: ...d enroll_pic1 enroll_pic2 enroll_pic3 enroll_pic4 under the root directory The employee ID should be less than 32 characters It can be a combination of lower letters upper letters and numbers It shoul...

Page 62: ...ation For details see Set Authentication Mode Authenticate face fingerprint card or QR code Face Face forward at the camera and start authentication via face Fingerprint Place the enrolled fingerprint...

Page 63: ...via QR code The dimension of the recognized QR code picture should be larger than 6 cm 6 cm 2 After the previous credential is authenticated continue authenticate other credentials Note For detailed...

Page 64: ...and Call Specified Room No If the combination authentication of face and QR code is supported and the QR code shortcut key is disabled there is no QR code shortcut key icon in the authentication page...

Page 65: ...g No Unit No Set the device installed unit No Beauty You can enable the beauty function and set the smooth and the whiten parameter Tap or to control the effect strength Note By default the function i...

Page 66: ...clear images with details Face 1 N Security Level Set the matching threshold when authenticating via 1 N matching mode The larger the value the smaller the false accept rate and the larger the false r...

Page 67: ...abling the face with mask detection the system will recognize the captured face with mask picture You can set face with mask face 1 N level and the strategy Reminder of Wearing If the person do not we...

Page 68: ...gerprint module supports the fingerprint related function Biometric recognition products are not completely applicable to anti spoofing environments If you require a higher security level use multiple...

Page 69: ...interval Available authentication interval range 0 to 65535 7 9 Time and Attendance Status Settings You can set the attendance mode as check in check out break out break in overtime in and overtime ou...

Page 70: ...igured on the platform 7 9 2 Set Manual Attendance via Device Set the attendance mode as manual and you should select a status manually when you take attendance Before You Start Add at least one user...

Page 71: ...dance status manually after authentication Note If you do not select a status the authentication will be failed and it will not be marked as a valid attendance 7 9 3 Set Auto Attendance via Device Set...

Page 72: ...d change its name if required The name will be displayed on the T A Status page and the authentication result page 6 Set the status schedule 1 Tap Attendance Schedule 2 Select Monday Tuesday Wednesday...

Page 73: ...ance mode as Manual and Auto and the system will automatically change the attendance status according to the configured schedule At the same time you can manually change the attendance status after th...

Page 74: ...ance status according to the schedule If you tap the edit icon on the result tab you can select a status to take attendance manually the authentication will be marked as the edited attendance status E...

Page 75: ...e number of user face picture card event and fingerprint Note Parts of the device models support displaying the fingerprint number Refers to the actual page for details Device Upgrade Plug the USB fla...

Page 76: ...ding to the prompts 2 Run the client software and the control panel of the software pops up 3 Click Device Management to enter the Device Management interface 4 Add the device to the client software N...

Page 77: ...d starts two way audio Note The device will call the main station in priority 7 11 3 Call Device from Client Software Steps 1 Get the client software from the supplied disk or the official website and...

Page 78: ...m If you have not configured a specified room No in the Basic Settings you should tap on the authentication page of the device Enter the room No on the dial page and tap to call the room 7 After the i...

Page 79: ...the password Click Login Login via Remote Configuration of Client Software Download and open the client software After adding the device click to enter the Configuration page 8 2 Live View You can vie...

Page 80: ...ure Click OK to save the person Add Basic Information Click User Add to enter the Add Person page Add the person s basic information including the employee ID the person s name user level floor No and...

Page 81: ...the Add Person page After check Adminstrator in Access Control the added person can log in by authenticating face Click OK to save the settings Add Authentication Mode Click User Add to enter the Add...

Page 82: ...ed on the right panel 8 5 Configuration 8 5 1 Set Local Parameters Set the live view parameters record file saving path and captured pictures saving path Set Live View Parameters Click Configuration L...

Page 83: ...the device name language model serial No QR code version device capacity etc Click Configuration System System Settings Basic Information to enter the configuration page You can view the device name l...

Page 84: ...ST Page 2 Check Enable DST 3 Set the DST start time end time and bias time 4 Click Save to save the settings 8 5 5 View Open Source Software License Go to Configuration System System Settings About De...

Page 85: ...e to the default settings except for the device IP address and the user information Unlink APP Account Unlink the Hik Connect account from the platform Import and Export Parameters Click Configuration...

Page 86: ...mode for logging in the client software On the Device for Management page click Configuration System Security Security Service Select a security mode from the drop down list and click Save Security M...

Page 87: ...ocal computer 7 Send the asking file to a certification authority for signature 8 Import the signed certificate 1 Select a certificate type in the Import Passwords area and select a certificate from t...

Page 88: ...least three kinds of following categories upper case letters lower case letters numbers and special characters in order to increase the security of your product And we recommend you change your passwo...

Page 89: ...system will allocate the IPv4 address IPv4 subnet mask and the IPv4 default gateway automatically NIC Type Select a NIC type from the drop down list By default it is Auto DNS Server Set the preferred...

Page 90: ...onfiguration Network Basic Settings Wi Fi Figure 8 6 Wi Fi Settings Page 2 Check Wi Fi 3 Select a Wi Fi Click of a Wi Fi in the list and enter the Wi Fi password Click Add and enter a Wi Fi s name pas...

Page 91: ...accessing device via ISUP protocol Steps Note The function should be supported by the device 1 Click Configuration Network Advanced Settings Platform 2 Select ISUP from the platform access mode drop...

Page 92: ...IP or host via HTTP protocol Before You Start The destination IP or host name should support the HTTP protocol to receive the alarm information Note The function should be supported by the device Ste...

Page 93: ...audio stream type and audio encoding You can also drag the block to adjust the device input and output volume Click Save to save the settings after the configuration Note The functions vary according...

Page 94: ...ce will broadcast the configured content 3 Enter the audio content 4 Optional Repeat substep 1 to 3 5 Optional Click to delete the configured time duration 4 Set the time duration when authentication...

Page 95: ...Page 2 Configure the parameters to adjust the image Video Standard Set the video frame rate when performing live view remotely After changing the standard you should reboot the device to take effect P...

Page 96: ...t Settings Page 2 Select a supplement light type and mode from the drop down list If you select the mode as ON you should set the brightness 8 5 17 Time and Attendance Settings If you want to track an...

Page 97: ...and click Delete Or click Delete All to clear the settings 6 Click Save Set Manual Attendance via Web Set the attendance mode as manual and you should select a status manually when you take attendanc...

Page 98: ...ect an status and change its name if required 6 Set the status schedule Refers to Time Settings for details Set Manual and Auto Attendance via Web Set the attendance mode as Manual and Auto and the sy...

Page 99: ...used as a door station outer door station or access control device You should set the device No before usage Click Configuration Video Intercom Device No If set the device type as Door Station or Acc...

Page 100: ...r Station No If you select outer door station as the device type you should enter a number between 1 and 99 Note If you change the No you should reboot the device Community No Set the device installed...

Page 101: ...val Person A can only recognized once If another person Person B has recognized during the interval Person A can recognized again Authentication Interval You can set the authentication interval of the...

Page 102: ...me the card reader will turn offline automatically Max Interval When Entering Password When you entering the password on the card reader if the interval between pressing two digits is longer than the...

Page 103: ...By default it is Remain Closed Extended Open Duration The door contact can be enabled with appropriate delay after person with extended access needs swipes her his card Door Remain Open Duration with...

Page 104: ...e EM card function Configure SIP Parameters Set the device s IP address and the SIP server s IP address After setting the parameters you can communicate among the access control device door station in...

Page 105: ...ller If connect the device to a terminal via the RS 485 interface set the RS 485 address as 2 If you connect the device to a controller set the RS 485 address according to the door No Baud Rate The ba...

Page 106: ...two devices will transmit the card No via Wiegand 26 or 34 4 Click Save to save the settings Note If you change the peripheral and after you save the device parameters the device will reboot automati...

Page 107: ...tform automatically Save Captured Picture When Authenticating If you enable this function you can save the picture when authenticating to the device Save Registered Picture The registered face picture...

Page 108: ...nable or disable the live face detection function If enabling the function the device can recognize whether the person is a live one or not Note Biometric recognition products are not completely appli...

Page 109: ...n rate Face Recognition Timeout Value Set the timeout value when face recognizing If the face recognition time is longer than the configured value the system will pop up a prompt ECO Mode After enabli...

Page 110: ...and the door will open Prompt and Not Open Door If the person do not wear a face mask when authenticating the device prompts a notification and the door keeps closed Fingerprint Security Level Select...

Page 111: ...heme can be added Play Schedule After you have created a theme you can select the theme and draw a schedule on the time line Select the drawn schedule and you can edit the exact start and end time Sel...

Page 112: ...ftware Follow the flow diagram below to configure on the client software Figure 9 1 Flow Diagram of Configuration on Client Software 9 2 Device Management The client supports managing access control d...

Page 113: ...Refresh Every 60s to refresh the information of the online devices Add Single or Multiple Online Devices The client can detect online devices which are in the same network as the PC running the clien...

Page 114: ...heck one or more online device s and click Add to open the device adding window Figure 9 3 Add Single Online Device Figure 9 4 Add Multiple Online Devices 4 Enter the required information Face Recogni...

Page 115: ...all passwords and other security settings is the responsibility of the installer and or end user 5 Optional Check Transmission Encryption TLS to enable transmission encryption using TLS Transport Lay...

Page 116: ...ally checked We highly recommend you change the password of your own choosing using a minimum of 8 characters including at least three kinds of following categories upper case letters lower case lette...

Page 117: ...value is 8000 User Name Enter the device user name By default the user name is admin Password Enter the device password Caution The password strength of the device can be automatically checked We hig...

Page 118: ...mported to this group 8 Finish adding the device Click Add to add the device and back to the device list page Click Add and New to save the settings and continue to add other device Add Devices by IP...

Page 119: ...e certificate file exported from the device to this default directory to strengthen the security See for details about enabling certificate verification You can log into the device to get the certific...

Page 120: ...ion such as device name device account and ISUP key Check Online User Click on Operation column to check the online users who access the device such as user name user type user s IP address and login...

Page 121: ...ords and other security settings is the responsibility of the installer and or end user Import to Group Enter 1 to create a group by the device name All the channels of the device will be imported to...

Page 122: ...e the added resources in different groups You can group the resources into different groups according to the resources locations Example For example on the 1st floor there mounted 16 doors 64 alarm in...

Page 123: ...ected resources to the group 9 3 3 Edit Resource Parameters After importing the resources to the group you can edit the resource parameters For access point you can edit the access point name For alar...

Page 124: ...gement of the persons You can also add a surbodinate organization for the added one Steps 1 Enter Person module 2 Select a parent organization in the left column and click Add in the upper left corner...

Page 125: ...address validity period etc 5 Confirm to add the person Click Add to add the person and close the Add Person window Click Add and New to add the person and continue to add other persons 9 4 3 Issue a...

Page 126: ...ion Note Currently the supported card enrollment station models include DS K1F100 D8 DS K1F100 M DS K1F100 D8E and DS K1F180 D8E Card Type This field is only available when the model is DS K1F100 D8E...

Page 127: ...ed in local PC to the client as the person s profile Steps 1 Enter Person module 2 Select an organization in the organization list to add the person and click Add Note Enter the person s basic informa...

Page 128: ...person s basic information first For details refer to Configure Basic Information 3 Click Add Face in the Basic Information area 4 Select Take Photo to enter Take Photo window 5 Optional Enable Verif...

Page 129: ...ded to the client which supports facial recognition function Steps 1 Enter Person module 2 Select an organization in the organization list to add the person and click Add Note Enter the person s basic...

Page 130: ...y means you can collect the fingerprint via the fingerprint recorder connected directly to the PC running the client The fingerprints recorded can be used as credentials of the persons to access the a...

Page 131: ...to add the person and click Add Note Enter the person s basic information first For details about configuring person s basic information refer to Configure Basic Information 3 In the Credential Finger...

Page 132: ...Access Control Information 4 Set a unique PIN code for the person which can be used for access authentication Manually enter a PIN code containing 4 to 8 digits Note Persons PIN codes cannot be repeat...

Page 133: ...ess control devices Note The Super User Extended Door Open Time Add to Blocklist and Mark as Visitor functions cannot be enabled concurrently For example if one person is set as super user you cannot...

Page 134: ...person and click Add Note Enter the person s basic information first For details about configuring person s basic information refer to Configure Basic Information 3 In the Resident Information panel...

Page 135: ...le persons in a predefined template CSV Excel file to import the information to the client in a batch Steps 1 Enter the Person module 2 Select an added organization in the list or click Add in the upp...

Page 136: ...e picture file Note The folder of face pictures should be in ZIP format Each picture file should be in JPG format and should be no larger than 200 KB Each picture file should be named as Person ID_Nam...

Page 137: ...d face picture is named as Person ID_Name_0 0 is for a full frontal face 9 4 18 Delete Registered Pictures You can delete face picture file of the added persons automatically Before You Start Make sur...

Page 138: ...device 5 Click Import to start importing the person information to the client Note Up to 2 000 persons and 5 000 cards can be imported The person information including person details person s fingerpr...

Page 139: ...uthorization will be inactive Steps 1 Enter Person module 2 Select the person you want to report card loss for and click Edit to open the Edit Person window 3 In the Credential Card panel click on the...

Page 140: ...rd Type Select the card type as EM card or IC card according to the actual card type Buzzing Enable or disable the buzzing when the card number is read successfully Card No Type Select the type of the...

Page 141: ...wing operations to edit the time durations Move the cursor to the time duration and drag the time duration on the timeline bar to the desired position when the cursor turns to Click the time duration...

Page 142: ...s on the timeline bar Note Up to 8 time duration s can be set for each day in the week schedule 3 Optional Perform the following operations to edit the time durations Move the cursor to the time durat...

Page 143: ...anges include changes of template access group settings person s access group settings and related person details including card number fingerprint face picture linkage between card number and fingerp...

Page 144: ...cted devices and then apply the new access group to the device Apply Changes to Devices This operation will not clear the existed access groups of the selected devices and only apply the changed part...

Page 145: ...ns of access control to meet some special requirements in different scene Note For the card related functions the type of access control card only the card s with access group applied will be listed w...

Page 146: ...Basic Information page click More to edit the parameters Voice Prompt If you enable this function the voice prompt is enabled in the device You can hear the voice prompt when operating in the device...

Page 147: ...ice 3 Select a door or floor to show its parameters on the right page 4 Edit the door or floor parameters Note The displayed parameters may vary for different access control devices Some of the follow...

Page 148: ...selected doors Note The door s status duration settings will be copied to the selected door s as well Configure Parameters for Card Reader After adding the access control device you can configure its...

Page 149: ...terval When Entering PWD When you inputting the password on the card reader if the interval between pressing two digits is larger than the set value the digits you pressed before will be cleared autom...

Page 150: ...Click OK 5 Optional Click Copy to and then select the card reader s to copy the parameters in the page to the selected card reader s 9 7 2 Configure Remaining Open Closed You can set the status of th...

Page 151: ...ion of time the configured access group is activated Note Up to 8 time durations can be set to one holiday period 5 Perform the following operations to edit the time durations Move the cursor to the t...

Page 152: ...ptional Select the person card group s and then click Delete to delete it them 7 Optional Select the person card group s and then click Apply to re apply access group that failed to be applied previou...

Page 153: ...in the Auth Times column Note The authentication times should be larger than 0 and smaller than the added personnel quantity in the personnel group The maximum value of authentication times is 16 6 C...

Page 154: ...Access Control Advanced Function Custom Wiegand to enter the Custom Wiegand page 2 Select a custom Wiegand on the left 3 Create a Wiegand name Note Up to 32 characters are allowed in the custom Wiegan...

Page 155: ...ure Person Authentication Mode You can set the passing rules for person to the specified the access control device according to your actual needs Before You Start Add access control device to the clie...

Page 156: ...mode page and then click Apply to apply the person authentication mode to the device Note Person authentication has higher priority than other authentication mode When the access control device has be...

Page 157: ...ded to the selected modes list 3 Click OK After selecting the modes the selected modes will display as icons with different color 4 Click the icon to select a card reader authentication mode and drag...

Page 158: ...the access group and apply the access group to the access control device For details refer to Set Access Group to Assign Access Authorization to Persons Perform this task when you want to configure o...

Page 159: ...i Passback The anti passback feature is designed to minimizes the misuse or fraudulent use of access credentials such as passing back card to an unauthorized person or tailed access The anti passback...

Page 160: ...on should be supported by the device 9 7 9 Configure Device Parameters After adding the access control device you can set its parameters such as network parameters Set Multiple NIC Parameters If the d...

Page 161: ...6 Select the uploading mode from the drop down list Enable N1 or G1 for the main channel Select Close to disable the main channel 7 Click Save Create ISUP Account in Wired Communication Mode You can...

Page 162: ...to record what happens when the event occurs You can view the captured pictures when checking the event details in Event Center Before that you need to set the parameters for the capture such as numbe...

Page 163: ...e 3 Select an access control device in the device list and select Manual Capture 4 Select the resolution of the captured pictures from the drop down list 5 Select the picture quality as High Medium or...

Page 164: ...uld authenticate your credential for accessing 5 Click Save Set RS 485 Parameters You can set the access control device s RS 485 parameters including the baud rate data bit the stop bit parity type fl...

Page 165: ...rection as Sending you are required to set the Wiegand Mode as Wiegand 26 or Wiegand 34 6 Check Enable Wiegand to enable the Wiegand function 7 Click Save The configured parameters will be applied to...

Page 166: ...how urgent the event is via the client by configuring client actions for the access event Client actions here refer to the actions automatically executed by the client itself such as making an audibl...

Page 167: ...r the access control device s triggered event When the event is triggered it can trigger the alarm output host buzzer and other actions on the same device Steps Note It should be supported by the devi...

Page 168: ...rce as Card Linkage 5 Enter the card number or select the card from the drop down list 6 Select the card reader where the card swipes to trigger the linked actions 7 In the Linkage Target area set the...

Page 169: ...Buzzer on Controller The audible warning of access control device will be triggered Buzzer on Reader The audible warning of card reader will be triggered Capture An event related picture will be captu...

Page 170: ...Click a door icon to select a door or press Ctrl and select multiple doors Note For Remain All Unlocked and Remain All Locked ignore this step 4 Click the following buttons to control the door Unlock...

Page 171: ...the real time and historical events view the event linked video handle the events and so on Before the client can receive the event information from the device you need to enable the events of the res...

Page 172: ...me priority etc Before You Start Enable receiving events from devices before the client can receive event from the device see Enable Receiving Event from Devices for details Steps 1 Click Event Center...

Page 173: ...ent Automatically Check Auto Select Latest Event to select the latest event automatically and the event information details is displayed Clear Events Click Clear to clear the all the events in the eve...

Page 174: ...need to set the followings Include Sub Node Search the events of the device and all resource channels Device Type Select the device from which you want to search events Group Search the events by reso...

Page 175: ...his person 3 Click Search to search the events according the conditions you set Figure 9 16 Search Historical Events Note If you have selected Access Control as device type in Step 2 you can view extr...

Page 176: ...led and then click Handle in the event information details page and enter the handling suggestion Note After an event is handled the Handle button will become Add Remark click Add Remark to add more r...

Page 177: ...er the cursor on the recorded video click to download the video 30s before the event happens triggered by the event 9 11 Time and Attendance The Time and Attendance module provides multiple functional...

Page 178: ...spectively Work Hour Rate Work Hour Rate is used to calculate work hours by multiplying it by overtime When you work for a certain period after end work time on workday you will reach different overti...

Page 179: ...atus uploaded from the device will all be calculated as Check in End Work Attendance status uploaded from the device will all be calculated as Check out Start End Work Attendance status will be calcul...

Page 180: ...of the following operations Edit Holiday Click to edit the holiday information Delete Holiday Select one or more added holidays and click Delete to delete the holiday s from the holiday list Add Irreg...

Page 181: ...r the major leave type and click to edit the major leave type Delete Select one major leave type and click Delete on the left to delete the major leave type 5 Click Add on the right to add a minor lea...

Page 182: ...ird party database the client will start reconnection every 30 mins After being reconnected the client will synchronize the data recorded during the disconnected time period to the third party databas...

Page 183: ...ime is recorded as the end break time Enable T A Status Set Enable T A Status switch to on to calculate the actual break time according to attendance status on the device Note This function should be...

Page 184: ...and color 4 Click Save 9 11 2 Add General Timetable On the timetable page you can add general timetable for employees which requires the fixed start work time and end work time Also you can set valid...

Page 185: ...he timetable type as general 5 Select calculation method First In Last Out The first check in time is recorded as start work time and the last check out time is recorded as the end work time Each Chec...

Page 186: ...or check out is valid Calculated as Set the duration calculated as the actual work duration Late Early Leave Allowable Set the timetable for late or early leave 9 Set absence related parameters Check...

Page 187: ...tables in one shift for employees which requires them to check in and check out for each timetable Before You Start Add a timetable first See Add General Timetable for details Steps 1 Click Time Atten...

Page 188: ...9 Add Shift Note You can select more than one timetables The start and end work time and the valid check in and out time in different time tables can not be overlapped Face Recognition Terminal User M...

Page 189: ...tab and check the desired organization s or person s box The selected organizations or persons will list on the right page 3 Set the Expire Date for the shift schedule 4 Set other parameters for the...

Page 190: ...In Time Attendance module the department list is the same with the organization You should add organization and persons in Person module first See Person Management for details Steps 1 Click Time Atte...

Page 191: ...ding to the schedule Effective for Overtime The persons overtime will be recorded for this schedule Flexible Shift Schedule on Weekend The person s attendance on the weekend will be recorded as overti...

Page 192: ...heck out when they end work Scheduled on Holidays On the holidays this schedule is still effective and the persons needs to go to work according to the schedule Effective for Overtime The persons over...

Page 193: ...rule for the schedule such as Check in Not Required andCheck out Not Required 6 Click Save Check Shift Schedule You can check the shift schedule in calendar or list mode You ca also edit or delete th...

Page 194: ...rection perform one of the following operations View Click or to view the added attendance handling information in calendar or list mode Edit In calendar mode click Edit to edit the details In list mo...

Page 195: ...rip perform one of the following operations View Click or to view the added attendance handling information in calendar or list mode Note In calendar mode you need to click Calculate to get the attend...

Page 196: ...k Attendance Statistics Calculation 3 Set the start time and end time to define the attendance data range 4 Select the department from the drop down list 5 Optional Set other conditions including name...

Page 197: ...or details refer to Person Management Calculate the attendance data Note The client will automatically calculate the previous day s attendance data at 1 00 am on the next day Keep the client running a...

Page 198: ...eport Click Export and select saving path to export the attendance report CVS file to the local PC Custom Export Click Custom Report and set conditions to export attendance records according to actual...

Page 199: ...edule to send the report to the email address es automatically Note The Auto Send Email function is enabled by default 1 Set the Effective Period during which the client will send the report on the se...

Page 200: ...the General Settings page 3 Configure the general parameters Date Format Time Format The display style of date and time on related pages Log Expiry Date The time for keeping the log files Once exceede...

Page 201: ...oad and Prompt Me If Upgrade After the client detects the new version of the device it will download the firmware package automatically and prompt the user whether to upgrade Download and Prompt Autom...

Page 202: ...local path for different alarms 5 Optional Click for a testing of the audio file 6 Optional Click in the Operation column to delete the custom sound 7 Click Save Note The format of the audio file can...

Page 203: ...e local PC The saving path of these files can be set Steps 1 Open the System Configuration page 2 Click File tab to enter the File Saving Path Settings page 3 Click and select a local path for the fil...

Page 204: ...the menu to ensure a smooth and convenient usage of the client In the upper right corner of the client click File System Tool and perform the following operations Open Log File You can open a log file...

Page 205: ...The figure displayed below is the correct way to scan your finger You should press your finger on the scanner horizontally The center of your scanned finger should align with the scanner center Incor...

Page 206: ...gerprint successfully You can blow your finger and scan again Others If your fingerprint is shallow or it is hard to scan your fingerprint we recommend you to use other authentication methods If you h...

Page 207: ...g face pictures just like the expression in the picture below Do not wear hat sunglasses or other accessories that can affect the facial recognition function Do not make your hair cover your eyes ears...

Page 208: ...Size Make sure your face is in the middle of the collecting window Face Recognition Terminal User Manual 192...

Page 209: ...Reference Value Candle 10Lux Bulb 100 850Lux Sunlight More than 1200Lux 2 Install the device at least 2 meters away from the light and at least 3 meters away from the window or door 3 Avoid backlight...

Page 210: ...Appendix D Dimension Figure D 1 Dimension Face Recognition Terminal User Manual 194...

Page 211: ...of Hikvision access control and video intercom devices Figure E 1 QR Code of Communication Matrix Device Command Scan the following QR code to get the device common serial port commands Note that the...

Page 212: ...UD17697B C...

Reviews: