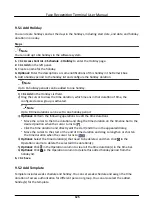
4) Optional: Select a selected holiday in the right list and click to remove the selected one, or
click Clear to clear all the selected holiday(s) in the right list.
7. Click Save to save the settings and finish adding the template.
9.6 Set Access Group to Assign Access Authorization to Persons
After adding the person and configuring the person's credentials, you can create the access groups
to define which person(s) can get access to which door(s) and then apply the access group to the
access control device to take effect.
Before You Start
●
Add person to the client.
●
Add access control device to the client and group access points. For details, refer to Group
●
Add template.
Steps
When the access group settings are changed, you need to apply the access groups to the devices
again to take effect. The access group changes include changes of template, access group settings,
person's access group settings, and related person details (including card number, fingerprint, face
picture, linkage between card number and fingerprint, linkage between card number and
fingerprint, card password, card effective period, etc).
1. Click Access Control → Authorization → Access Group to enter the Access Group interface.
2. Click Add to open the Add window.
3. In the Name text field, create a name for the access group as you want.
4. Select a template for the access group.
Note
You should configure the template before access group settings. Refer to Configure Schedule
and Template for details.
5. In the left list of the Select Person field, select person(s) to assign access authority.
6. In the left list of the Select Access Point field, select door(s), door station(s) or floor(s) for the
selected persons to access.
7. Click Save.
You can view the selected person(s) and the selected access point(s) on the right side of the
interface.
Face Recognition Terminal User Manual
127


