5
CASE INSTALLATION
FLOOR PREP
1.
Ask the general contractor if your current copy of the
building dimensions are the most recently issued. Also,
ask for the points of reference from which you should
take dimensions to locate the cases.
2.
Using chalk lines or a laser transit, mark the fl oor
where the cases are to be located for the entire lineup.
The lines should coincide with the outside edges of the
case feet.
3.
Leveling is necessary to ensure proper case alignment
and to avoid potential case damage. Locate the high-
est point on the positioning lines as a reference for
determining the proper height of the shim-pack level-
ers. A laser transit is recommended for precision and
requires just one person.
4.
Locate basehorse positions along the chalk lines. Spot
properly leveled shim packs at each basehorse loca-
tion.
LINE-UP & INSTALLATION
Single Case
1.
Roll the case into position, leaving a minimum of 2" be-
tween the wall and back of case. Using a “J” bar, raise
the end of the case (under cross support), remove the
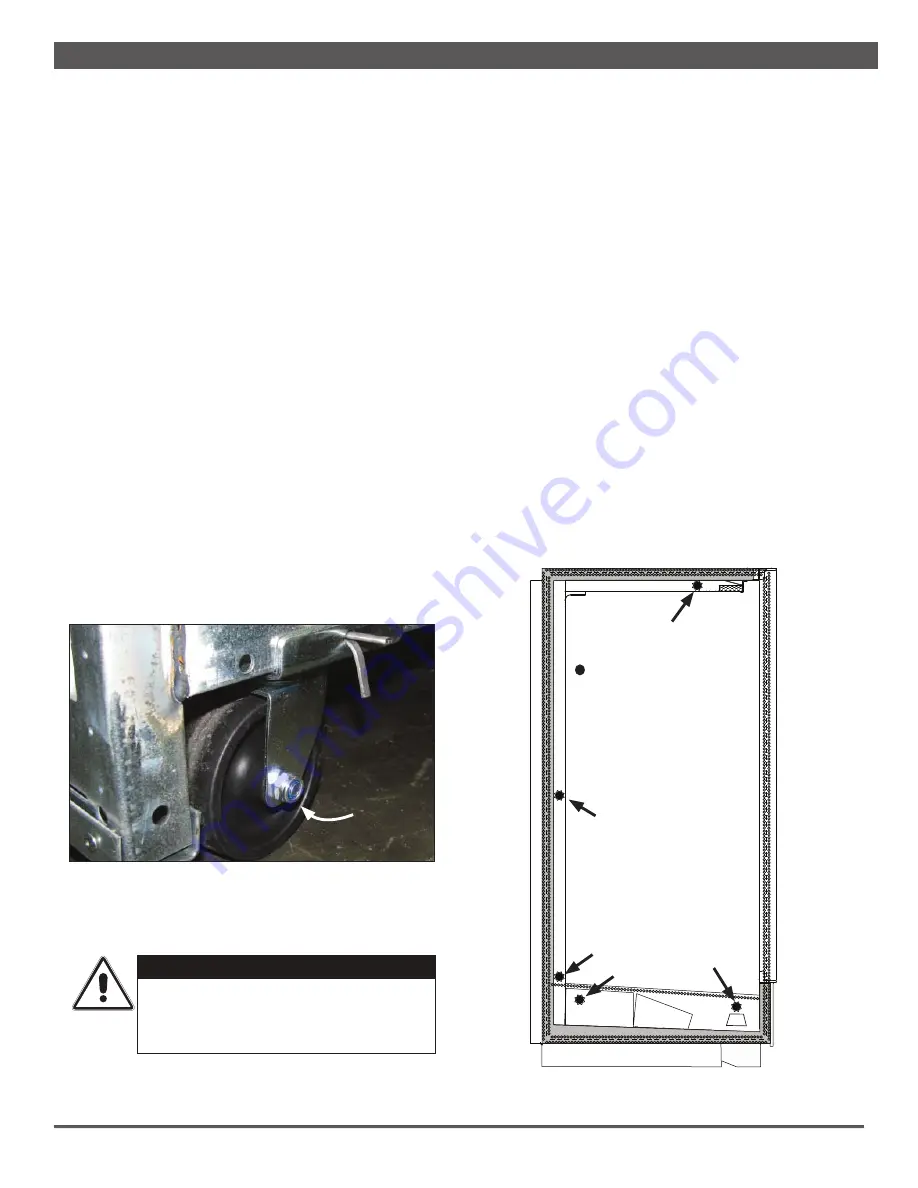
caster assembly (Fig. 1) and lower the basehorse on to
the shim packs. Repeat on the other end of the case.
2.
Once the basehorse is properly placed on the shim
packs, check the vertical plumb of the case by placing
a bubble level on the shelf standard. Add/remove shim
packs as needed. For the horizontal level, repeat this
process after placing the bubble level on the front sill.
Multi-Case
1.
Remove any shelves (discard the shelf clips) and/or
loose items (e.g. shipping braces, mirror assemblies,
etc) from the cases that may interfere with case join-
ing.
Keep all loose items as they will be used later
in the installation process.
2.
Remove the return air grill at the case joint. The grill
lifts out without fasteners and may be easily removed
to gain clear access to the case-to-case joining bolts.
3.
Follow the single-case installation instructions for the
fi rst case, then position the next case in the line-up ap-
proximately 3’ away. Remove the casters on the end
that is closest to the fi rst case.
4.
Apply the foam tape gasket (supplied) and a bead of
butyl or silicone sealant to the end of the fi rst case (Fig.
2). From the opposite end, push the second case to
a position that is approximately 6" from the fi rst case,
then remove the remaining casters and position case
on the shim packs.
CAUTION!
Be certain that your hands and feet are
out of the way before lowering the case
after the removal of the casters. Failure
to do so may result in serious injury.
Fig. 1 Removing the casters is an easy process. Simply flatten and
remove the cotter pins that are holding the casters in place. Then
lift the case with a “J” bar and slide the caster assemblies out. The
dismantled casters can now be discarded.
COTTER
COTTER
PIN
PIN
CASTER
CASTER
= bolt holes
X = foam tape gasket
O = butyl or silicone sealant
NOTE: It is recommended that
cases be bolted together in
the numbered order indicated
in the diagram.
1
2
5
4
Fig. 2 Bolt holes, foam tape gasket and sealant
3
Summary of Contents for VNRB
Page 2: ...ii ...
Page 5: ...v Revision History new manual format_9 19 ...
Page 51: ...H2 SEISMIC BRACKETS 4 BRACKETS ...
Page 52: ......


