27
28
EXTENDED RANGE CONFIGURATION
3
EXTENDED RANGE CONFIGURATION
3
CONNECTING TO A LOW-FLOW OXYGEN SOURCE USING THE COMBO
2
®
HOSE
WARNING:
The interface, source gas supply hose, and power cords should be positioned to avoid restricting movement,
causing a tripping hazard, or posing a strangulation risk.
NOTE:
A 20-foot source gas supply hose (available to order) is recommended when using a ventilator output
volume greater than 350 ml.
Ensure the ventilator is powered off.
NOTE:
Alarms might be encountered and/or the selected Activity Button might be inadvertently changed if
the ventilator is not powered off.
The compressor may be powered off or powered on.
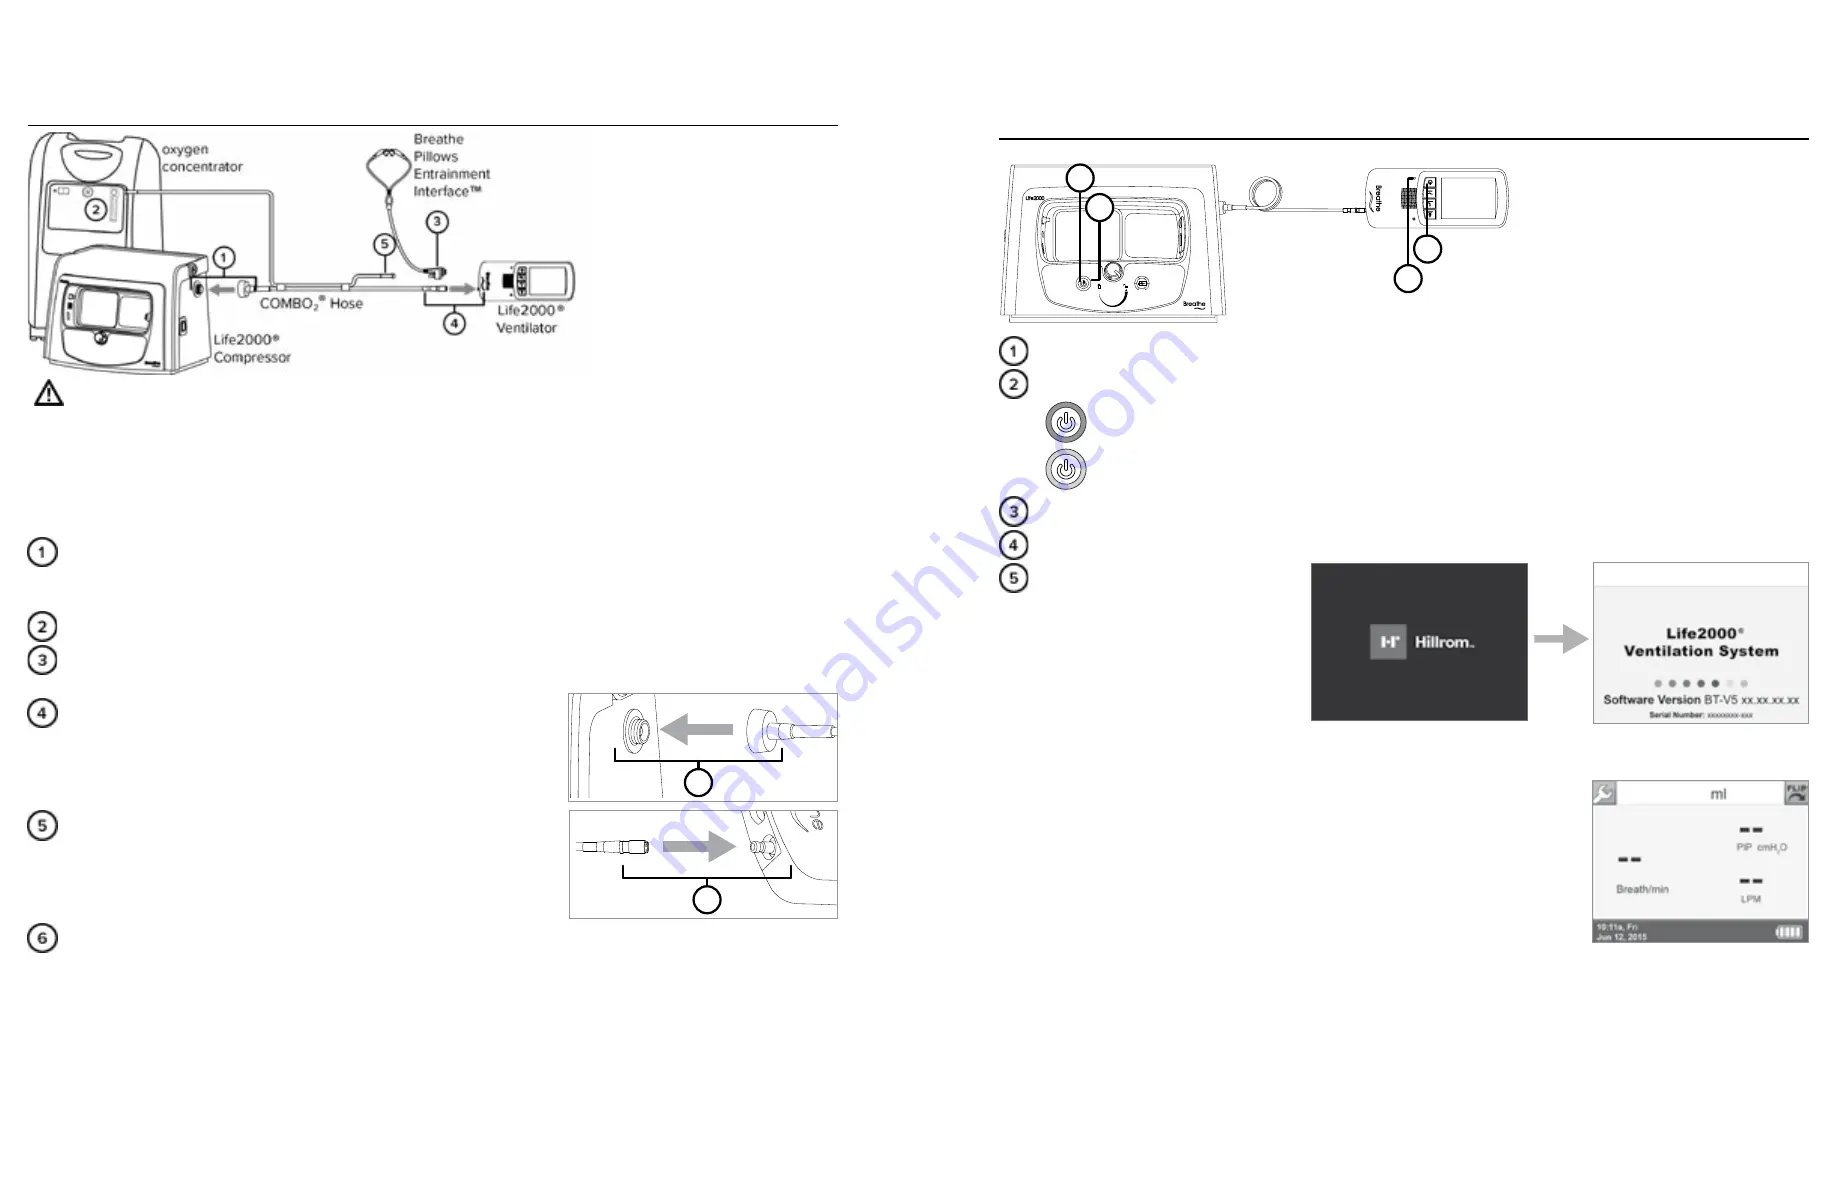
Attach the outlet fitting connector on the CombO
2
® hose to the
outlet fitting on the compressor.
NOTE: The outlet fitting is to be used only for connecting the
compressor to the Life2000® Ventilator with an approved source gas
supply hose or during the purging of an interface.
Connect the quick connect end on the CombO
2
® hose to the
ventilator by pushing the small quick connect end onto the gas inlet
connection on the ventilator; when connected, the quick connect
end
will click into place.
NOTES:
• Ventilation will not begin until an Activity Button is selected on the ventilator. For more information see
"Choosing an Activity Button (Patient Selectable) to Begin Ventilation" on page 67.
4
5
POWERING ON SEQUENCE IN EXTENDED RANGE CONFIGURATION
0
100%
1
2
3
4
Power on the compressor by pressing the power button for the compressor.
When powered on, lights surrounding the compressor power button will illuminate:
Green indicates the compressor is connected to AC power.
Orange indicates the internal battery is being used.
Power on the ventilator by pressing the power button for the ventilator.
Ensure the green power indicator light on the ventilator is on.
When the startup screen is displayed,
listen for audible tones to test the
ventilator's alarm speaker.
During the ventilator’s start up
sequence, the ventilator will perform
a self test. During the test, all
ventilator indicator lights should
briefly flash and an audible alarm should briefly sound. This self test can take up to 15 seconds to complete.
If you do not hear tones when you turn on the ventilator, contact your service representative.
When the
Home
Screen is displayed, the touch screen is ready to use.
NOTE:
Ventilation will not begin until an Activity Button is selected on the
ventilator. For more information see "Choosing an Activity Button (Patient
Selectable) to Begin Ventilation" on page 67.
NOTE:
A high-pitched sound may be heard briefly while the compressor is
powering on. This sound will go away once the compressor reaches operating
pressure.


