C
C
D
D
F
E
F
G
G
G
G
H
H
H
H
7
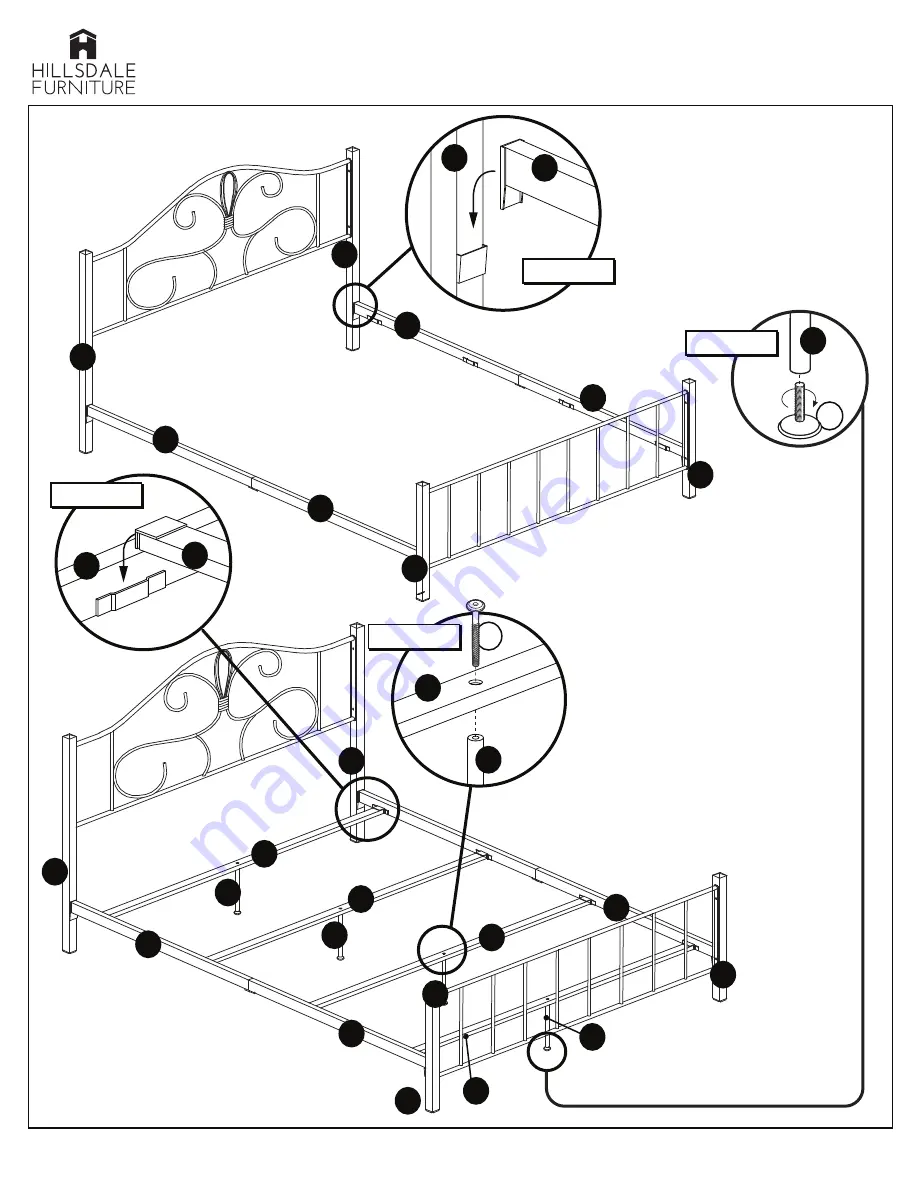
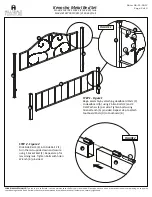
STEP 3 - Figure 3
Turn Side Rail 1 (E) right side up and
insert firmly i
nto slot on Headboard
Post (C). For the other side, insert
Side Rail 2 (F) into slot on
Headboard Post (C). Take remaining
ends of Side Rails (E & F) and insert
into slots on Footboard Posts (D).
STEP 4 - Figure 4
Insert Adjustable Glides (7) into
bo
tt
oms of Support Legs (H).
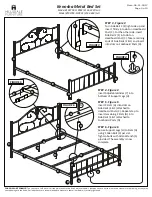
STEP 5 - Figure 5
Insert 2 Slats (G) into slots on
Side Rails (E & F) a
tt
ached to
Headboard Posts (C). Repeat step to
insert remaining 2 Slats (G) into
Side Rails (E & F) a
tt
ached to
Footboard Posts (D).
STEP 6 - Figure 6
Secure Support Legs (H) to Slats (G)
using 1 Allen Bolt (3) per slat.
Tighten bolts with Allen Wrench (5)
provided. The assembly is now
complete.
Date: 06-11-2017
Page 3 of 3
CARE & MAINTENANCE:
The touch of a so
ft
cloth is all the maintenance the
finish
will ever need. Please do not use harsh or abrasive cleaners for polishing, as they may
cause damage t
o the finish.
Periodic checks are recommended to make sure that all hardware is securely
ti
ghtened.
F
F
FIGURE 3
E
E
E
C
C
C
D
D
FIGURE 4
H
3
H
FIGURE 5
FIGURE 6
G
E
G
Model #103703-110944 (2144-330) Twin
Model #103703-110945 (2144-460) Full
Kenosha Metal Bed Set


