08.12.2021
08.12.2021
8
9
EN
EN
HT-TWIN 550
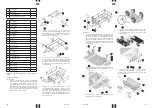
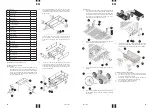
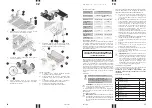
1.
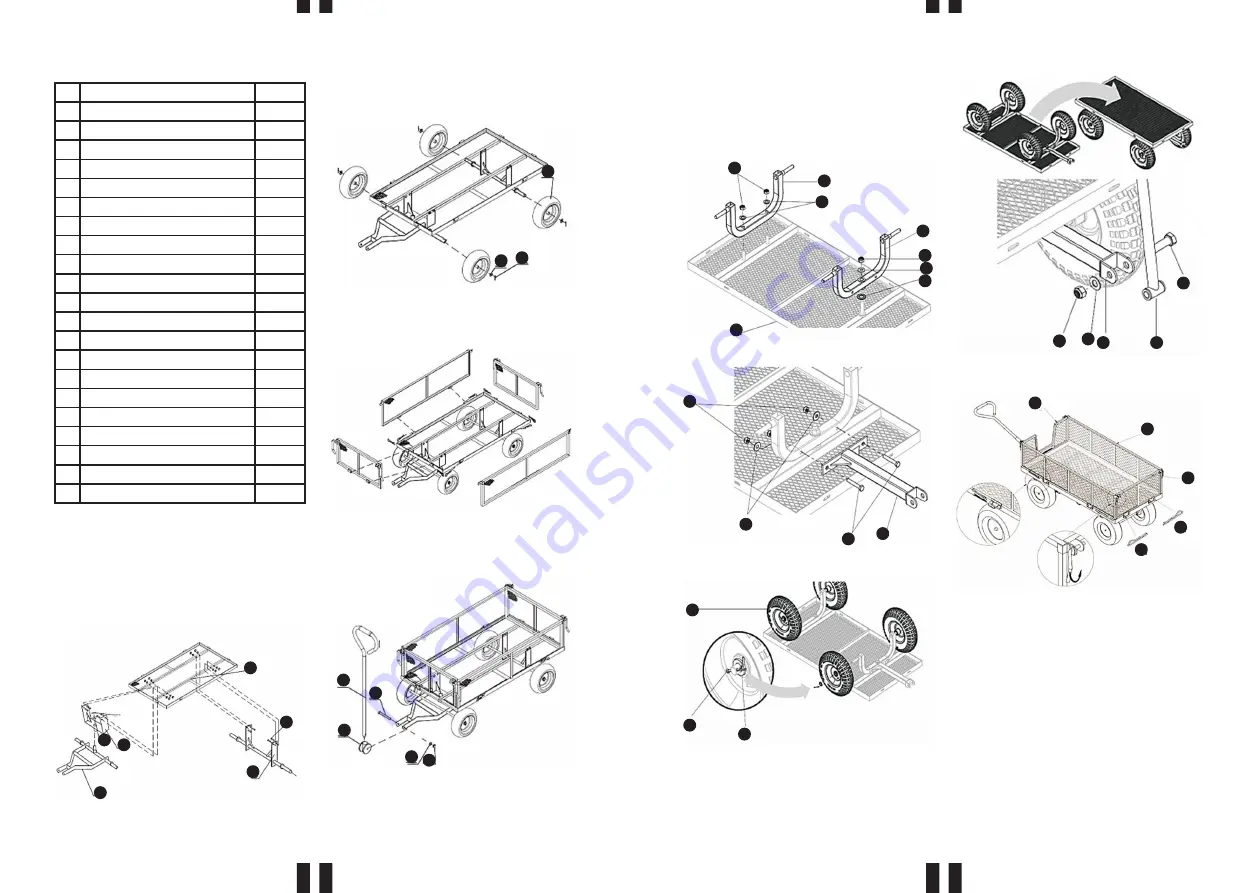
Turn the base of the trolley around(A) and attach the
rear axle(C) with the washers(E) and nuts(D). Place
the thrust bearing(G) between the front axle(B) and
the base, then put on the washer(U) and screw on
the nut(V). Do not tighten the nut(V) too much,
make sure that the front axle can turn.
2.
Attach the handle bracket(F) to the front axle with
the screws(P), washers(S) and nuts(N).
5.
Attach the front and rear barrier(L and K) to the
sides of the trolley base with the pins(M), and then
the side rails(J). The hinges must be on the outside.
3.
Fix the wheels(I) on the axle ends using nuts(T) and
pins(R).
4.
Turn the assembled trolley over, fasten the handle(H)
to the handle post(F) with the screw(Q), washer(T)
and nut(O).
15
16
12 14
5
D
C
E
B
V
U
G
A
N
S
F
P
T
R
I
Q
H
F
T
O
L
J
K
M
M
A
Trolley base
1x
B
Front axle
1x
C
Rear axle
1x
D
M14 nut
2x
E
M14 washer
2x
F
Handle bracket
1x
G
Thrust bearing
1x
H
Handle
1x
I
Wheel
4x
J
Side barrier
2x
K
Rear barrier
1x
L
Front barrier
1x
M
Pin
8x
N
M10 nut
2x
O
M16 nut
1x
P
M10x55 screw
2x
Q
M16x65 screw
1x
R
Pin
4x
S
M10 washer
2x
T
M16 washer
5x
U
M20 washer
1x
V
M20 nut
1x
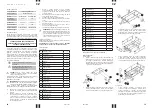
HT-TWIN 550
PREPARING FOR USE/ DEVICE USE
ASSEMBLING THE APPLIANCE
HT-TWIN 300
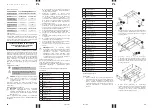
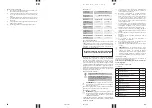
1.
Put the central axle on the front hook(4), put the
hook spindle in the hole in the front bracket(7), put
the washer(13) on it and secure it with the pin(11).
Screw the front bracket(7) and rear bracket(8) to the
trolley base(1) with the screw(10), washer(12), and
nut(14). Tighten securely.
2.
Place the wheels(6) on the ends of the front and
rear brackets. Install the washer(13). Insert a pin(11)
through the holes at the end of each axis and then
bend its ends.
3.
Align the holes in the side panels(2) with the side
holes in the base of the trolley, then insert the B
pins(9) through them. Perform the operation on
each side of the trolley. Each panel is fixed with 2
pins.
4.
Insert the end of the handle(5) into the plastic
connector(16), then place the whole in the frame
forks and align the holes of both elements. Insert
the bolt(15) through the holes, fit the washer(12) and
nut(14) and tighten.
17
10
13 7
8
4
13 11
6
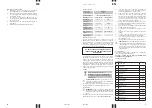
CLEANING AND MAINTENANCE
a)
Use only non-corrosive cleaners to clean the surface.
b)
Store the unit in a dry, cool place, free from moisture
and direct exposure to sunlight.
c)
The device must be regularly inspected to check its
technical efficiency and spot any damage.
d)
Use a soft, damp cloth for cleaning.
e)
Periodically check tire pressure.


