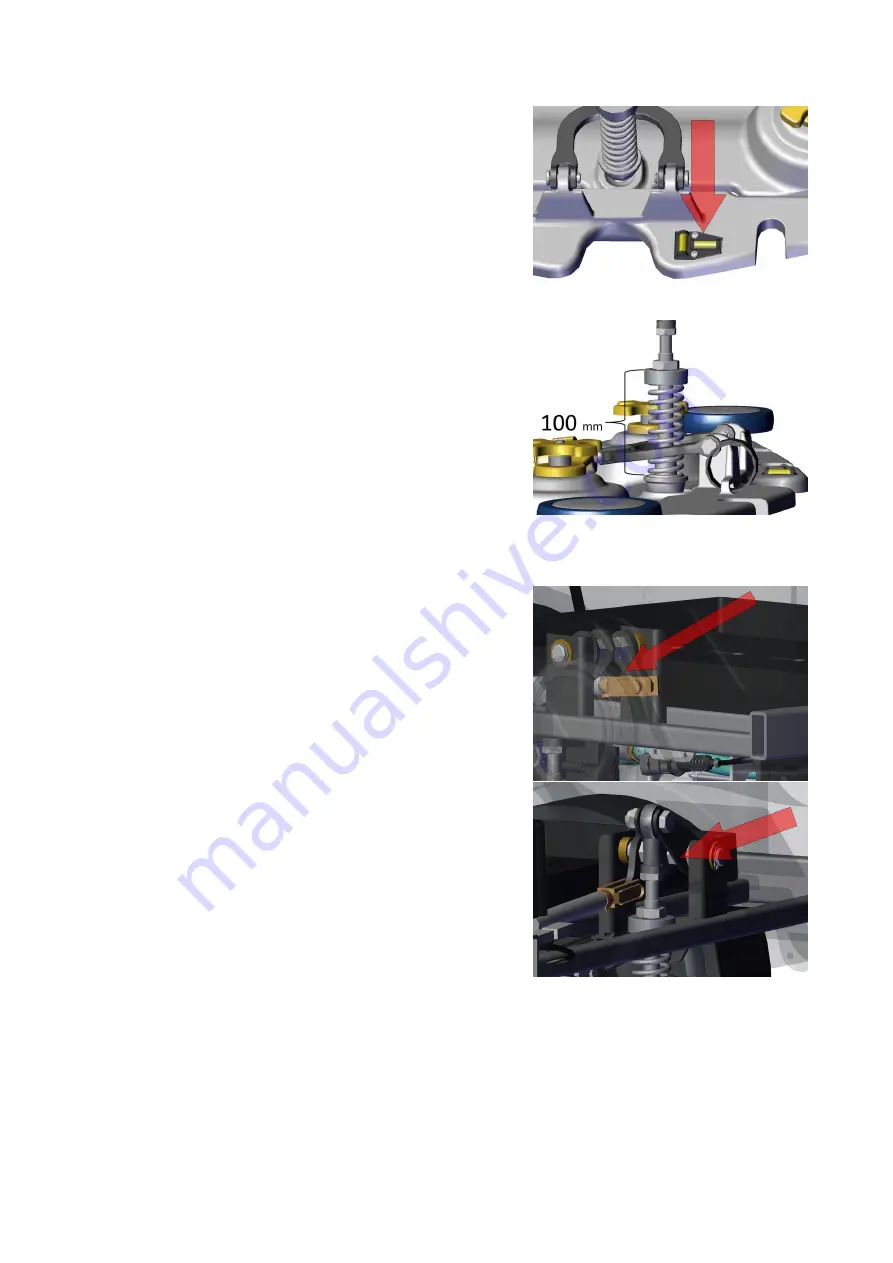
When the operation is performed, verify that height and incli-
nation adjustment bubble levels of the squeegee are in central
position.
At further confirmation, check that the trailing spring of the
squeegee support has a stroke equal to 100 mm.
Check functionally the resulting adjustment.
6.7.2
Squeegee Actuator
Adjust the micro switches inside the actuator using the appro-
priate adjusting screws.
Requirements:
Switched Off machine, squeegee mounted on the
machine.
Procedure:
Remove the black plastic cover from the brush deck actua-
tor.
Adjust the brush deck lowering micro (brown wire) so that
the squeegee lifting lever does not impact on the actuator
lever.
Do not adjust the brush deck lifting micro (blue wire).
6.8
Disassembly
6.8.1
Squeegee Support
Put the machine in safe conditions.
Disconnect the vacuum hose.
Unscrew the knobs that secure the squeegee to its support and remove the squeegee.
Remove the screw that secures the center head of the squeegee to the frame. To properly remove this screw,
89
Summary of Contents for 108538
Page 1: ...SERVICE MANUAL TRIDENT R30SC R28SC Version AA Date August 5 2019 Document Number 100x...
Page 4: ...Part I Product Introduction 4...
Page 10: ...1 6 Machine Dimensions 1 6 1 R30SC 10...
Page 11: ...1 6 2 R28SC 11...
Page 15: ...Part II Anomalies Resolution Guide 15...
Page 24: ...Part III Functional Groups 24...
Page 26: ...3 2 Location of Electrical Components 3 2 1 R30SC R28SC Plus 26...
Page 28: ...3 2 3 R30SC Base 28...
Page 64: ...4 6 Related electrical circuit 4 6 1 R30SC Base 64...
Page 66: ...4 6 2 R30SC PLUS 66...
Page 76: ...5 6 Related electrical circuit 5 6 1 R28SC PLUS 76...
Page 84: ...6 6 Related electrical circuit 6 6 1 R28SC Base 84...
Page 86: ...6 6 2 R30SC R28SC PLUS 86...
Page 94: ...7 5 Related electrical circuit 7 5 1 R30SC Base 94...
Page 96: ...7 5 2 R30SC R28SC PLUS 96...
Page 104: ...8 5 Related electrical circuit 8 5 1 R30SC Base 104...
Page 106: ...8 5 2 R30SC R28SC PLUS 106...
Page 112: ...Part IV Accessories and Add On 112...


