***** Nur für internen Gebrauch ***** 07.02.2020 / 13:17:39 - H2\DOK-Sprachpaket\System\PM_30-G1\DEU\PM30-MG_POS1
18
English
2243556
*2243556*
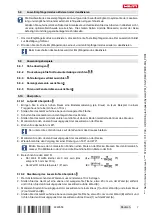
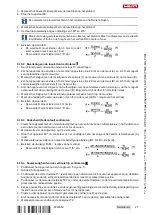
8. Calculate the value R.
▶
The value R should be less than 3 mm.
▶
The value R should be less than 1/8".
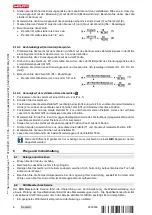
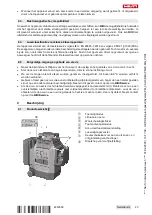
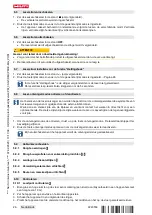
5.10.3 Checking perpendicularity (horizontal)
1. Position the tool so that the lower plumb beam coincides with the center of a reference cross marked in
the middle of a room at a distance of about 5 m from the walls.
2. Mark all 4 points of intersection on the four walls.
3. Rotate the tool through 90° and make sure that the center of the point of intersection coincides with the
first reference point (A).
4. Mark each new point of intersection and measure each offset (R1, R2, R3, R4 [mm]).
5. Calculate the offset R (RL = room length).
▶
The value R should be less than 3 mm or 1/8".
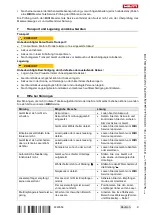
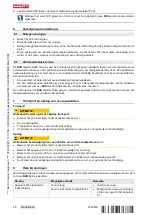
5.10.4 Checking the accuracy of the vertical line
1. Position the tool at a height of 2 m (pos.1).
2. Switch the tool on.
3. Position the first target plate T1 (vertical) at a distance of 2.5 meters from the tool at the same height (2
meters), so that the vertical laser beam strikes the plate. Mark this position.
4. Then place the second target plate T2 at a position 2 meters below the first target plate, so that the
vertical laser beam strikes the plate. Mark this position.
5. Mark position 2 at the opposite side of the test setup (mirror image) on the laser line on the floor at a
distance of 5 meters from the tool.
6. Now place the tool on the previously marked position (pos. 2) on the floor.
7. Align the laser beam so that it strikes the target plate T1 and the position marked on it.
8. Mark the new position on target plate T2.
9. Read the distance D between the two marks on target plate T2.
If the difference D is greater than 3 mm, the tool must be returned to a
Hilti
repair center for
adjustment.
6
Care and maintenance
6.1
Cleaning and drying
▶
Blow any dust off the glass.
▶
Do not touch the glass surfaces with your fingers.
▶
Use only a soft, clean cloth to clean the tool. If necessary, moisten the cloth with a little alcohol or water.
▶
Observe the specified temperature limits when storing your equipment, above all in winter and summer,
especially if the equipment is stored in a motor vehicle.
6.2
Hilti Measuring Systems Service
Hilti
Measuring Systems Service checks the scanning tool and, if deviations from the specified accuracy are
found, recalibrates it and rechecks to ensure conformity with specifications. The service certificate provides
written confirmation of conformity with specifications at the time of the test. The following is recommended:
• Choose a test/inspection interval that matches usage of the device.
• Have the product checked by
Hilti
Measuring Systems Service after exceptionally heavy use or subjection
to unusual conditions or stress, before important work or at least once a year.
Testing and inspection by
Hilti
Measuring Systems Service does not relieve the user of the obligation to
check the scanning tool before and during use.

