background image

Shenzhen Hingmed Medical instrument Co.,Ltd. (Enterprise Edition) 2020-11-18

Shenzhen Hingmed Medical instrument Co.,Ltd.

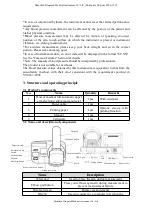
The left and right arms can be measured by the instrument, preferably right arm.

Please note: There must be 2-3 minutes intervals between two measurements

Please be shirtless or wear thin clothes, and insert your arm into your shoulder. If

the clothing on the arm is too thick, it may cause measurement errors. Please take off

your clothes to measure.

Please press the [Start/Stop] button. Start to measure blood pressure.

The instrument will automatically roll up the cuff and pressurize it.

After the measurement is over, the instrument will deflate automatically and the

cuff will return to its original state.

The measurement results are reported by voice broadcast.

The measurement results can also be printed on printing paper.

6. Calibration

1. Connect the medical full-automatic upper arm electronic sphygmomanometer to a

computer equipped with blood pressure calibration software specially produced by the

Shenzhen Hingmed Medical instrument Co.,Ltd. through a USB data cable;

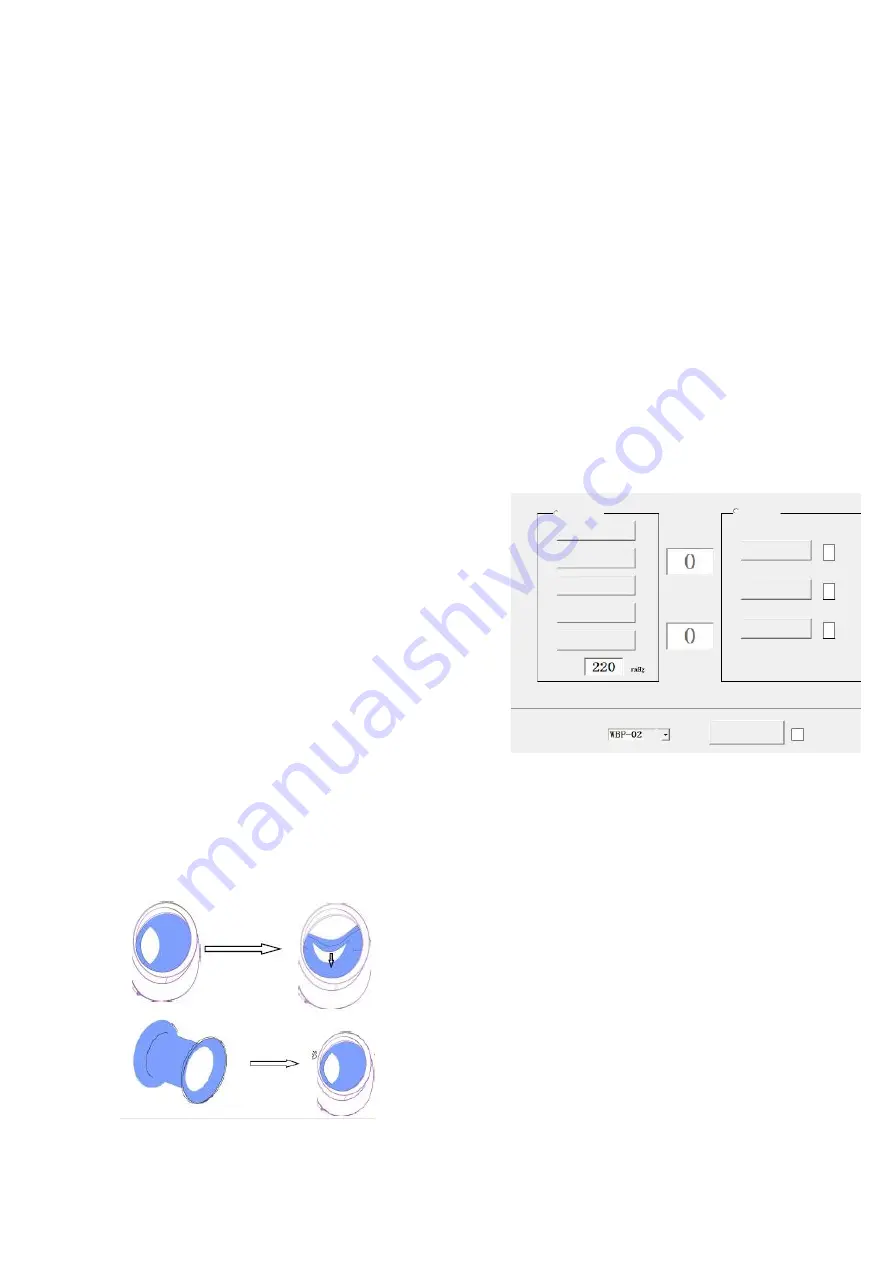
2. Put a rigid cylindrical straight tube equivalent to

30cm arm circumference into the cuff as an arm

prosthesis;

3. Connect the digital pressure meter within expiry

date and the inflatable airbag to the upstream air hole

on the back of the instrument;

4. Click to calibration 250mmHg, allow the

instrument to automatically enter the static pressure

mode for automatic inflation and pressurization;

5. Enter the value from the digital pressure meter into

the corresponding text box of "Actual pressure" and

click the "Calibration" button.

Note: When entering the calibration mode, you need to

connect an inflatable airbag for manual pressurization

and a digital pressure meter to the upstream air hole. In

manual static pressure calibration mode, the pressure is

manually applied up to 290mmHg.

7. Replacement of parts

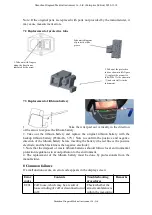
7.1 Replacement of cuff

Plastic ring fixing groove (inner side of ring)

Hold cuff with your hand and pull down in a direction of

allow in the figure, take the cuff out of the plastic ring

fixing groove.

Shenzhen Hingmed Medical instrument Co.,Ltd.

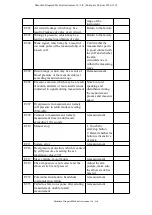
Pass the new cuff through the arm sleeve and press into the

plastic ring fixing groove respectively

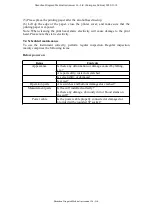
Calibration

verification

Verification 0mmHg

Verification 100mmHg

Verification 150mmHg

Verification 200mmHg

Calibration

Actual pressure

Primary pressure

Secondary pressure

Pump & Valve

maintenance

Air pump

Quick-opening valve

Slow-opening valve

Attraction

Attraction

Stop

Device

model

Bluetooth

Connection

Summary of Contents for DBP-01

Page 1: ...enzhen Hingmed Medical instrument Co Ltd Enterprise Edition 2020 11 18 Shenzhen Hingmed Medical instrument Co Ltd Clinical Automatic Blood Pressure Monitor User Manual Prepared on June 30 2020 Version A 3 ...

Page 2: ...duct Technical Requirement No Y X Z Z No 20202071769 Medical Device Registration Certificate No Y X Z Z No 20202071769 Production License No Y S Y J X S C X No 20142561 Production date seen in label Service life five years Software Release Version V1 Product manufacturer Registrant manufacturer name Shenzhen Hingmed Medical instrument Co Ltd Registrant s address production address 4 F Zhonghang Fl...

Page 3: ...ng screen 7 3 4 Contents and meanings of labels 8 4 Installation of product 9 4 1 Installation of wrist pad 9 4 2 Installation of printing paper model DBP 01HP DBP 01P applicable 9 5 Measuring blood pressure 9 6 Calibration 10 7 Replacement of parts 10 7 1 Replacement of cuff 10 7 2 Replacement of protective tube 11 7 3 Replacement of lithium battery 11 8 Common failures 11 9 Maintenance 13 9 1 Cl...

Page 4: ...omanometer is used to measure the diastolic pressure systolic pressure and pulse of adults with oscillometry for providing measured values as diagnosis reference 1 3 Structure Components DBP 01P DBP 01HP DBP 01 DBP 01H are composed of host including wrist pad cuff and power cable 1 3 1 Model configuration Model Function partition Color screen Digital screen Print function DBP 01 DBP 01P DBP 01H DB...

Page 5: ...may cause an accident 2 3 Precautions Please use this instrument in the following working environment and storage site if it is stored or used out of the specified temperature and humidity range storage environment temperature 20 55 relative humidity not more than 95 working environment temperature 5 40 relative humidity 10 95 the system may not reach the claimed performance specifications Use the...

Page 6: ...suitable for newborns The blood pressure values obtained by this instrument are equivalent to that from the auscultatory method with their error consistent with the requirement specified in YY0667 2008 3 Structure and operating principle 3 1 Product s components No Name Quantity Remarks 1 Host of medical full automatic upper arm electronic sphygmomanometer 1pcs With wrist pad 2 Power cable 1pcs 3 ...

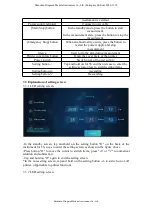
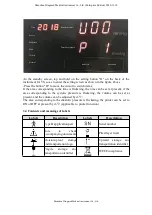
Page 7: ...ly Setting button Tap and hold on for 5S and then release to enter the setting screen press to switch setting items Setting button Ascending Setting button Descending 3 3 Explanation of setting screen 3 3 1 LCD setting screen In the standby screen tap and hold on the setting button O on the back of the instrument for 5S so as to enter the setting screen as shown in the figure above Press button O ...

Page 8: ... pressure is flickering the volume can be set at present and the volume can be adjusted by The area corresponding to the diastolic pressure is flickering the printer can be set to ON or OFF at present by applicable to printer function 3 4 Contents and meanings of labels Labels Description Labels Description Type B application part Serial number Note to check accompanying documents Piled layer limi...

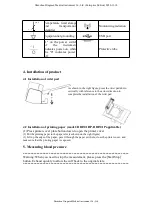
Page 9: ...e wrist pad down vertically with reference to the arrow direction to complete the installation of the wrist pad 4 2 Installation of printing paper model DBP 01HP DBP 01P applicable 1 Press printer cover plate button down to open the printer cover 2 Put the printing paper in the paper slot as shown on the right figure 3 Lift up the edge of the paper pass it through the paper exit hole close the pri...

Page 10: ... the cuff as an arm prosthesis 3 Connect the digital pressure meter within expiry date and the inflatable airbag to the upstream air hole on the back of the instrument 4 Click to calibration 250mmHg allow the instrument to automatically enter the static pressure mode for automatic inflation and pressurization 5 Enter the value from the digital pressure meter into the corresponding text box of Actu...

Page 11: ...itive electrode and the black line is the negative electrode 3 Note that the disposal of waste lithium batteries should follow local environmental protection regulations to avoid pollution to the environment 4 The replacement of the lithium battery must be done by professionals from the manufacturer 8 Common failures If a malfunction occurs an error code appears in the display screen Error codes C...

Page 12: ...f motion artifacts or more interferences contained in signals during measurement Note to avoid speaking and disturbance during the measurement process and measure again EC07 Overpressure in measurement namely cuff pressure in adult mode exceeding 290mmHg EC09 Timeout in measurement namely measurement time in adult mode exceeding 120 seconds remeasurement EC10 Manual stop 1 Touch the start stop but...

Page 13: ...anometer 9 1 Cleaning 1 Before cleaning the sphygmomanometer turn off the power supply of the host and disconnect the AC power supply 2 Wet the soft and clean lint free cloth with mild soapy water or non corrosive diluted detergent 3 Wipe the contact surface between the instrument and the patients 4 Dry with a clean and dry soft cloth 5 Blood pressure cuff After soaking in soapy water rinse and dr...

Page 14: ...ic electricity 9 4 Scheduled maintenance To use the instrument correctly perform regular inspection Regular inspection mainly comprises the following items Before power on Items Contents Appearance Is there any deformation or damage caused by falling etc Are parts dirty rusted or scratched Is screen dirty or damaged Is it wet Operation parts Are switches and buttons damaged or crashed Measurement ...

Page 15: ... there is printing paper and whether the paper is placed correctly Is printing paper fed correctly Is the printed result clear Recommendation The product should be calibrated once a year by a qualified organization Please contact the manufacturer for verification calibration during later use otherwise accurate measurement may not be possible 10 Disposal In order to protect environment please follo...

Page 16: ...trument Co Ltd Be sure to use the accessories provided by our company for replacement otherwise it may affect the normal operation of the product and may even be dangerous No Name Specification 1 Cuff 270 145mm 2 Lithium battery 570mAh 3 7V 3 Protective tube 250V 1A 4 Printing paper Thermal paper 58mm ...

Page 17: ...tee period Once a defect appears the initial purchaser should notify Shenzhen Hingmed Medical instrument Co Ltd of the suspected defect The instrument should be carefully packaged and shipped to Shenzhen Hingmed Medical instrument Co Ltd under prepayment Address 4 F Zhonghang Flying Industrial Park 371 Guangshen Road Xixiang Bao an Shenzhen Contact 86 755 23730600 Postcode 518102 The instrument sh...

Page 18: ... user should ensure that it is used in these electromagnetic environments Immunity test IEC 60601 Test level Conforming level Electromagnetic Environment Guidelines Electrostatic discharge GB T 17626 2 6kV contact discharge 6kV contact discharge The floor should be made of wood concrete or ceramic tiles If the floor is covered with synthetic materials the relative humidity should be at least 30 8k...

Page 19: ... ensure that it is used in these electromagnetic environments Immunity test IEC 60601 Test level Conforming level Electromagnetic Environment Guidelines Conducted RF GB T 17626 6 3V effective value 150kHz 80MHz 3V The distance between portable or mobile RF communication device and any used part including cable of DBP 01H should not less than the recommended isolation distance The distance should b...

Page 20: ...ntensity should be less than 3 V m in frequency range of 150kHz 80MHz Recommended isolation distance between portable and mobile RF communication device and the instrument The instrument is intended to use in an electromagnetic environment where the radiation RF disturbance is controlled According to maximum rated output power of communication device the purchaser and the user can prevent electrom...

Reviews: